Xtralis Pty Ltd XCC Product Guide
www.xtralis.com 15
4.3 Battery Backup
The power supply for the XCC detector may be switched to a back up battery in the event of the supply being
disrupted. The size of the battery back up is determined by local standards and codes, the total power required
by the system, back up time required, allowance for reduction in capacity with age and expected temperature
variations.
Note: It is recommended that batteries be changed as per the battery manufacturer’s specifications or as
per your local codes and standards.
4.3.1 Backup Battery size calculation sheet
Table 4-1: Calculating the size of the backup battery
XCC-010 Normal Load @ 24 VDC Full alarm load @ 24 VDC
Equipment Load mA Number Total Load mA Number Total
Detector 225 245
Other 24 V loads
Total mA Total mA
X X
Standby hours Alarm hours
=
Standby capacity Alarm capacity
Total capacity = Standby + Alarm capacity
Divided by 1000 for standby capacity
Multiplied by battery factor (Normally 1.25)
4.4 Startup
Note: An XCC detector must only be powered up by accredited personnel.
After installing the XCC detector it is necessary to power up the system. The system takes approximately 15
seconds to power up. If the system fails to power up, check all power wires are secured to its terminals and
the polarities of the power wires are correctly terminated.
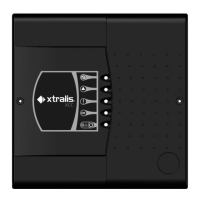
On power up:
l The aspirator starts up
l The LED indicators on the XCC front cover:
n Will light up and cycle on and off
n If a fault has been detected the FAULT LED indicator will remain illuminated
n If the system is functioning normally the OK LED indicator will remain illuminated
n If the detector does not behave normally on power up, contact your commissioning engineer or
distributor to troubleshoot.
Note: It is normal for the detector to display troubles immediately after power up. Reset the detector by
pressing the reset button on the front cover of the detector to unlatch the relays and fault LED. If the
fault LED on the front cover continues to be illuminated, proceed with the preliminary systems
check.