COOLING SYSTEM
BY Service Manual
7-15
Repair
13. Install and secure air inlet pipe between
turbocharger and intake air cooler.
14. Start the engine and check for coolant leaks.
Check the level of the coolant and fill as
necessary.
Disassemble and Assemble Charge
Air Cooler
1. Remove charge air cooler from engine. See
Remove and Install Charge Air Cooler on
page 7-14.
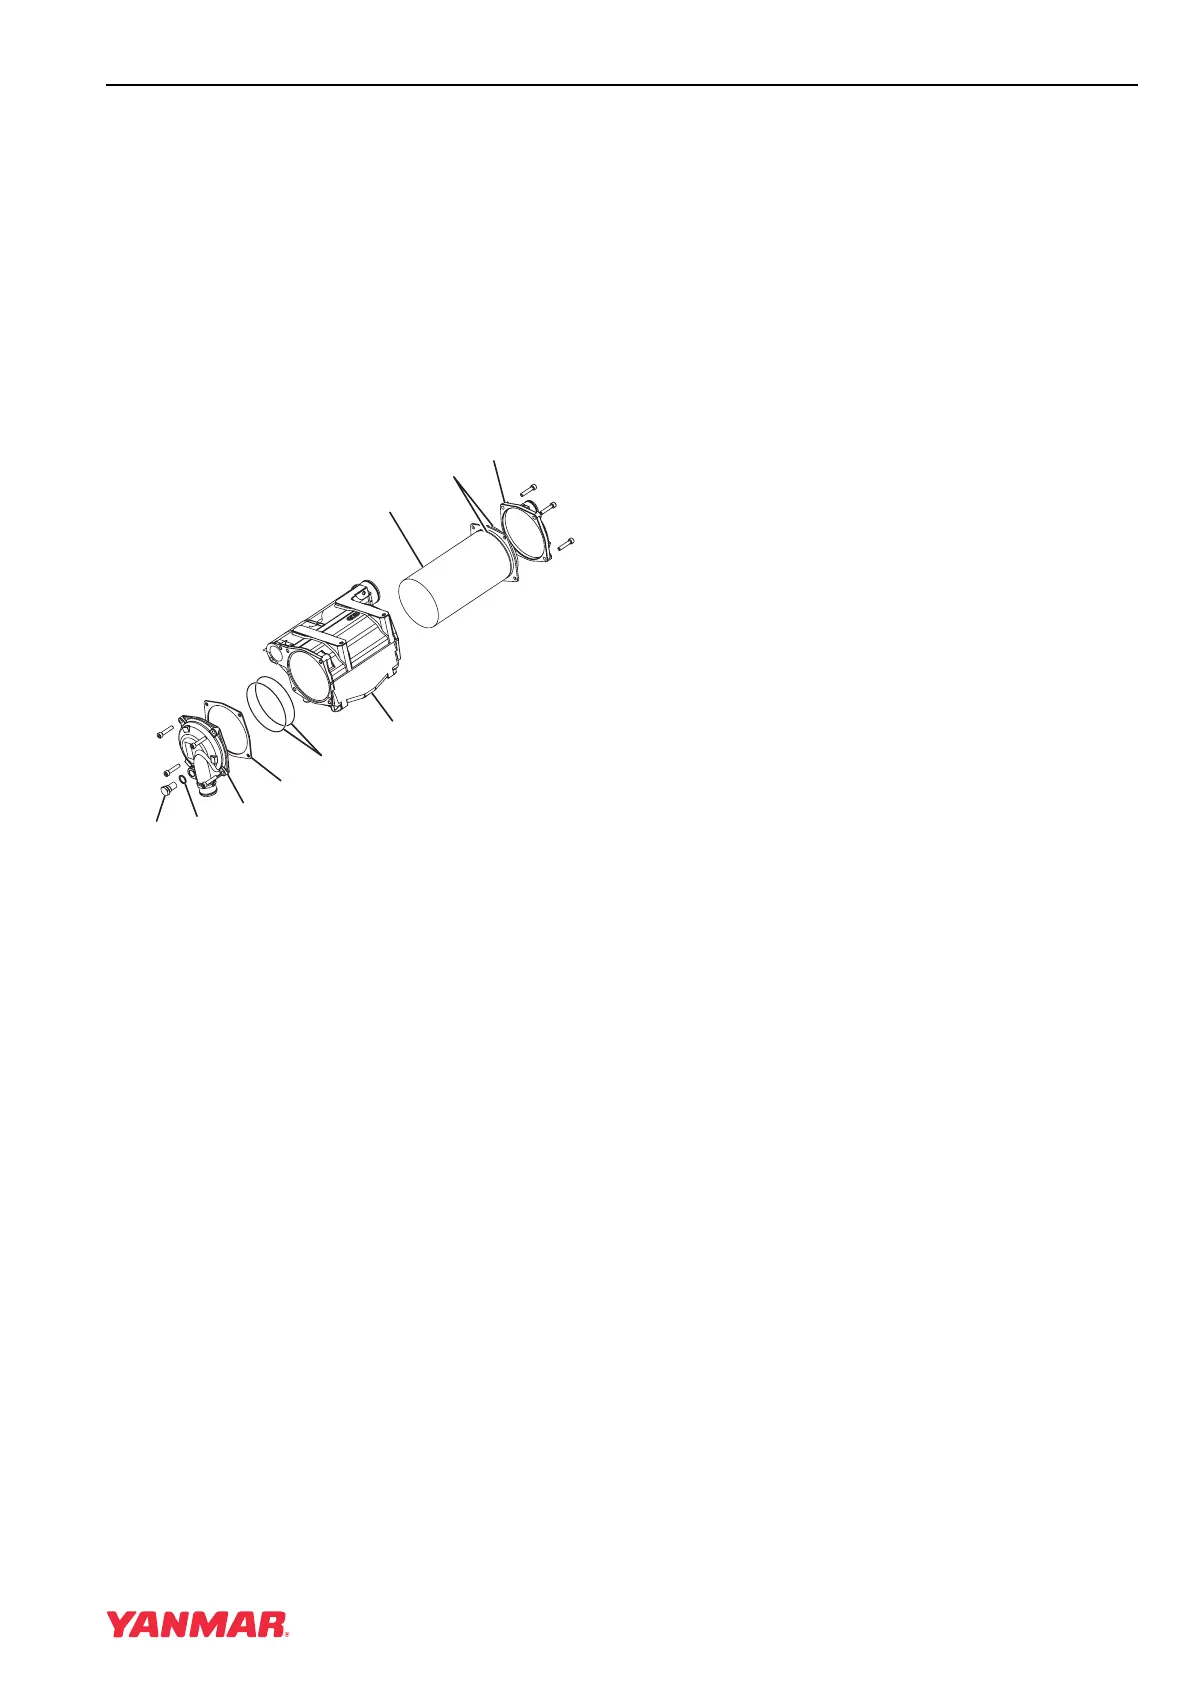
Figure 7-13
2. Remove outlet cover (Figure 7-13, (4)) and
spacer (Figure 7-13, (5)).
3. Remove inlet cover (Figure 7-13, (1)).
4. Pull core (Figure 7-13, (3)) from housing.
5. Remove O-rings (Figure 7-13, (2, 6))
6. Remove zinc anode (Figure 7-13, (7)) and
gasket (Figure 7-13, (8)).
IMPORTANT
Under no circumstances should caustic
soda be used to clean the components.
7. Use paraffin-based engine detergent to clean
the cooler element. Thoroughly flush and rinse
all components.
8. If any internal deposits remain in the tubes,
consult a local radiator repair shop.
Note: Always install new O-rings.
9. Install new O-rings (Figure 7-13, (2)) on cooler
core.
10. Install cooler core and inlet cover
(Figure 7-13, (1)).
11. Install one O-ring (Figure 7-13, (6)) between
core and housing (Figure 7-13, (9)).
12. Install spacer (Figure 7-13, (5)), remaining
O-ring (Figure 7-13, (6)), and outlet cover
(Figure 7-13, (4)).
13. Install new zinc anode (Figure 7-13, (7)) and
washer (Figure 7-13, (8)). See Check and
Replace Zinc Anodes on page 7-11.
14. Install charge air cooler. See Remove and
Install Charge Air Cooler on page 7-14.
(3)
(1)
(9)
(6)
(5)
(4)
(8)
(7)
(2)
0003698