ENGINE
5-38
BY Service Manual
Pistons and Cylinders
2. Clean piston ring grooves using a piston ring
groove cleaning tool. Follow tool manufacturer’s
instructions for correct operation.
3. Wash pistons in an appropriate solvent using a
soft-bristled brush.
4. Visually inspect each piston for cracks. Pay
particular attention to the ring lands between
the piston ring grooves.
Figure 5-50
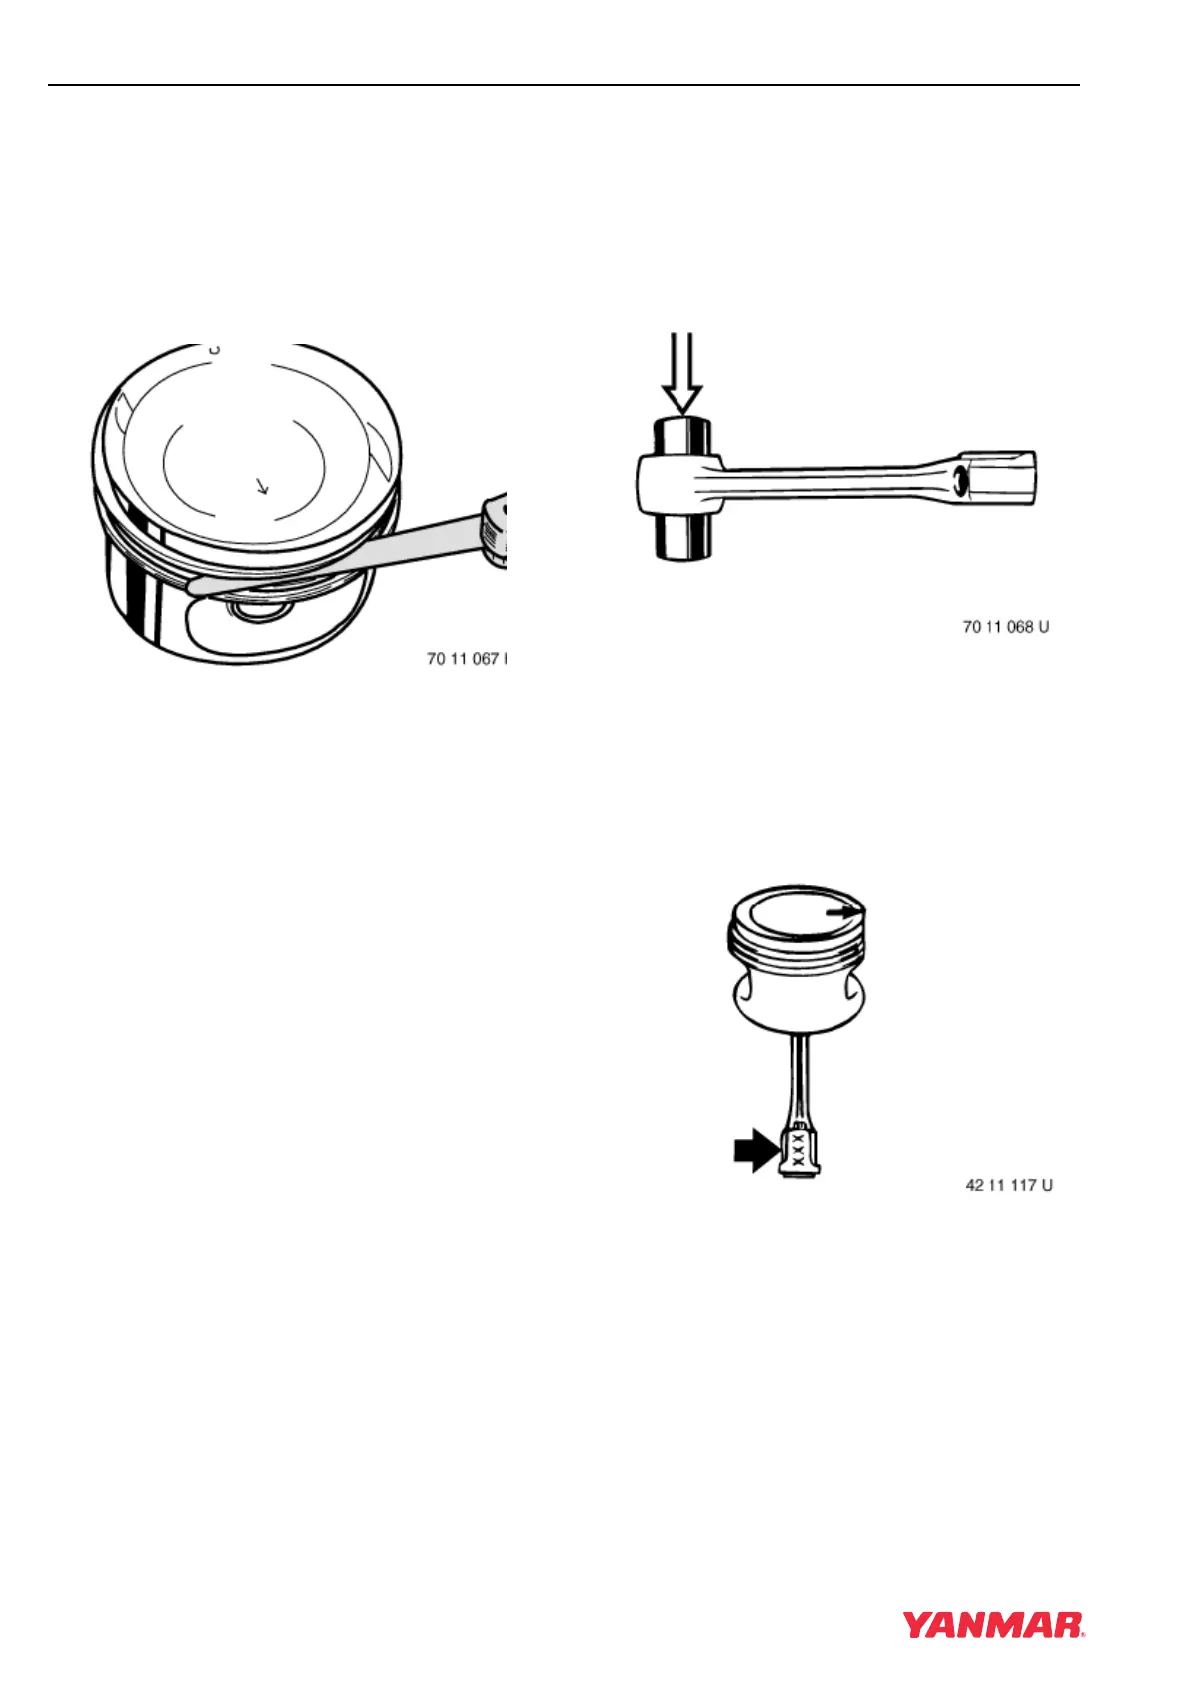
5. Install a new piston ring. See Assembling
Piston and Connecting Rod on page 5-38. Use
a feeler gauge to measure the gap between the
ring and the piston (Figure 5-50). Replace the
piston if not within specification. Repeat with
the second ring.
Note: The oil ring (third groove) cannot be
measured.
6. Repeat steps for each of the cylinders and the
piston rings for that specific cylinder.
Assembling Piston and Connecting
Rod
1. Clean the piston and rings thoroughly without
damaging the ring grooves.
2. Oil the wrist pin bore and wrist pin before
assembling.
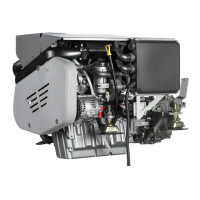
Figure 5-51
3. Check the fit of the wrist pin in the connecting
rod. The wrist pin should pass through the
bushing with little force and not have any
significant play (Figure 5-51).
4. Install one retaining ring in the piston with the
gap in the retaining ring opposite the recess.
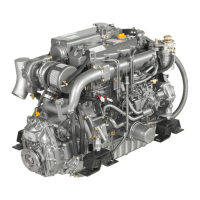
Figure 5-52
5. Orient the piston and connecting rod as shown
for assembly (Figure 5-52). The arrow on top of
the piston must point to the right when the
connecting rod identification marks are visible.