<2. Installation>
2-4
IM 12B07W01-04EN 1st Edition : Nov 11, 2016-00
2.2.3 Installing the PH8HS3 Holder
Follow the procedure below to mount the PH8HS3 holder onto the pipe.
(1) Attach the mounting brackets (two pairs) to the holder by adjusting the position of the pH
sensor to satisfy the required distance to the pipe. To attach brackets, use the bolts (two
each), washers (four each) and nuts (two each) that with the holder.
(2) Assemble the U bolts, washers and nuts into the brackets (see Figure 2.5).
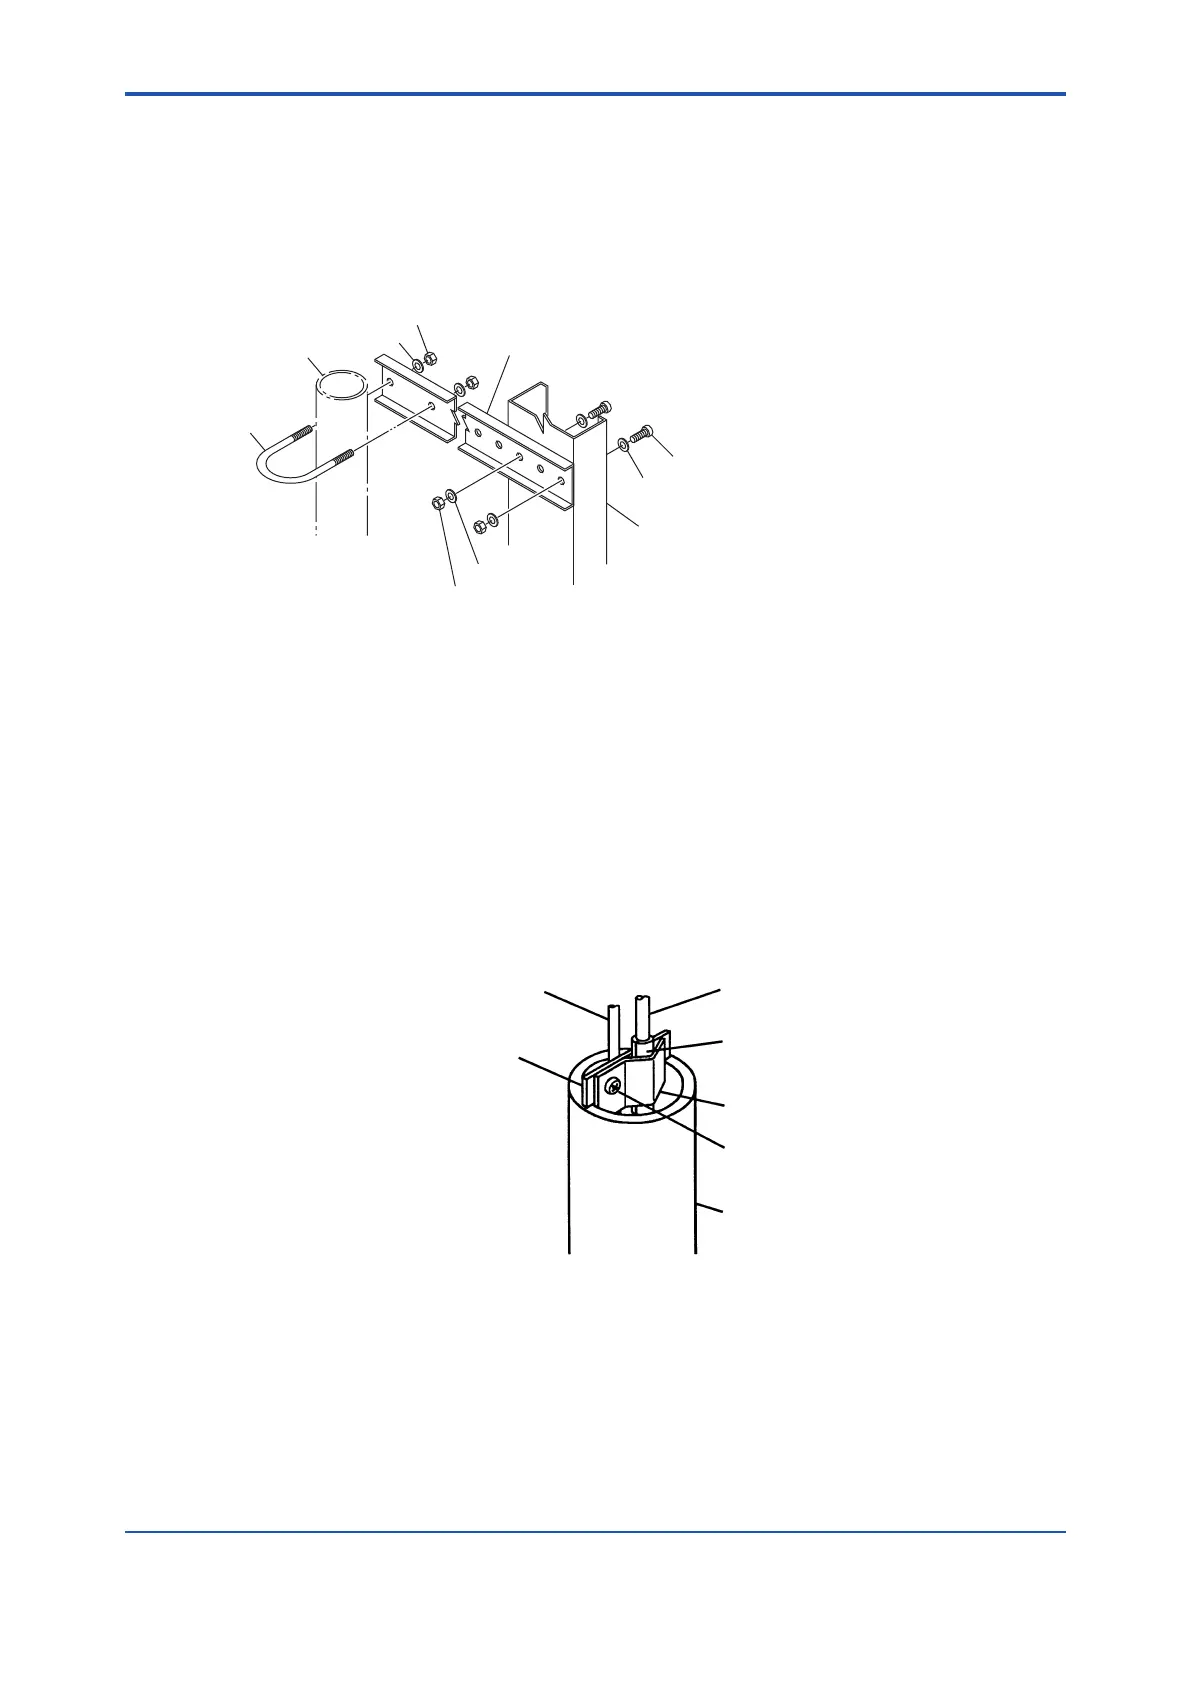
F2.5.ai
(Pipe)
U bolt
Washer
Nut
Mounting bracket
Bolt (M8)
Washer
Chassis
Washer
Nut
Figure 2.5 Parts for Mounting Bracket (Included)
(3) Assemble the PH8EFP pH sensor onto the sensor holder.
a. First remove the rubber cap on the top end of the sensor holder. Then thread the cable of
the pH sensor and the KCI supply tube from the bottom end of the sensor holder and then
pull them out from the top end.
b. Insert the pH sensor into the sensor holder so the sensor ange contacts the bottom end of
the sensor holder.
Note: Two O-rings are used to seal the openings of the sensor holder to prevent the
measured solution from leaking into the holder.
c. Using the supplied parts (plate, clamp, screw and rubber sheet), attach the given latch
mechanism to the sensor cable to prevent the sensor and sensor holder from coming apart
(see Figure 2.6).
KCl supply tube
Sensor cable
Plate
Rubber sheet (19 x 40 mm) [P/N K9729WE]
Attach the rubber sheet around the sensor cable
with the 40 mm length parallel with the cable.
Clamp
Screw
Sensor holder
Note:
·Fasten only the sensor cable with the clamp.
·Make sure that there is no slack in the sensor
cable inside the sensor holder.
Figure 2.6 Treatment to Prevent the pH Sensor from Coming Apart
d. Replace the rubber cap on the sensor holder.
e. Using the cable tie (included), securely fasten the sensor cable and the KCl supply tube to
the sensor holder. ( Figure 2.7)
 Loading...