Start-Up
Axiostar plus Attaching epi-fluorescence illuminator Carl Zeiss
B 40-815 e 12/01 2-29
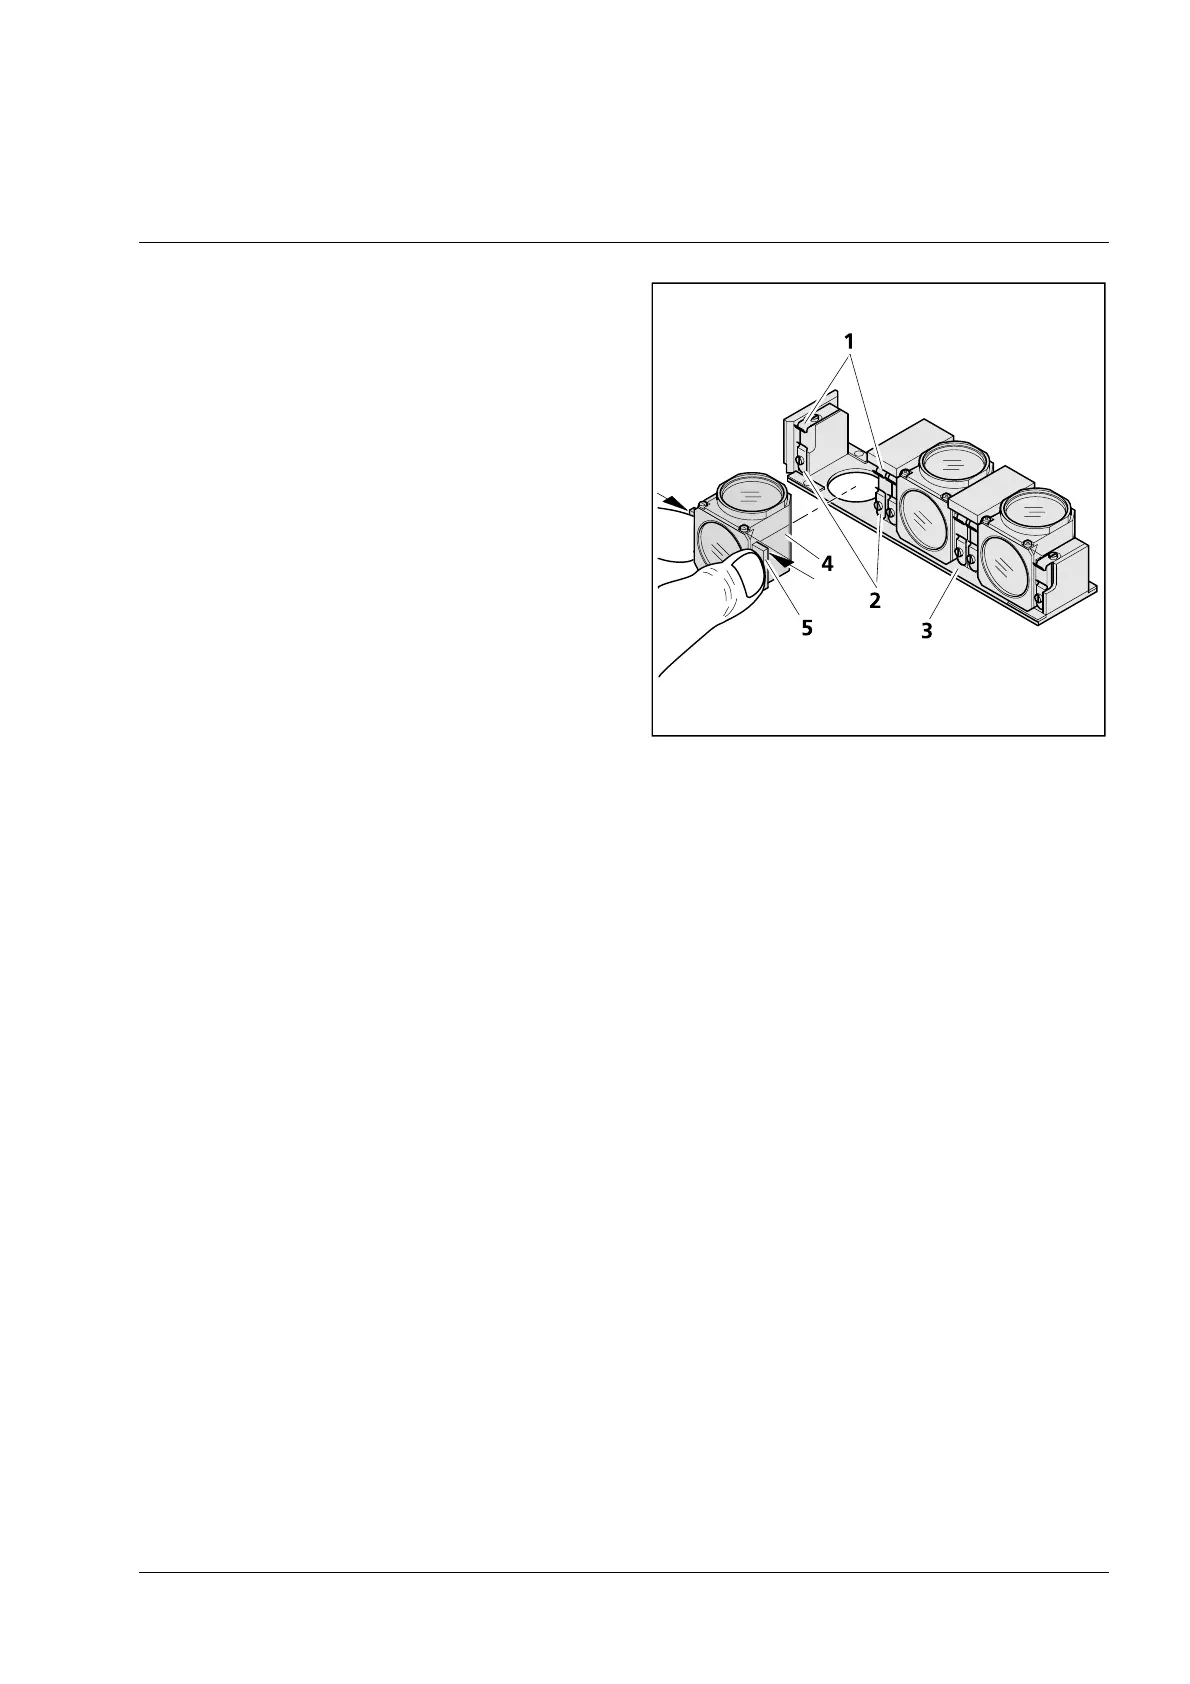
Inserting a P&C reflector module:
• Hold the module (2-26/4) with thumb and
index finger as shown in Fig. 2-26 and
insert at a slant from the top with the right
and left holding supports (2-26/5) into the
bottom spring clamps (2-26/2) in the
reflector carriage (2-26/3).
• Press on the top of the module until it
engages in the top spring clamps (2-26/1).
Removing a P&C reflector module:
• Slightly tip the module and disengage first
from the top spring clamps (2-26/1) and
then from the bottom spring clamps
(2-26/2) to remove completely.
Inserting the reflector carriage:
• Turn the reflector carriage (2-25/4) to the
correct insertion position and place in the
epi-fluorescence illuminator. Hold the lever
(2-25/5) to the right and push in the
reflector carriage until it engages.
• Turn lock (2-25/3) clockwise to lock
position.
• Push the reflector carriage lever to the left
or middle position an insert the protective
cap into the groove from above.
1 Top spring clamps
2 Bottom spring clamps
3 Reflector carriage
4 P&C reflector module
5 Holding supports
Fig. 2-26 Removing/inserting P&C reflector module
☞
If the reflector carriage is not locked correctly,
the imaging quality will be affected negatively.
• The last step is to label the three reflector
carriage positions (2-25/6) on the epi-
fluorescence illuminator with the included
labels (000000-1100-994) for filter
combination and pigment.
Artisan Scientific - Quality Instrumentation ... Guaranteed | (888) 88-SOURCE | www.artisan-scientific.com



 To Next Page