OPERATION
Carl Zeiss Core accessories Stemi DV4 / DR
3-14 B 40-003 e 08/00
☞
When taking photos in transmitted light with a lamp voltage close to U
max
(blue LED of the
illumination control is blinking!), remember that the lamp voltage is reduced to constant
voltage after three minutes!
• For the operation of the camera, see the operating manual "SONY Digital Handycam DCR-PC100"!
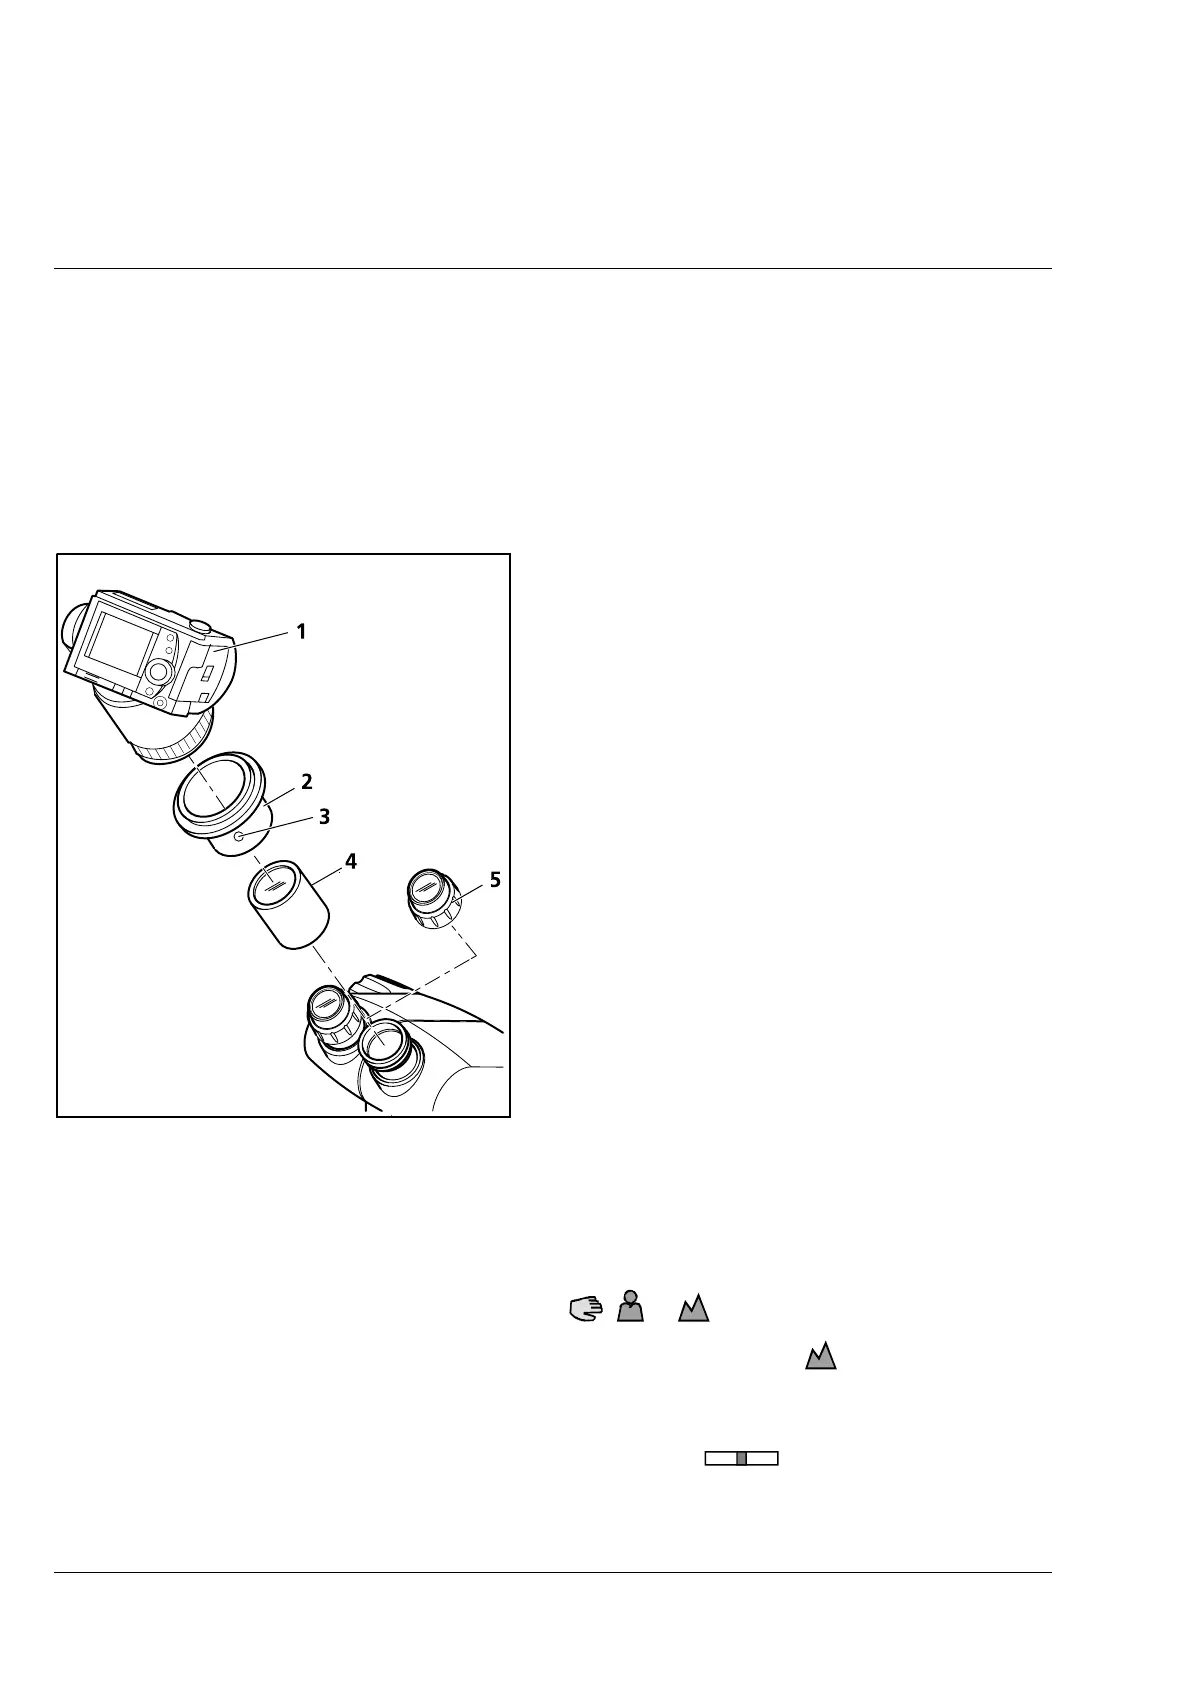
3.2.3.3 SONY camera "Digital Still Camera
Cybershot DSC-F505"
• Use the angled screwdriver to loosen the set
screw (3-17/3) on the eyepiece adapter.
• Pull out the lens mount (3-17/4).
• Unscrew eyepiece (3-17/5) from one of the
eyepiece tubes.
• Screw lens mount (3-17/4, optical surface
pointing to the observer) onto the thread of the
eyepiece tube and tighten the screw until stop.
Caution! Do not touch the optics!
• Screw sliding mount with thread M52 (3-17/2)
into the M52 objective/filter thread of the DSC-
F505 camera (3-17/1) until stop.
• Attach sliding mount (3-17/2) with camera
(3-17/1) to the lens mount (3-17/4), orient it
and use angled screwdriver to tighten the set
screw (3-17/3).
• Connect supply and signal cables, if required. If
the camera will be used for a long period of
time, it is recommended to use the line adapter
which is enclosed with the camera!
• Switch on the camera.
• Switch Autofocus to manual focusing (the symbols
F
, or are displayed).
• Set camera lens manually to ∞ via the focusing ring: the symbol must be displayed.
Caution! It is possible that the "∞" setting is slightly moved when the adapter is manipulated or the
camera zoom operated. Therefore: always check the "∞" setting before taking exposures!
• Move zoom camera lens into the center zoom position (display:
WT
).
• Move camera lens into the "W" or "T" direction until the image is untrimmed and homogeneously
illuminated and until the required magnification has been reached.
Fig. 3-17 Attachment of SONY camera
"Digital Still Camera Cybershot DSC-
F505"