14
EN
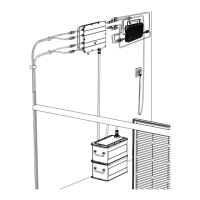
5.3.7 Connect with Cables
Cable Connection For 1-in-1 Microinverter
1
2
4
3
Home Socket
The arrow on the battery
cable is in the front.
MC4 Y connector 1-to-2
The arrow on the battery
connector and the "note" on
the top of the AB1000 or AB2000
are on one side.
1
2
4
3
Home Socket
The arrow on the battery
cable is in the front.
The arrow on the battery
connector and the "note" on
the top of the AB1000 are on
one side.
3
Connect AB1000 or AB2000 or SuperBase V or Satellite Battery to Hub
2000 with the battery cable,The terminals of battery cable can be self-
locking, when you hear a click, you have inserted the battery cable well.
(Be sure to tighten the connector screws for a secure connection to
your SuperBase V or Satellite Battery.)
Connect Hub 2000 to Microinverter with Microinverter cable.
Connect the Microinverter to the home socket with your original cable.
Connect the solar panel to Hub 2000.
Tips: You must connect AB1000 or AB2000 or SuperBase V or Satellite
Battery rst and then connect the solar panels.
1
2
4
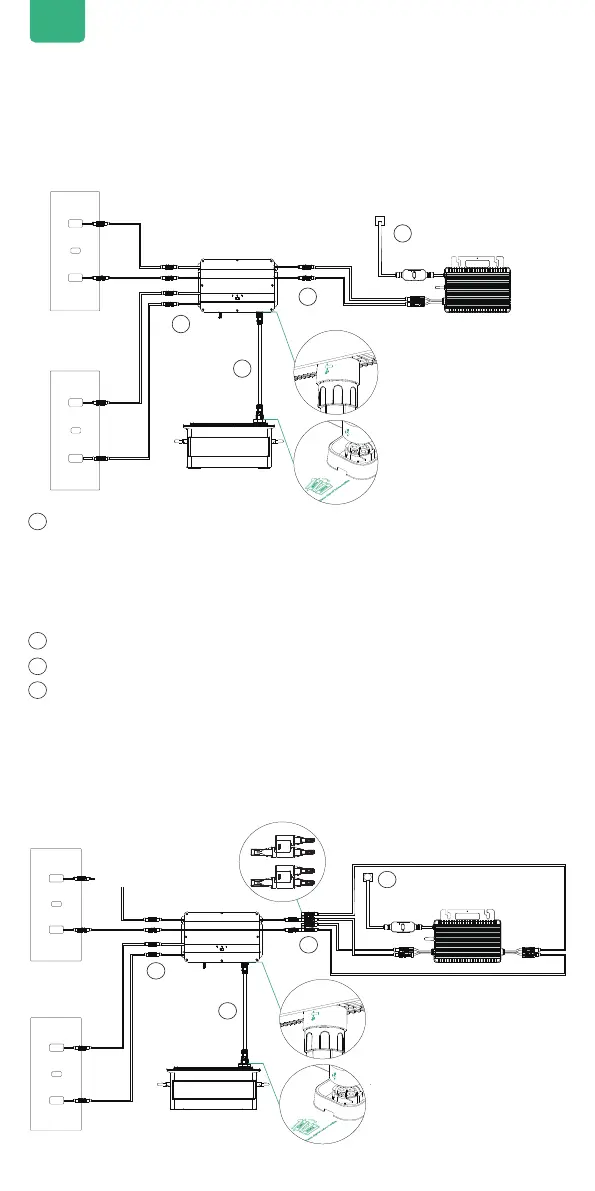
Cable Connection For 2-in-1 Microinverter
Home Socket
MC4-Y connector
1-to-2
Tips:Before connecting cable, please make sure that the product is turned off.
Press and hold IOT Button for 6s to shut off SolarFlow.
If battery is SuperBase V / Satellite Battery and still working , then also hold its
Power Button for 3s to switch it off .
 Loading...