64171, Rev. 10/May 2019
3M™ GMI™ PS200 PORTABLE GAS MONITOR
OPERATION
3-2
Additional:
• Perform regular leak checks on pumped instruments by placing your thumb over the sample inlet
nozzle and ensuring the monitor displays FLOW FAULT.
• Perform regular bump tests.
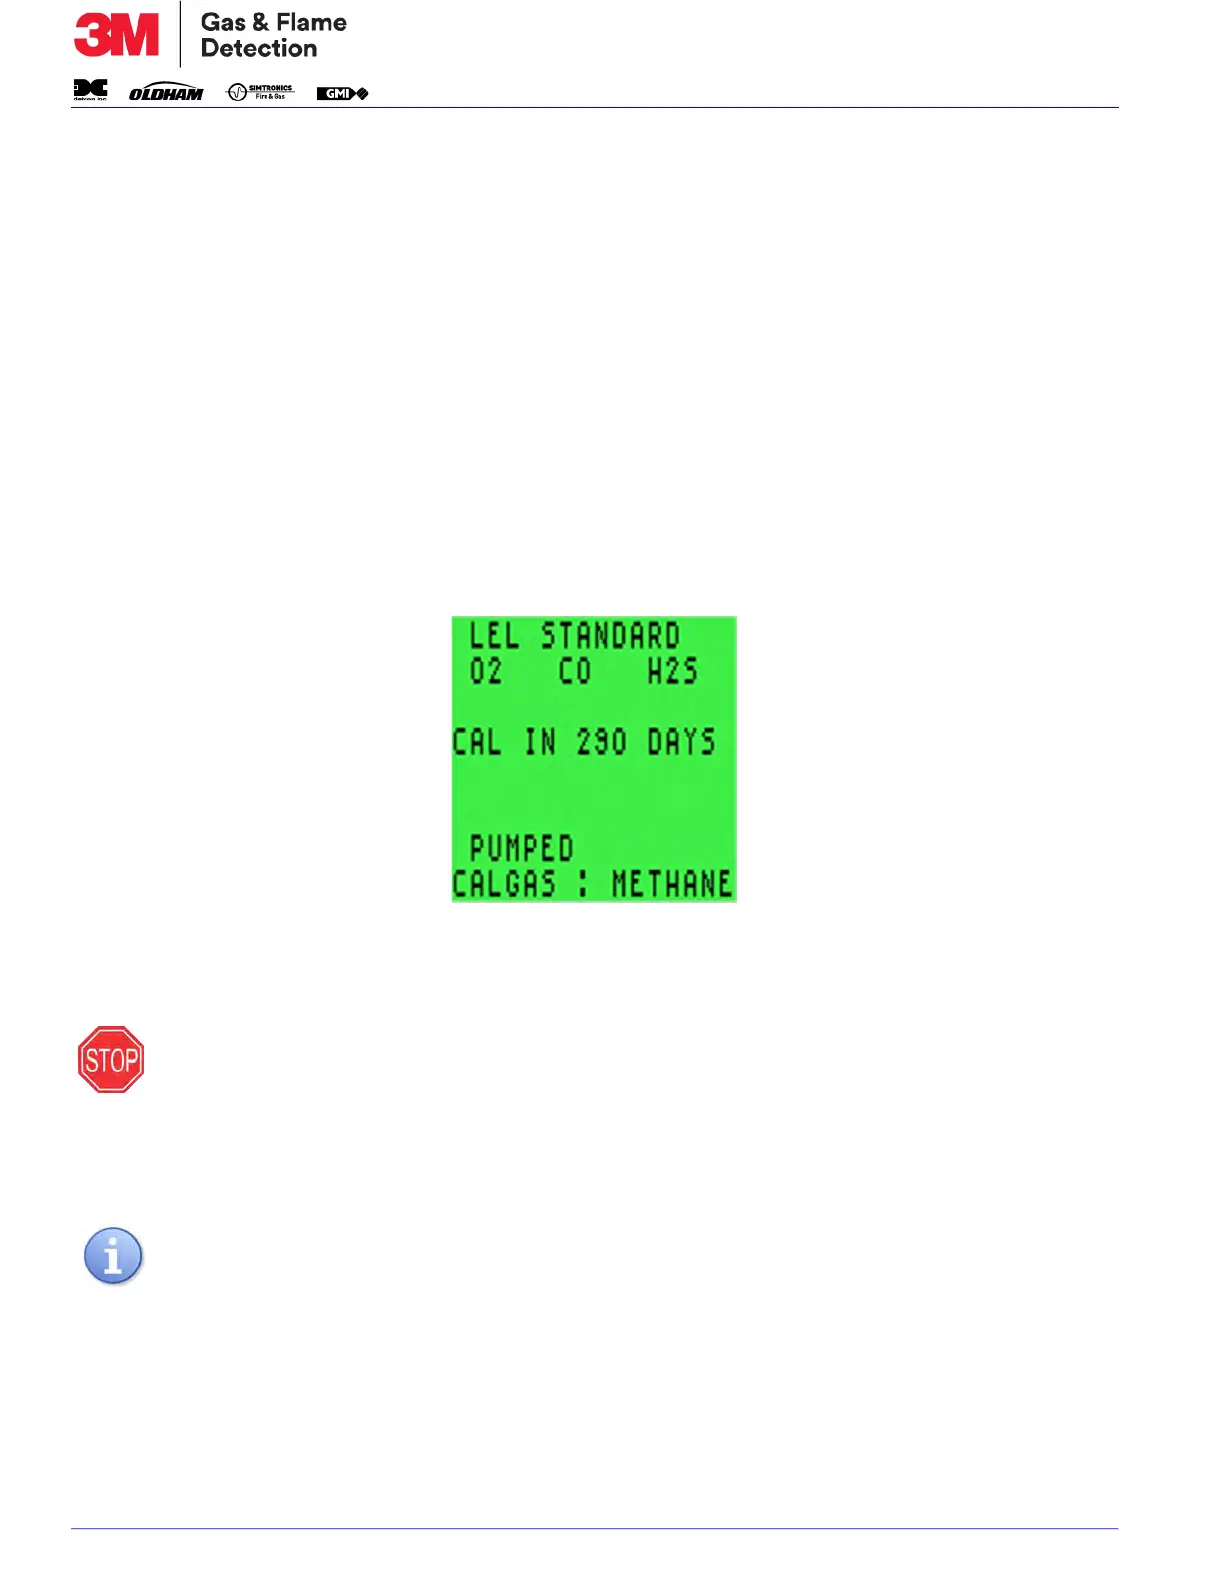
3.2. Quick Configuration Display
This allows configuration information to be viewed without fully switching the monitor ON (see
Figure 3-2: Quick Configuration Display).
With the monitor OFF, press the R Button for less than one second. The monitor will display:
• sensors fitted;
• calibration due date;
• pumped or diffusion;
• LEL calibration gas.
Figure 3-2: Quick Configuration Display
3.3. Switching the Monitor On
Press and hold the R Button for one second to switch the monitor ON (refer to Figure 3-1: Function
Buttons
). The flash screen appears (as shown in Figure 3-3: Flash Screen) and the monitor begins its
warm-up routine. A countdown timer appears in the top right corner of the display.
WARNING: ALWAYS SWITCH THE MONITOR ON IN FRESH AIR. FAILURE TO HEED
THIS WARNING COULD RESULT IN SERIOUS INJURY OR DEATH.
NOTE: The LCD backlight is green during warm-up and automatically switches off when
warm-up is complete.

 Loading...