64171, Rev. 10/May 2019
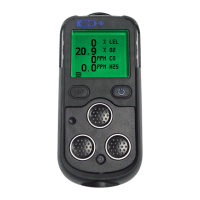
3M™ GMI™ PS200 PORTABLE GAS MONITOR
MANUAL BUMP TEST OPTIONS
6-1
6. MANUAL BUMP TEST OPTIONS
6.1. Bump Testing
A bump test verifies sensor response and alarm operation by exposing the monitor to a known con-
centration of gas.
The monitor has 2 manual bump test options:
• QUICK bump test validates sensors respond to gas and alarms are working.
• FULL bump test checks the response of all sensors against set limits and alarms are working.
By default, both of these options are disabled.
A bump test kit (Part No. 64051) is available and contains test gas, a regulator, and Tygon® tubing.
6.2. Initiating a Manual Bump Test
If enabled, switch the monitor ON by pressing the L button.
During warm-up, the BUMP TEST confirmation screen appears, as shown in Figure 6-1: BUMP TEST
Confirmation Screen
. Press the R button to continue.
Figure 6-1: BUMP TEST Confirmation Screen
When warm-up is complete, the APPLY GAS screen appears, as shown in
Figure 6-2: Apply Gas
Screen (4-Gas Model)
.
WARNING: A QUICK BUMP TEST ONLY CHECKS THE OPERATION OF THE AUDIBLE
AND VISUAL ALARMS. IT DOES NOT VALIDATE SENSOR ACCURACY OR
RESPONSE TIME.
WHEN PERFORMING A BUMP TEST, THE TEST GAS CONCENTRATION
SHOULD BE HIGH ENOUGH TO TRIGGER THE MONITOR’S ALARMS. IF
ANY MONITOR FAILS A BUMP TEST, PERFORM A FULL CALIBRATION
BEFORE USING THAT MONITOR.
 Loading...