64171, Rev. 10/May 2019
3M™ GMI™ PS200 PORTABLE GAS MONITOR
OPERATOR MAINTENANCE
8-2
•
• Place the filter cover over the filter recess and slide it towards the display until the locating lugs
engage in the locating slots.
• Using a No.1 Pozidrive
®
screwdriver, tighten the captive screw.
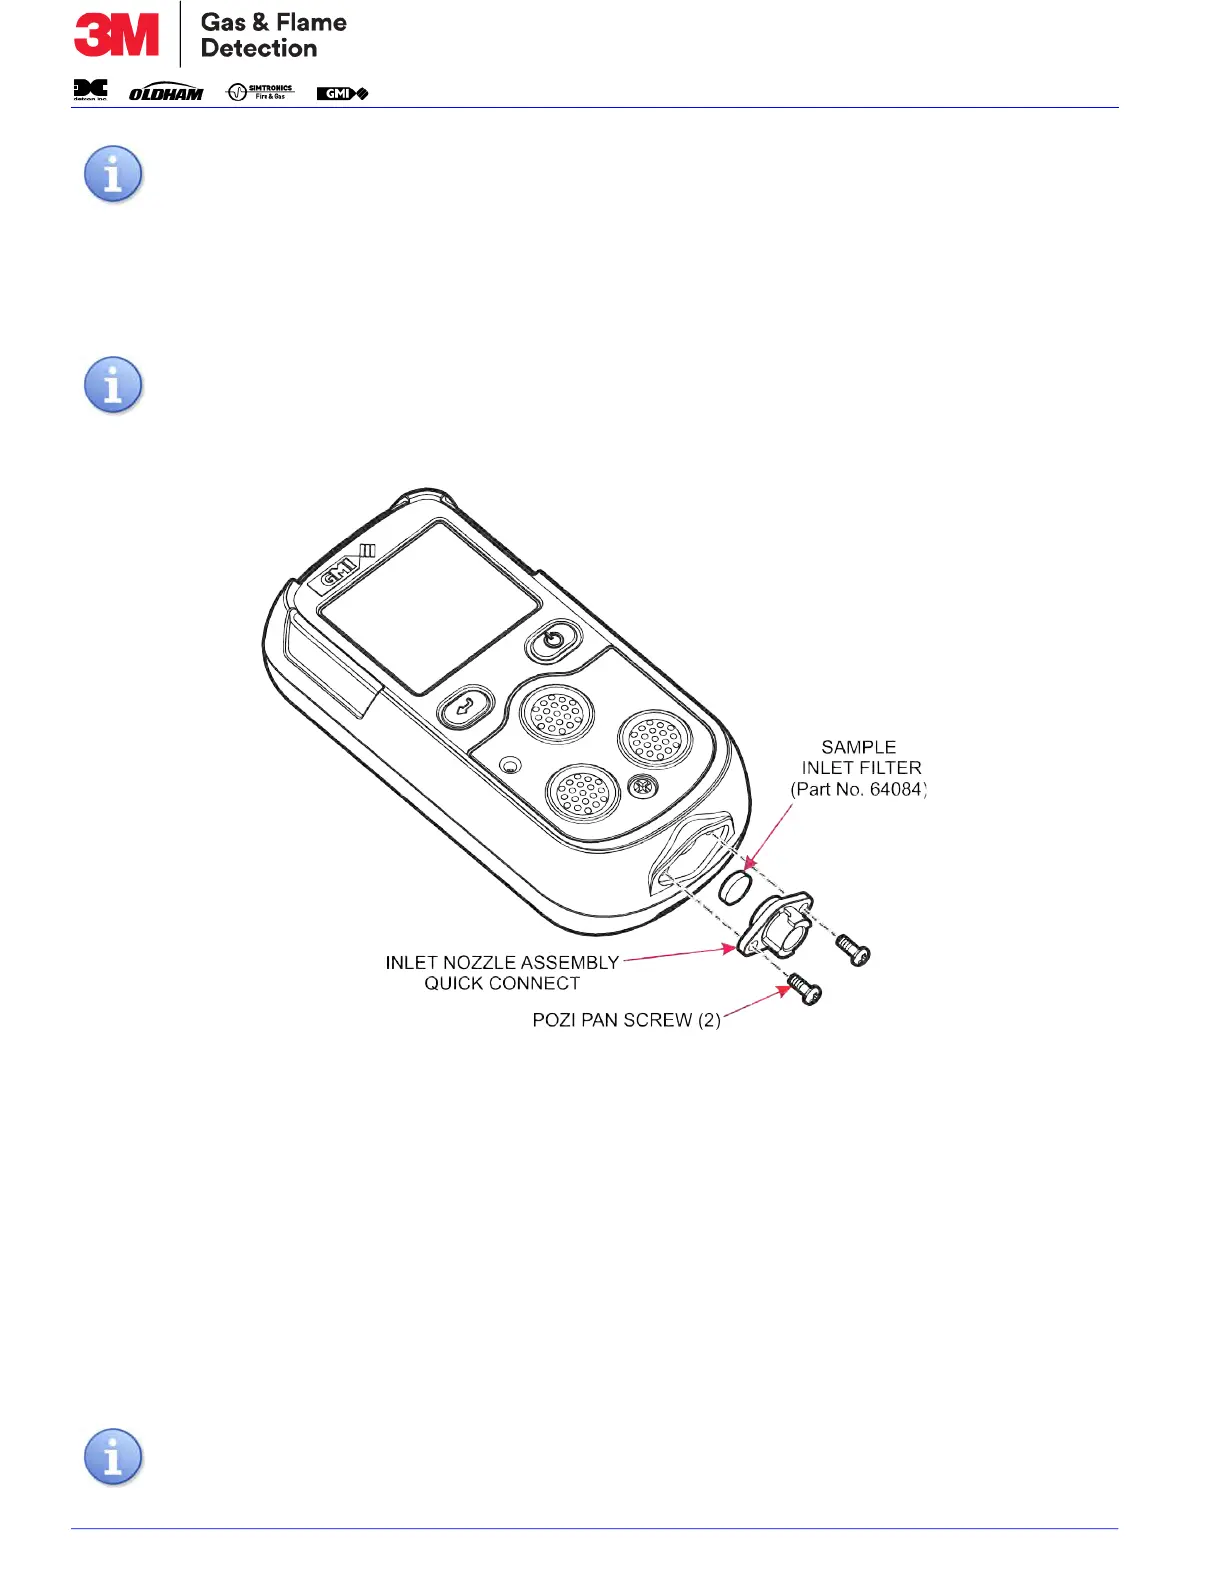
8.2.2. SAMPLE INLET (DUST) FILTER REPLACEMENT
Figure 8-2: Sample Inlet (Dust) Filter Replacement
• Using a No.1 Pozidrive
®
screwdriver, remove the 2 Pozi Pan screws.
• Remove the inlet nozzle. The sample inlet filter is located at the rear of the inlet nozzle.
• Push a matchstick, or similar, into the front of the inlet nozzle and remove the sample inlet filter
from the rear of the inlet nozzle.
• Insert a new sample inlet filter into the rear of the inlet nozzle. Ensure the ‘rough’ surface faces
the inlet filter (sample side).
• Replace the inlet nozzle. The inlet nozzle will only fit in one direction.
• Using a No.1 Pozidrive
®
screwdriver, insert the 2 Pozi Pan screws.
NOTE: Ensure that the locating pegs in the monitor filter recess align with the mating
pin-holes in the hydrophobic filter.
NOTE: Do not overtighten the captive screw.
NOTE: Do not overtighten the screws.
 Loading...