The following settings are available for the live
view.
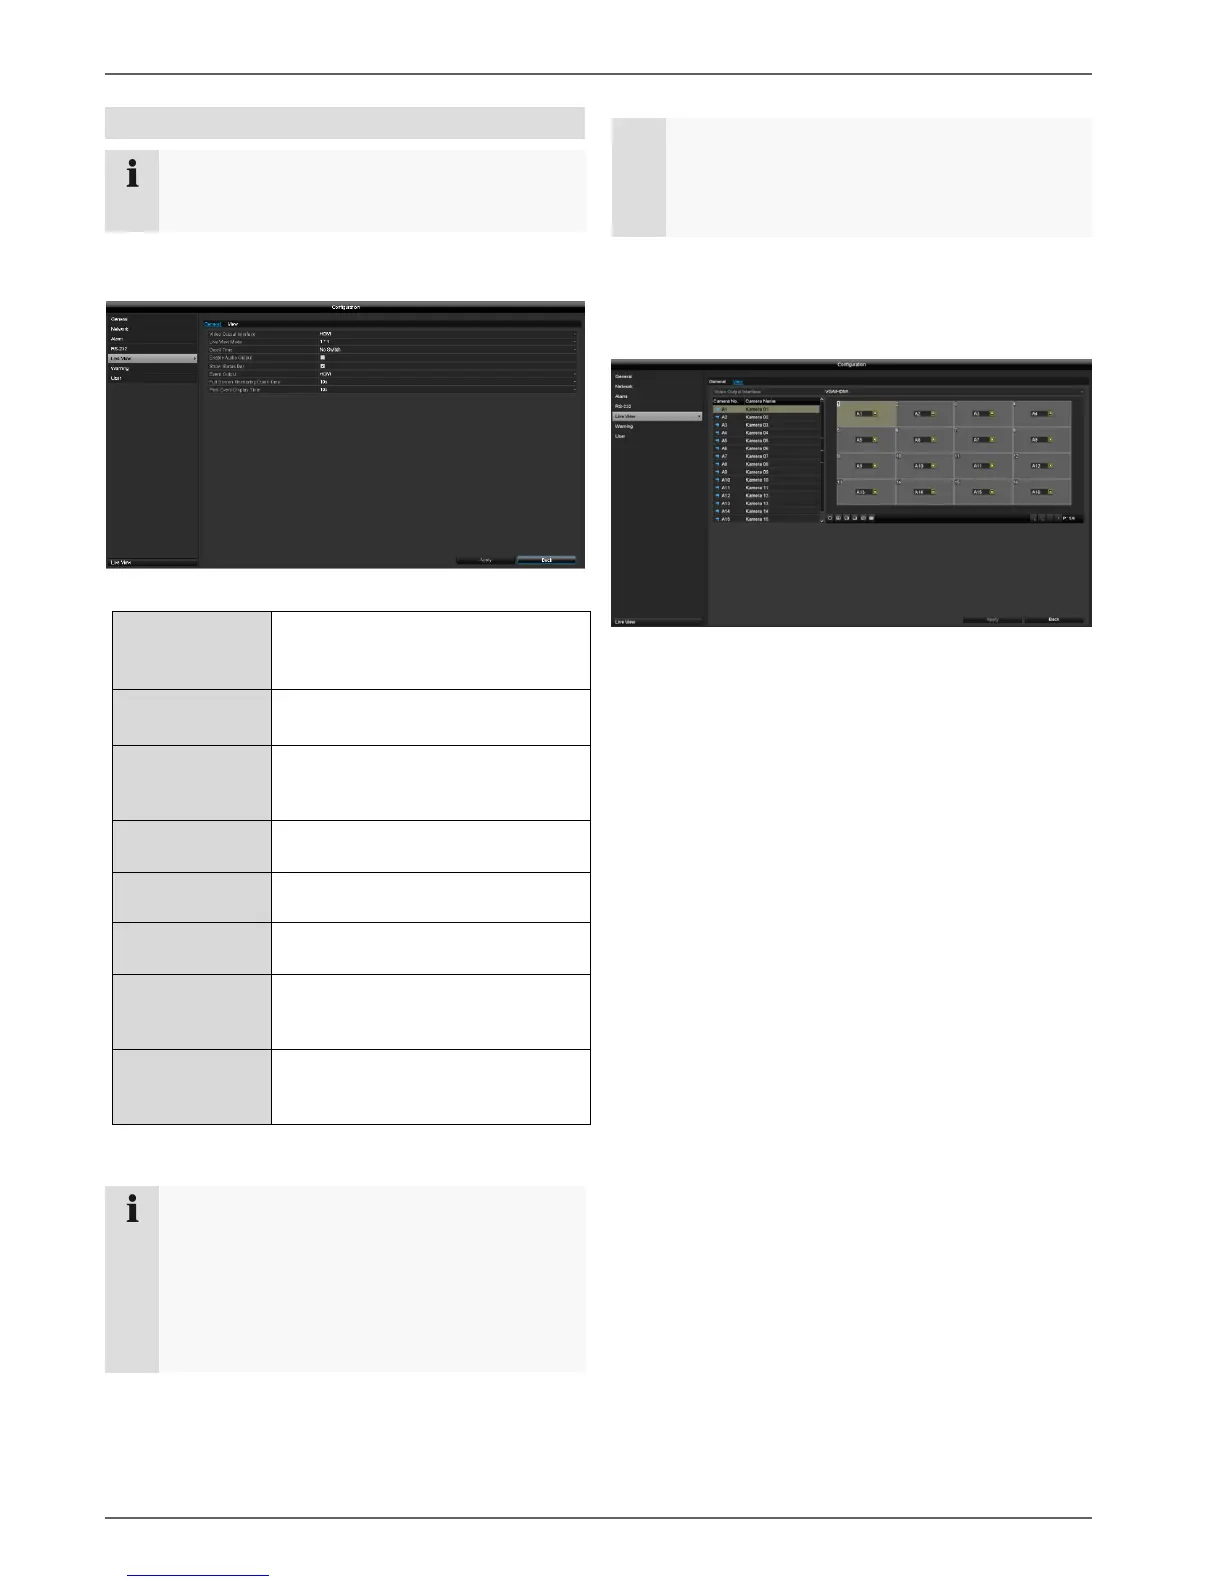
Open the main menu and click on Configuration. Then
click on Live View:
The following settings are available in the General tab:
Select the connection where the
settings are changed.
1x1, 2x2, 1+5, 1+7, 3x3, 4x4
Switching time between the
individual cameras during auto-
switch.
Activates the audio output
(VGA/HDMI/BNC) for the live view.
Activate/deactivate the status bar.
Allocate monitor for the output of
events.
Full Screen
Monitoring Dwell
Time
The number of seconds for which
the event will be displayed on the
allocated monitor.
The number of seconds for which
the pop-up window should be
displayed in the event of an alarm.
Note
VGA monitor connected:
If a VGA monitor is connected, it will be
recognised automatically when the device is
started up. The main video signal will be displayed
on the monitor.
No HDMI monitor connected:
If no HDMI cable is connected to the monitor
when the device is started up, the main video
signal will be emitted at the main VGA connection.
Connect the VGA cable and restart the recorder to
perform automatic detection.
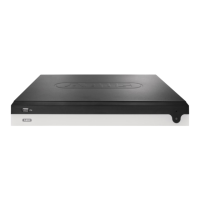
Setting the camera output
You can display a maximum of 16 cameras
simultaneously in live view.
Select the display mode.
1 x 1
2 x 2
1 + 5
1+7
3 x 3
4 x 4
Use the navigation keys to allocate the camera
signal required to the corresponding screen section.
The X setting means that this particular camera
is not being displayed.
Click on Apply to apply the setting.