Page 32
Dolby Pro Logic II Music & Custom Settings
TRx BRx VRx
TONE RECALL1 TN BL VL EQ
BAL RECALL1 SETUP
VOL RECALL1 LOUDNESS M]
LABELS/AV PL EH [P M]
SPEAKERS BASS ADABUS
LEVELS HDMI THX TURN ON
DELAYS SOLO TEST REVERB
PL1 CEN WIDTH3 SUR 6 KHz
AUTOBAL ON PANORAMA ON
NORMAL MATRIX COE1
DELAYON 5 DIMEN [P M]
PL1 CEN WIDTH3 SUR 6 KHz
AUTOBAL ON PANORAMA ON
NORMAL MATRIX COE1
DELAYON 5 DIMEN [P M]
PL2 CEN WIDTH3 SUR 6 KHz
AUTOBAL ON PANORAMA ON
NORMAL MATRIX COE1
DELAYON 5 DIMEN [P M]
PL3 CEN WIDTH3 SUR 6 KHz
AUTOBAL ON PANORAMA ON
NORMAL MATRIX COE1
DELAYON 5 DIMEN [P M]
PLM CEN WIDTH3 SUR xxxxx
AUTOBAL xxx PANORAMA ON
xxxxOL MATRIX COEx
DELAYxxx5 DIMEN [P M]
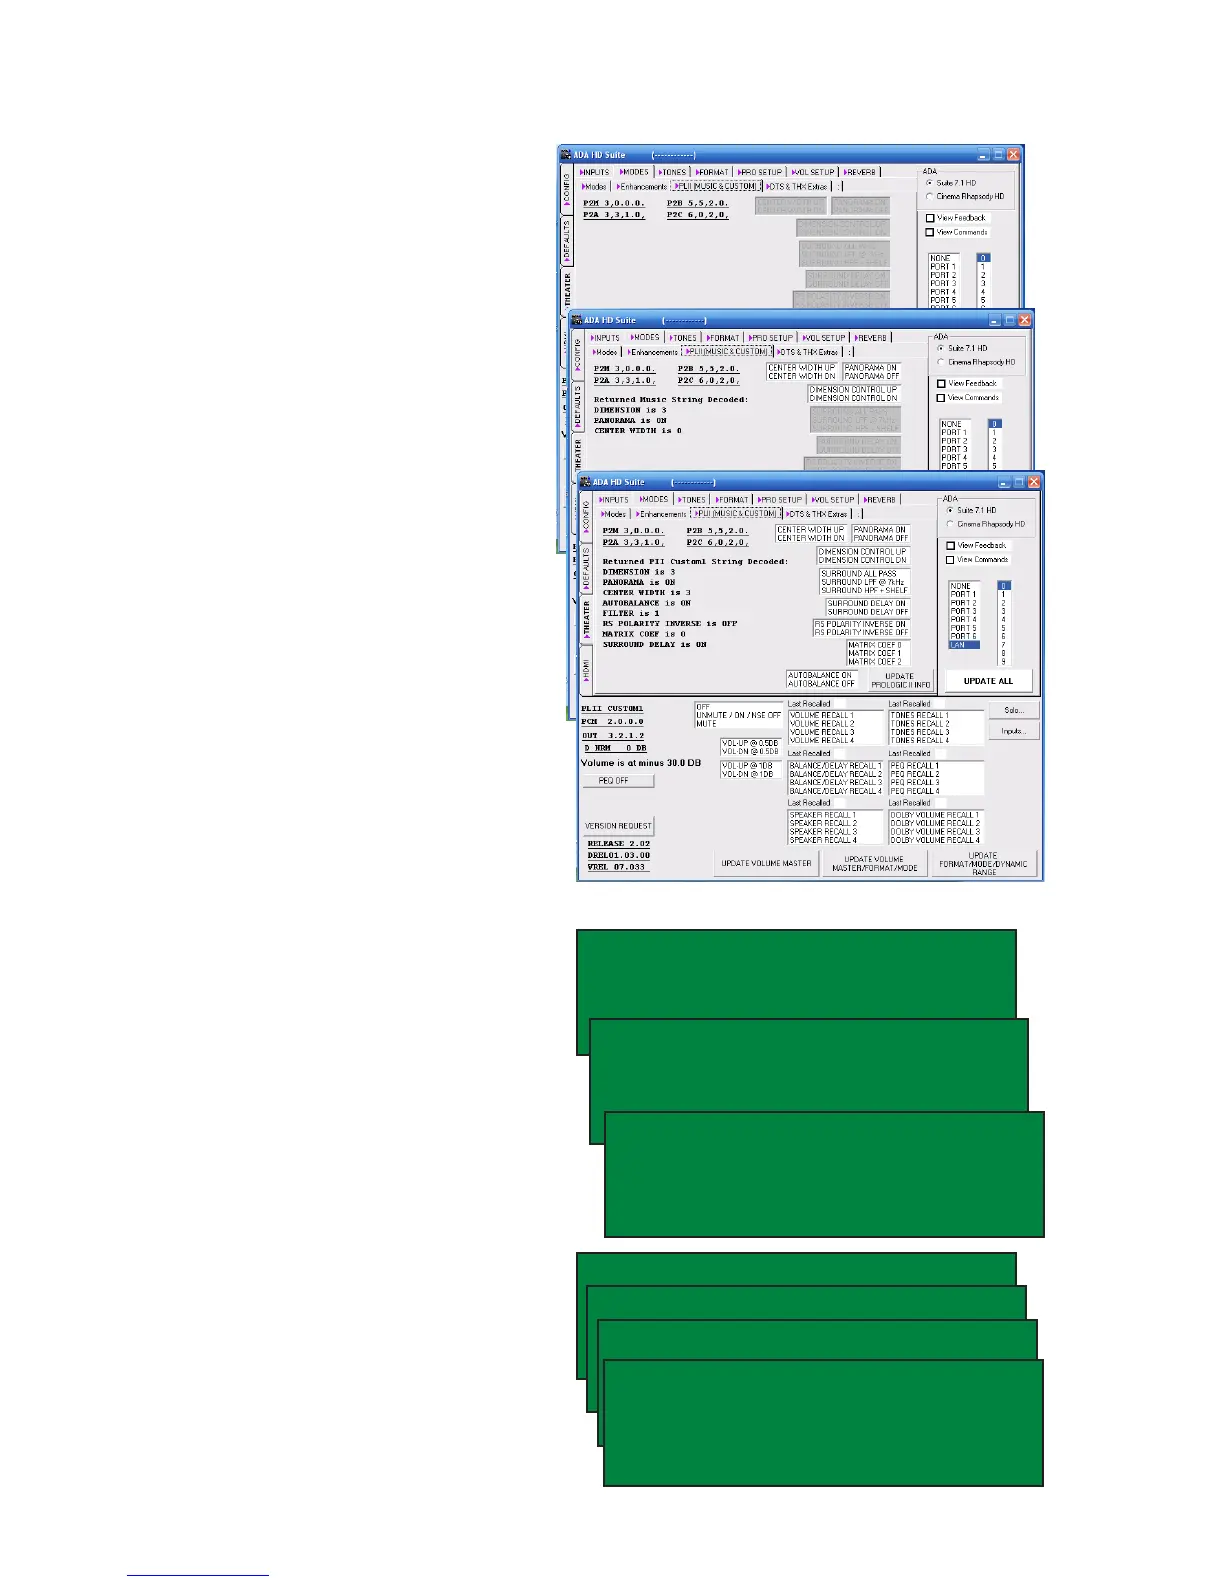
The Suite 7.1 HD features Dolby Pro Logic de-
coding. While the parameters behind the Dolby
Prologic II Movie mode are not adjustable (the top
image of the PC program shows that all features
are greyed-out when in this mode), some of these
parameters are adjustable for Dolby Prologic
II Music mode (middle screen shot). All of the
parameters are available for the three Dolby Pro
Logic II Custom modes.
Center Width - Using a scale from 0 (off) to 7, Center
Width spreads the center channel image toward
the right and left. Remember that this is still a
mode that is based on Dolby Prologic decod-
ing and as such, mono (i.e. vocals in music) are
extracted from the right & left tracks and passed
onto the center channel.
Panorama On or Off - When Panorama is ON, the
sound eld from the front speakers is pulled into
the surround speakers.
Dimension Control - Using a scale from 0 (off) to
7, Dimension Control is the level of audio that is
pulled to the surround channels when Panorama
is ON.
Additional features available when rst selecting
one of the three Prologic II Custom modes include
Surround Shelng lter, Surround Delay On/Off,
Polarity Control, Matrix Coefcient Control and
Auto Balance On/Off.
Once features are set for either Prologic II Music
or any of the three Custom modes, it remains set
for that mode.
From the front panel of the Suite 7.1 HD while
in the Setup Mode navigate to the SETUP using
the Mode knob and press the knob. While on the
screen that displays LABELS/AV in the upper left-
hand corner, turn the Mode knob until the cursor is
on the letter P in PL and press the Mode knob.
You are now on the Prologic II setup screen.
While the cursor is on the letter P in the upper left-
hand corner of the display, turning the Input knob
will advance through the three Custom modes and
one Music mode. You can scroll through features
for that mode by turning the Mode knob. While
on the desired feature, turning the Input knob will
change that feature’s settings.
 Loading...