Page 20
Loading Custom Input Congurations
As a reminder to how the Suite 7.1 HD operates,
when you adjust most every feature on the unit,
the changes occur in real time (immediately).
That is not the case when it comes to labeling of
inputs, assigning AV jacks, altering input presets,
or changing default modes.
For these specic features, you must load them
into the Suite 7.1 HD. Even if you are adjusting
them on the front panel control, these changes
are only being held in the front panel control and
have not yet been loaded into the motherboard.
As such, the front panel control works much like
the PC program which also needs to be “loaded”
into the Suite 7.1 HD.
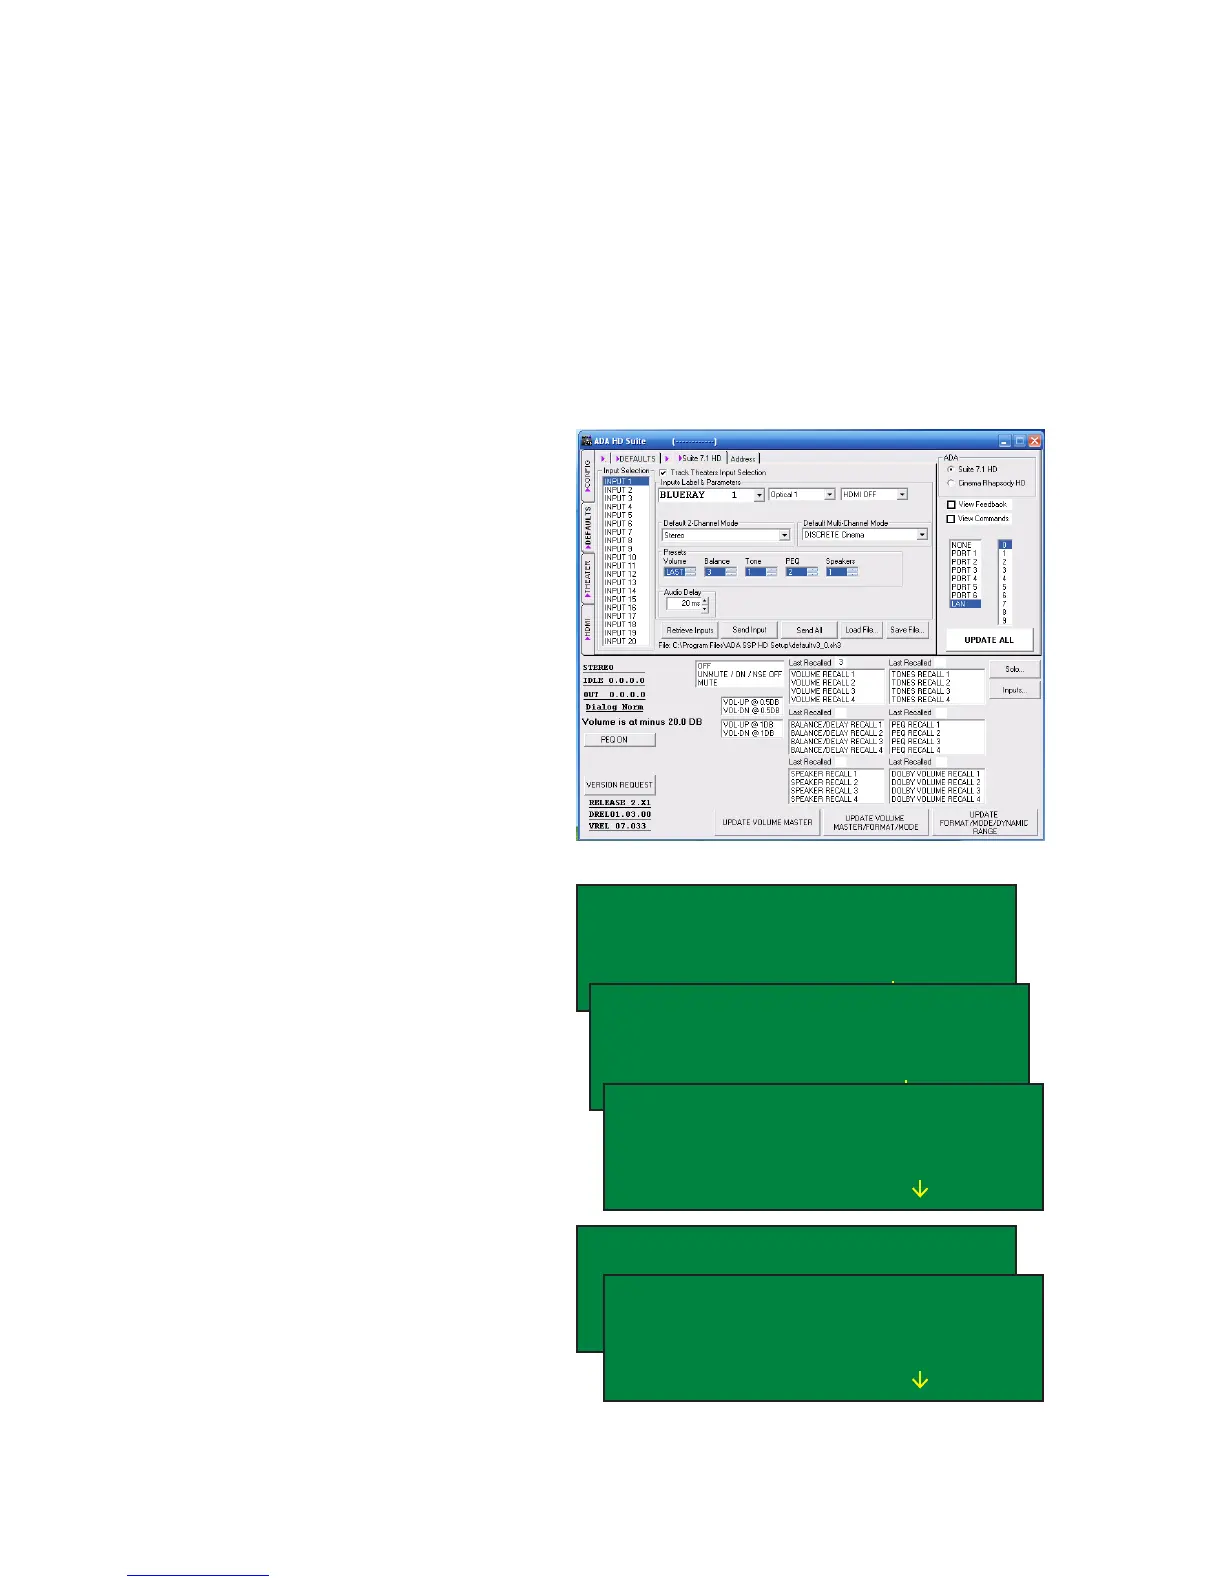
When using the PC program, you have two load-
ing options which read Send Input or Send All.
Since Send All involves going through all 20 Input
Labels, the Send Input is a nice feature if you only
made a change to a few devices. While on that
Input, press the Send Input button and just that
input will be loaded to the Suite 7.1 HD. Also, you
save the conguration for all inputs by selecting
Save File. Inversely, you can load a previously
stored conguration using the Load File feature.
The Retrieve Input feature loads the settings in-
ternal to the Suite 7.1 HD into the PC Program.
From the front of the Suite 7.1 HD, while on the
LABELS/AV display, turn the Mode knob so that
the cursor is ashing on the “L” in LOAD ALL.
Then press the Mode knob.
The display will change from reading LOAD ALL
to LOADING and the inputs will scroll through all
20 Input Labels.
When the upload is completed, the display will
indicate revert to the rst Input Label and LOAD
ALL will be displayed.
At this time, you can choose to adjust the Final In-
put number, return the previous menu page (P) for
other settings, or exit the setup completely (M).
INPUT 2 FINAL INPUT 2O
LABEL SATELLITE 2 SAVE
AUDIO HDMI LOAD ALL
VIDEO HMI1 2 N [P M]
INPUT 2 FINAL INPUT 2O
LABEL SATELLITE 2 SAVE
AUDIO HDMI LOADING
VIDEO HMI1 2 N [P M]
INPUT 1 FINAL INPUT 2O
LABEL BLU-RAY 1 SAVE
AUDIO HDMI LOAD ALL
VIDEO HDMI 1 N [P M]
INPUT 1 FINAL INPUT 2O
LABEL BLU-RAY 1 SAVE
AUDIO HDMI LOAD ALL
VIDEO HMI1 1 N [P M]
INPUT 1 FINAL INPUT 12
LABEL BLU-RAY 1 SAVE
AUDIO HDMI LOAD ALL
VIDEO HDMI 1 N [P M]
 Loading...