Home
ADEEPT
Robotics
Robotic Arm
Page 42 (Learning the Code Program of this Lesson)
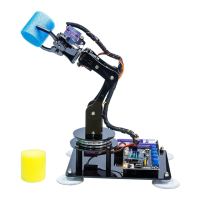
ADEEPT Robotic Arm - Learning the Code Program of this Lesson
182 pages
Manual
Save Page as PDF
To Next Page
To Next Page
To Previous Page
To Previous Page
Loading...
39
1.4.2
Learni
ng
the
code
program
of
this
lesson
Initialize
potentiometers
A0,
A1,
A2,
A3,
A6.
Initialize
the
serial
monitor
.
Convert
the
value
of
1023
to
180
proportionall
y
,
and
then
print
out
t
he
converted
data
to
the
serial
monit
or
.
41
43
Table of Contents
Main Page
About Adeept
2
Table of Contents
3
Acrylic Plates
4
Contents
4
Components List
4
Machinery Parts
6
Sucking Disc Component
6
Electronic Parts
7
Tools
8
Self-Prepared Parts
8
Introduction of Robotic Arm
9
Power LED
12
Introduction of Adeept Arm Drive Board
12
Reset
13
Switch
13
Micro USB
13
Potentiometer Button
13
Arduino Development Language
14
Arduino Program Structure
14
Lesson 0 Building the Arduino Development Environment
14
Install Arduino IDE under Windows
15
Menu Bar
20
Verify
24
Code Editing Area
24
Console
24
Connecting the Adeept Arm Drive Board and the Computer
25
Install CH341SER Driver
25
Download Processing
29
Components Used in this Course
36
Introduction of Potentiometer
36
Lesson 1 How to Read the Data of the Potentiometer
36
Wiring Diagram (Circuit Diagram)
37
Compile and Run the Code Program of this Course
38
Learning the Code Program of this Lesson
42
The Introduction of the Servo
43
Lesson 2 Controlling the Servo
43
The Working Principle of the Servo
44
The Principle of Write () Function
45
Lesson 3 Displaying Text on the OLED Screen
50
About EEPROM
55
Lesson 4 Saving Data with EEPROM
55
How to Use EEPROM to Save Data
56
Lesson 5 Servo 90 Degree Adjustment
61
Upload the Servo90.Ino
62
Pedestal Assembly
65
Lesson 6 How to Assemble the Robotic Arm
65
Fix OLED to Drive
66
Fix 18650X2 Battery Holder to A01
67
Install and Remove Batterries
72
Turnplate and Rocker Arm Assembly
73
SERVO of Number
74
Fix a Debugged Servo to A02 and A03
75
Play
87
Circuit Connection
96
Connection of each Devices for the Robotic Arm
96
Combinations of the Robotic Arm
97
Adjustment of the Robot Arm
97
Downloading and Installing Python
100
Lesson 7 GUI Application Control Mode
100
Installing Pyserial
102
Opening the GUI Interface
104
Lesson 8 Gwblock Graphical Control Mode
112
The Method of Reconnecting the Gwblock Graphical Editor
124
Upload the Potentiometer_Control.ino
138
Lesson 9 Potentiometer Control Mode
138
Specific Function Descriptions
143
Upload the Learning.ino
145
Lesson 10 Learning Mode
145
How to Start the Learning Mode of Robotic Arm
148
Introduction to Learning Mode
148
How to Modify the Number of Recorded Exercise States
150
How to Download Processing?
151
Lesson 11 Processing Controls Robotic Arm
151
Upload the Adeeptarmrobot.ino
157
Run the Processingarmrobot.pde
160
Prepare
165
Lesson 12 Imitation Function(Pen)
165
Upload the Adeeptsimulation.ino
167
How to Start the Imitation Mode of Robotic Arm
170
Introduction to Imitation Mode
170
Upload the Writinganddrawing.ino
174
Lesson 13 Processing Controls Robotic Arm to Write and Draw
174
Run the Processingwritinganddrawing.pde
176
Related product manuals
ADEEPT Quadruped Robot
59 pages
ADEEPT RaspTank
69 pages
ADEEPT RaspClaws
57 pages
ADEEPT RaspRover
56 pages
ADEEPT PiCar-B
81 pages
ADEEPT Hexapod
56 pages
ADEEPT PiCar-Pro
178 pages
ADEEPT ADA031
93 pages