Deployment Guide 143
EXAMPLE 1: MAPPING LOCATIONS AND INSTALLING HIVEAPS
6. Select the icon and drag it to the location you want.
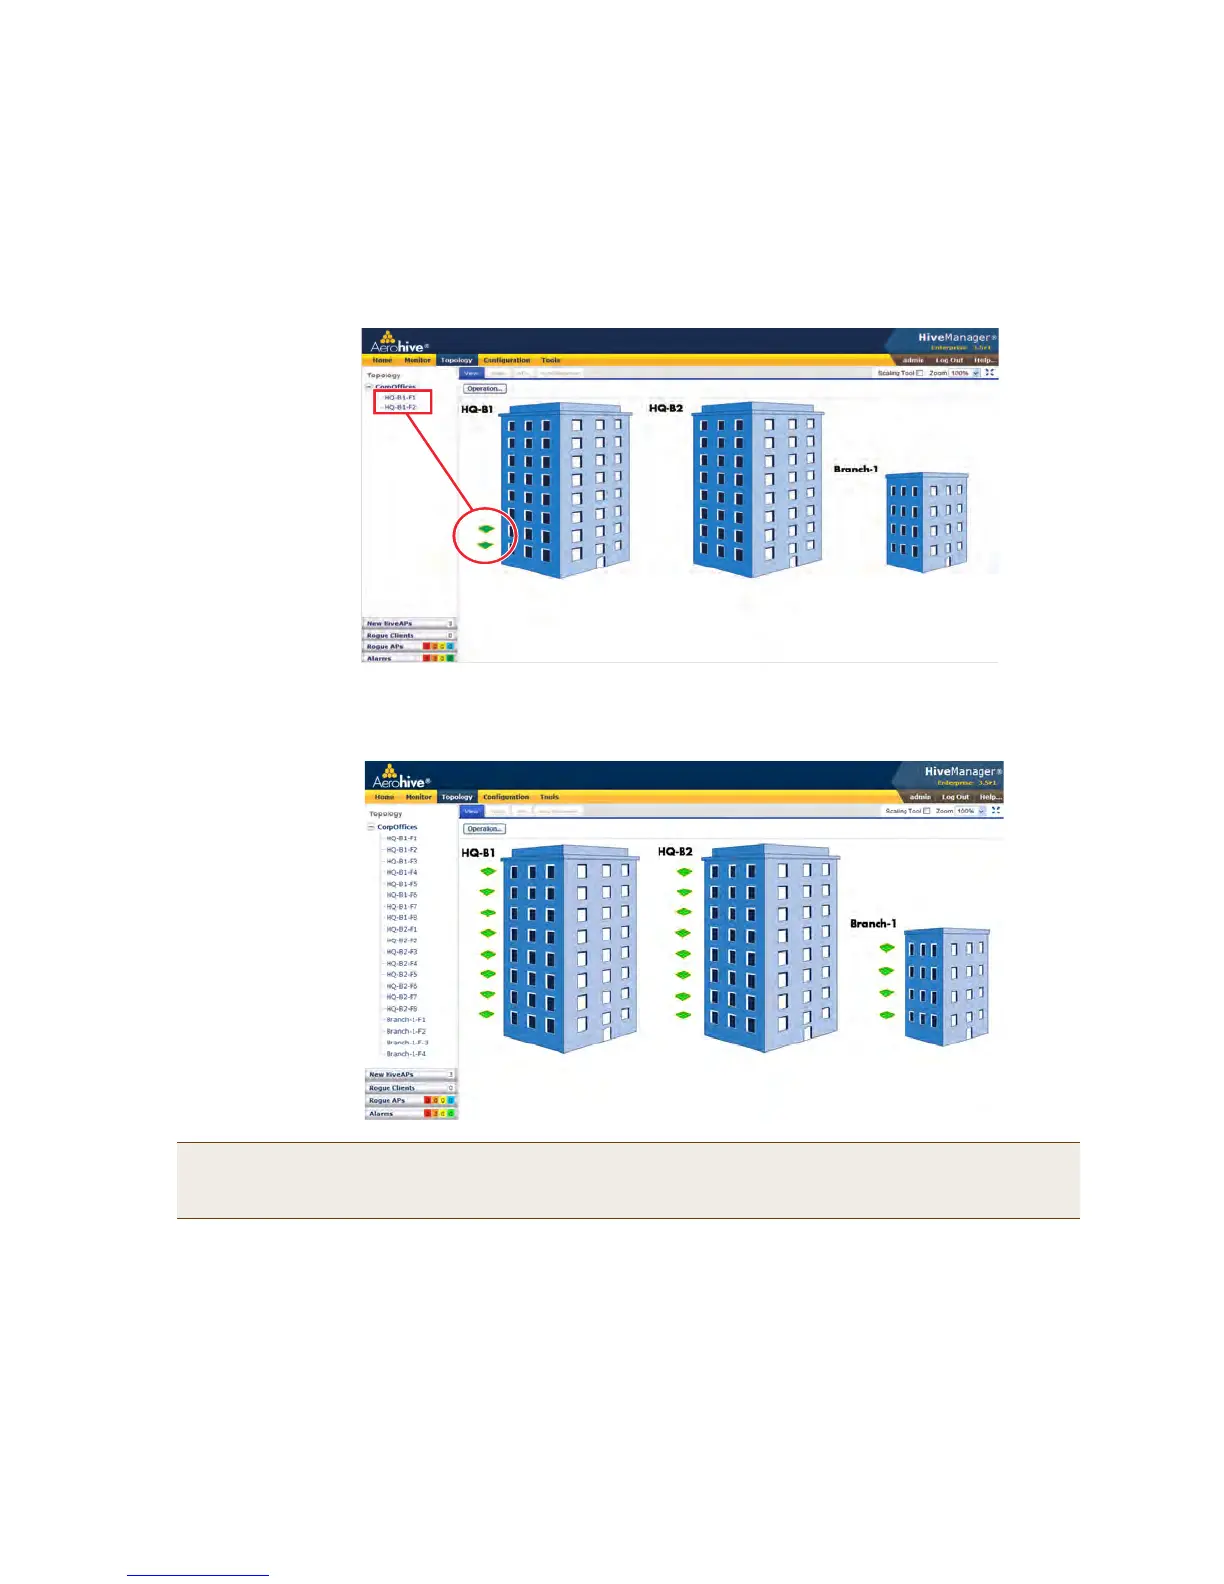
After adding the CorpOffices "map" (really an illustration showing three buildings), two floor plans for the first
and second floors of "HQ-B1", and dragging the floor icons into position, the display of the CorpOffices map
looks similar to that in Figure 4.
Figure 4 CorpOffice map (level 1) with links to level-2 maps HQ-B1-F1 and HQ-B1-F2
7. Repeat this process until you have arranged all the maps and icons in place as shown in Figure 5.
Figure 5 CorpOffice map with links to all level-2 maps
Note: You can add up to seven levels to the map hierarchy. You can also remove maps as long as they do not
have any submaps or HiveAP icons on them. To remove a map from the hierarchy, right-click it in the
Map Hierarchy list, select Remove from the short-cut menu that pops up, and then click Yes.
The submaps in the
navigation tree and the
icons on this map link
to other maps.
Click a submap or
double-click an icon to
open the map to which
it links.