• Low density
• Mid density
• High density
WARNING:
The densitometer of the printer is calibrated at installation.
Authorized service personnel should recalibrate the
densitometer annually or after major service or repair.
To establish the daily operating levels, proceed as follows:
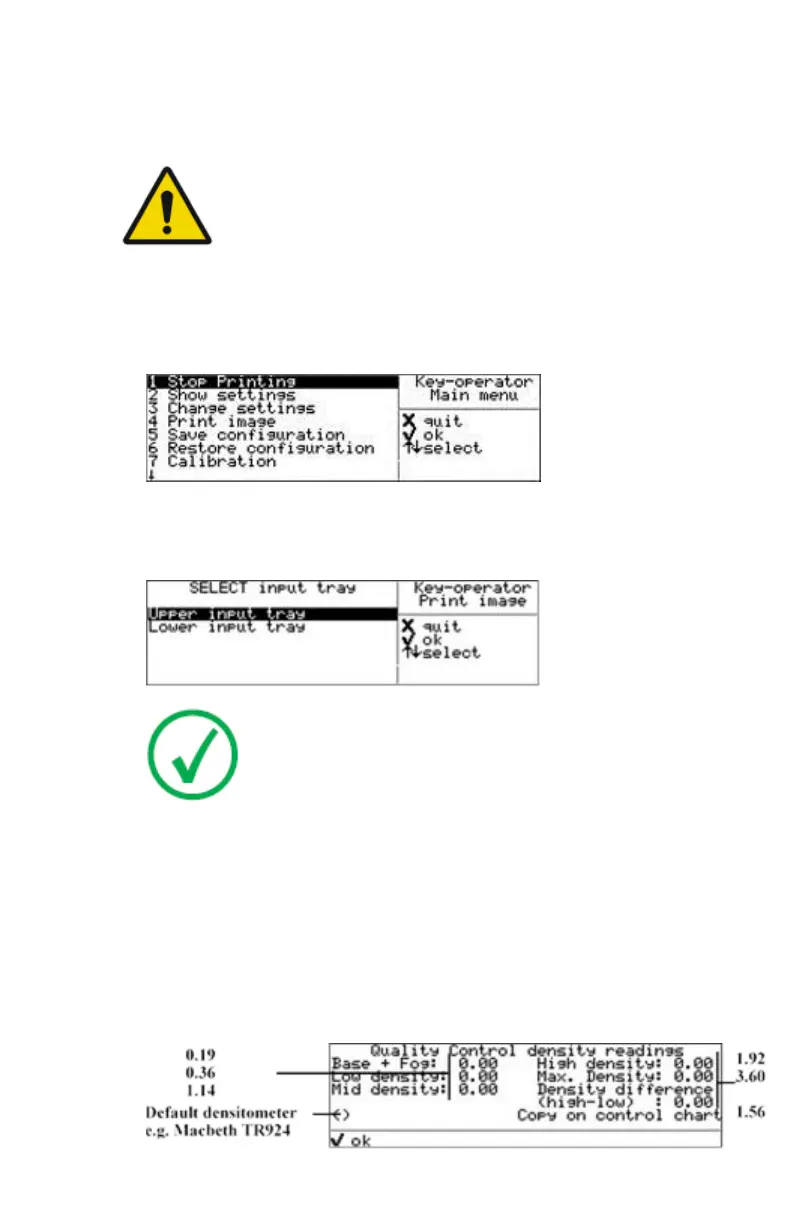
1. Press the Key-operator key to enter the Key-operator mode.
The ‘Key-operator main menu’ screen appears:
2. Press the Down key eight times, followed by the Confirm key to select
‘Quality Control’
The ‘Select input tray’ screen appears:
Note:
When controlling the printer via a remote PC, The ‘Select
input tray’ screen is preceded by a screen, which allows you
to:
• Start the quality control procedure immediately,
• Edit additional data for the last quality control
measuring.
3. Press the Up/Down arrow keys to select the proper input tray, followed by
the Confirm key.
The printer will automatically print the QC general radiography test
image.
4. After the image is printed, the system will display all measured optical
density values:
90 | Drystar 5500, Drystar 5503 | Advanced Operation (key-operator mode)
2901J EN 20191018 0826