1-5
Initial Troubleshooting and Overall Block Diagram
Initial Troubleshooting
Initial Troubleshooting
Perform the following troubleshooting steps in the order they are presented. If you are unable to identify
the failed assembly, go to Chapter 2, "Assembly-Level Troubleshooting with Block Diagrams," for further
instruction.
NOTE: Do not attempt to replace any fuses within the power supply to correct a problem with your
signal generator. If you determine that the power supply is the failed assembly, replace the
power supply.
Step 1: Observe the Front and Rear Panel LEDs
Observing the LEDs on the front and rear panel of the signal generator will determine if there is a
catastrophic failure in the power supply assembly.
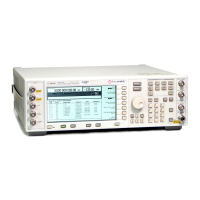
1. Ensure the signal generator is plugged in (do not switch the power on) and verify that the yellow LED on both the
front and rear panels is lit. Refer to Figure 1-1 for LED locations. A lit yellow LED (+15V_STBY) indicates that
line voltage is present.
2. Power on the signal generator and verify that the green LED on both the front and rear panels is lit. A lit green LED
ind
icates the power supply has received an “ON” command. The ON/OFF switch toggles a flip-flop latch which
biases the proper transistors in the LED control circuit. This circuit is powered by VBAT, the battery-backed SRAM
supply, so that the on-off state is “remembered” even when the instrument is unplugged.

 Loading...


