Chapter 6: Replacing Assemblies
To remove and replace the PCI bridge board
124
To remove and replace the PCI bridge board
Use this procedure to remove and replace the PCI bridge board. When necessary, refer to other
removal procedures. The graphics in this chapter are representative of the oscilloscope at the
time of this printing. Your unit may look different.
1
Disconnect the power cable and remove the top cover.
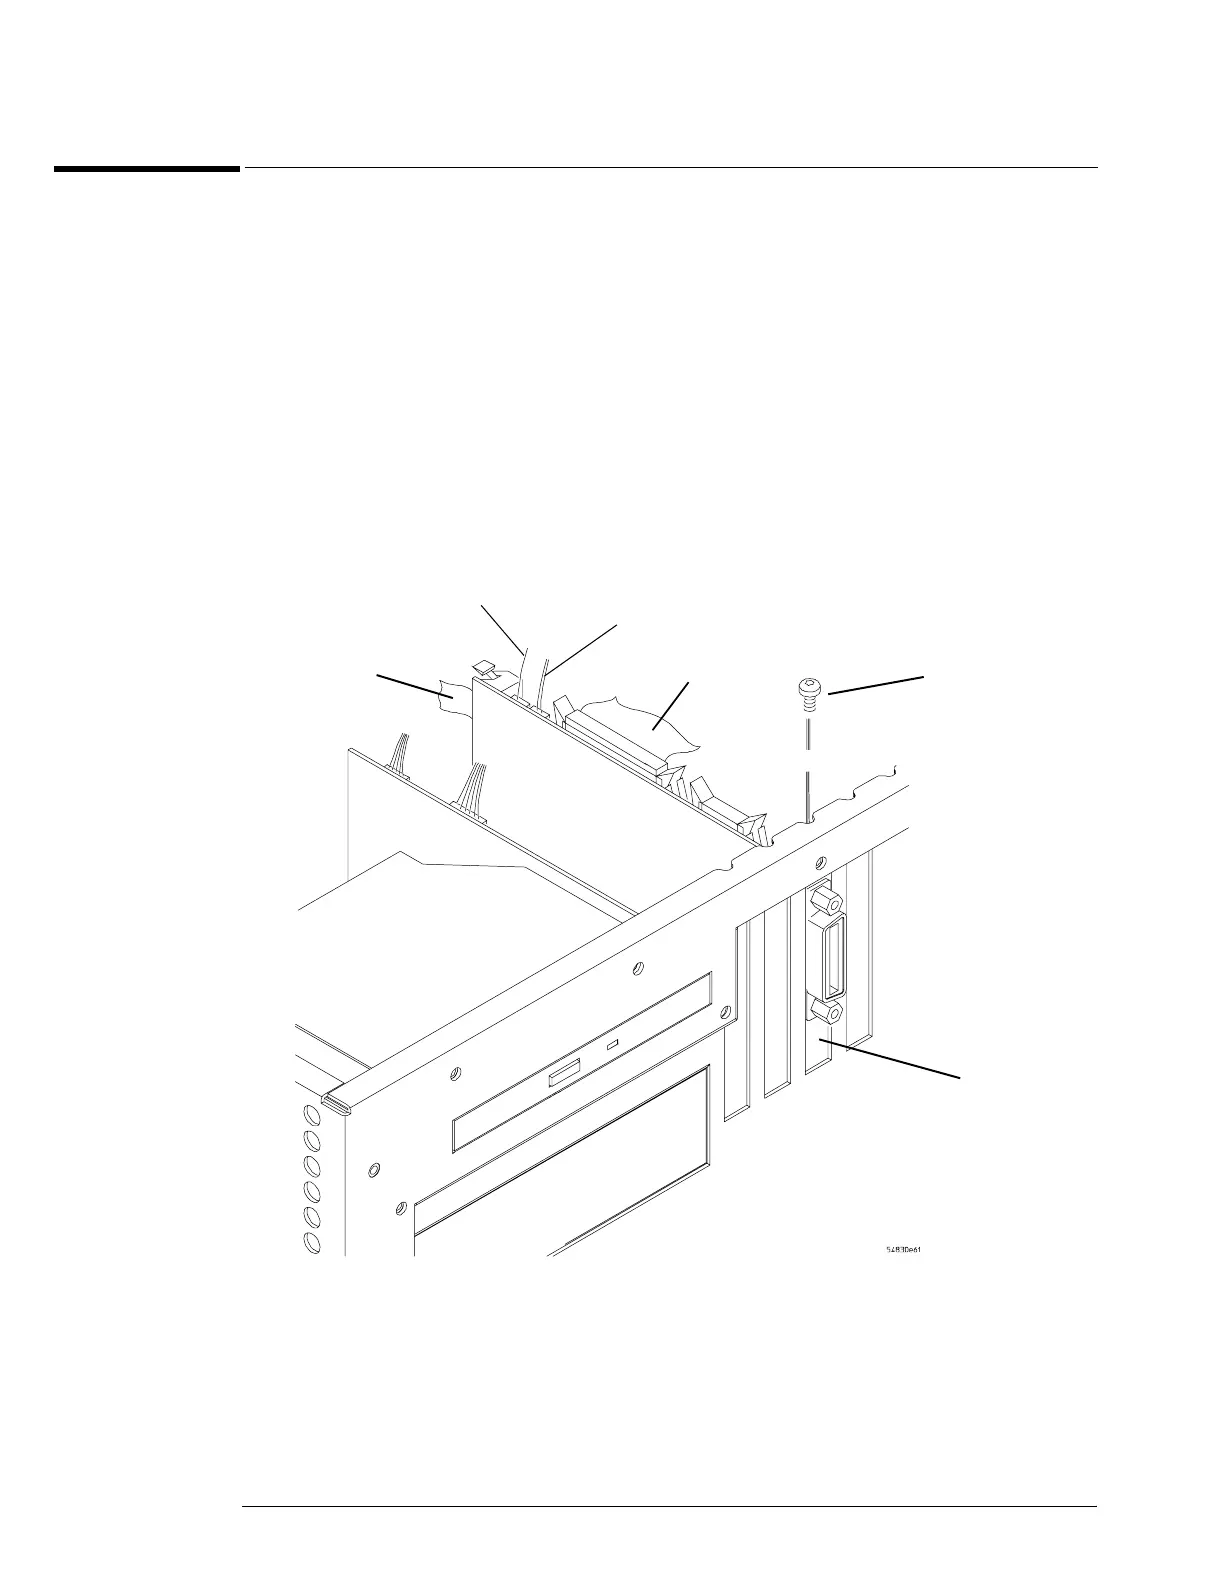
2 Remove the keyboard cable, power supply cable, motherboard cable, and acquisition
board cable from the PCI bridge board.
3 Remove the Torx T10 screw that secures the PCI bridge board to the rear of the chassis.
4 Pull the board up to disengage it from the motherboard, then lift it up and out of the
chassis.
5 To replace the board, reverse the removal procedure.
Figure 6-22
Removing the PC interface and GPIB board
Acquisition
board cable
T10 Torx Screw
PCI bridge
board
Keyboard cable
Motherboard
switch cable
Power supply
harness cable
 Loading...