Chapter 6: Replacing Assemblies
To remove and replace the power supply
131
8
Lift the motherboard out of the tray.
9 To replace the motherboard assembly, reverse the above procedure.
10 Run the self test to verify the oscilloscope is operating properly.
See “Run oscilloscope self-tests.” on page 72.
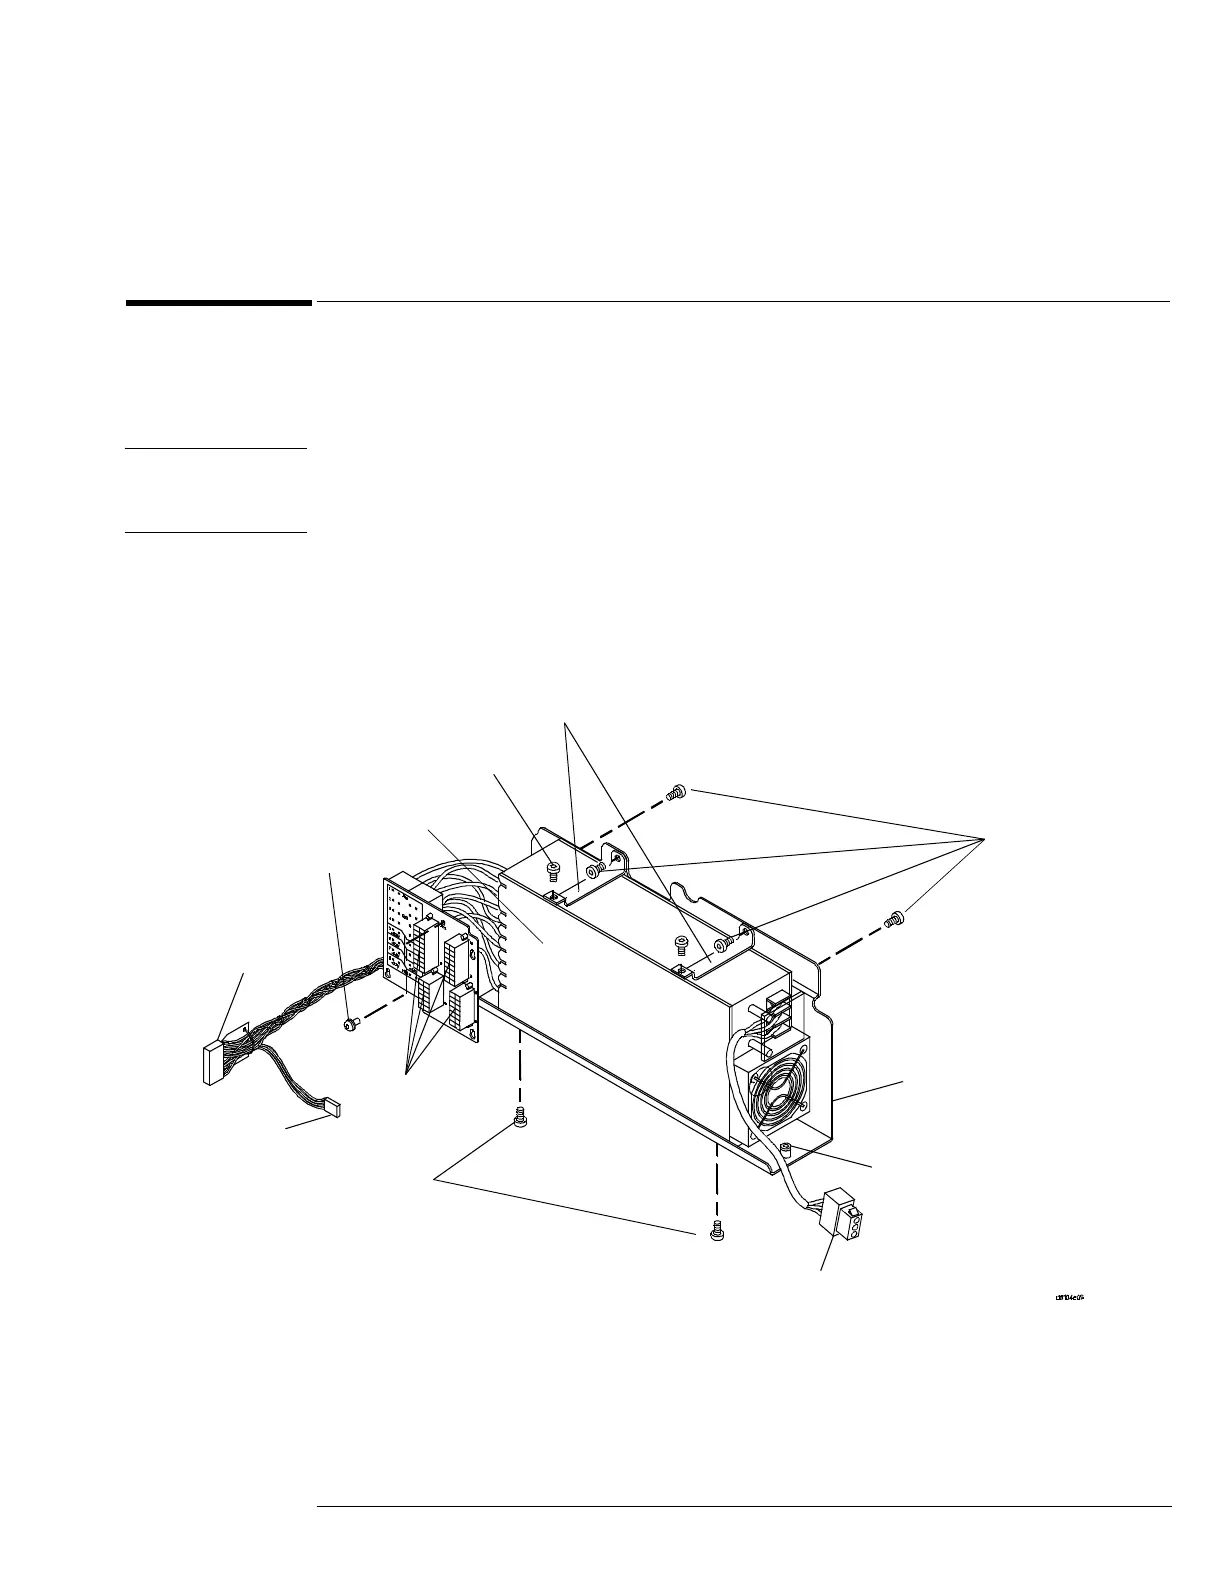
To remove and replace the power supply
Use this procedure to remove and replace the power supply. When necessary, refer to other
removal procedures. The graphics in this chapter are representative of the oscilloscope at the
time of this printing. Your unit may look different.
WARNING SHOCK HAZARD!
If the power supply is defective it could have a dangerous charge on some capacitors. This charge
could remain for many days after removing power from the supply.
1
Disconnect the power cable and remove the top cover.
2 Disconnect the sense cable, power button cable, and AC power cable from their
connectors but do not disconnect them from the power supply.
Figure 6-29
Disconnecting power supply cables
Power Supply
T10 Screws
T20 Screws
T20 Screws
Power Supply
Bracket
T20 Screws
Sense Cable
Power Button
Cable
AC Power Cable
Power
Distribution
Board
Top Support Brackets
T10 Screws
 Loading...