25
Connection
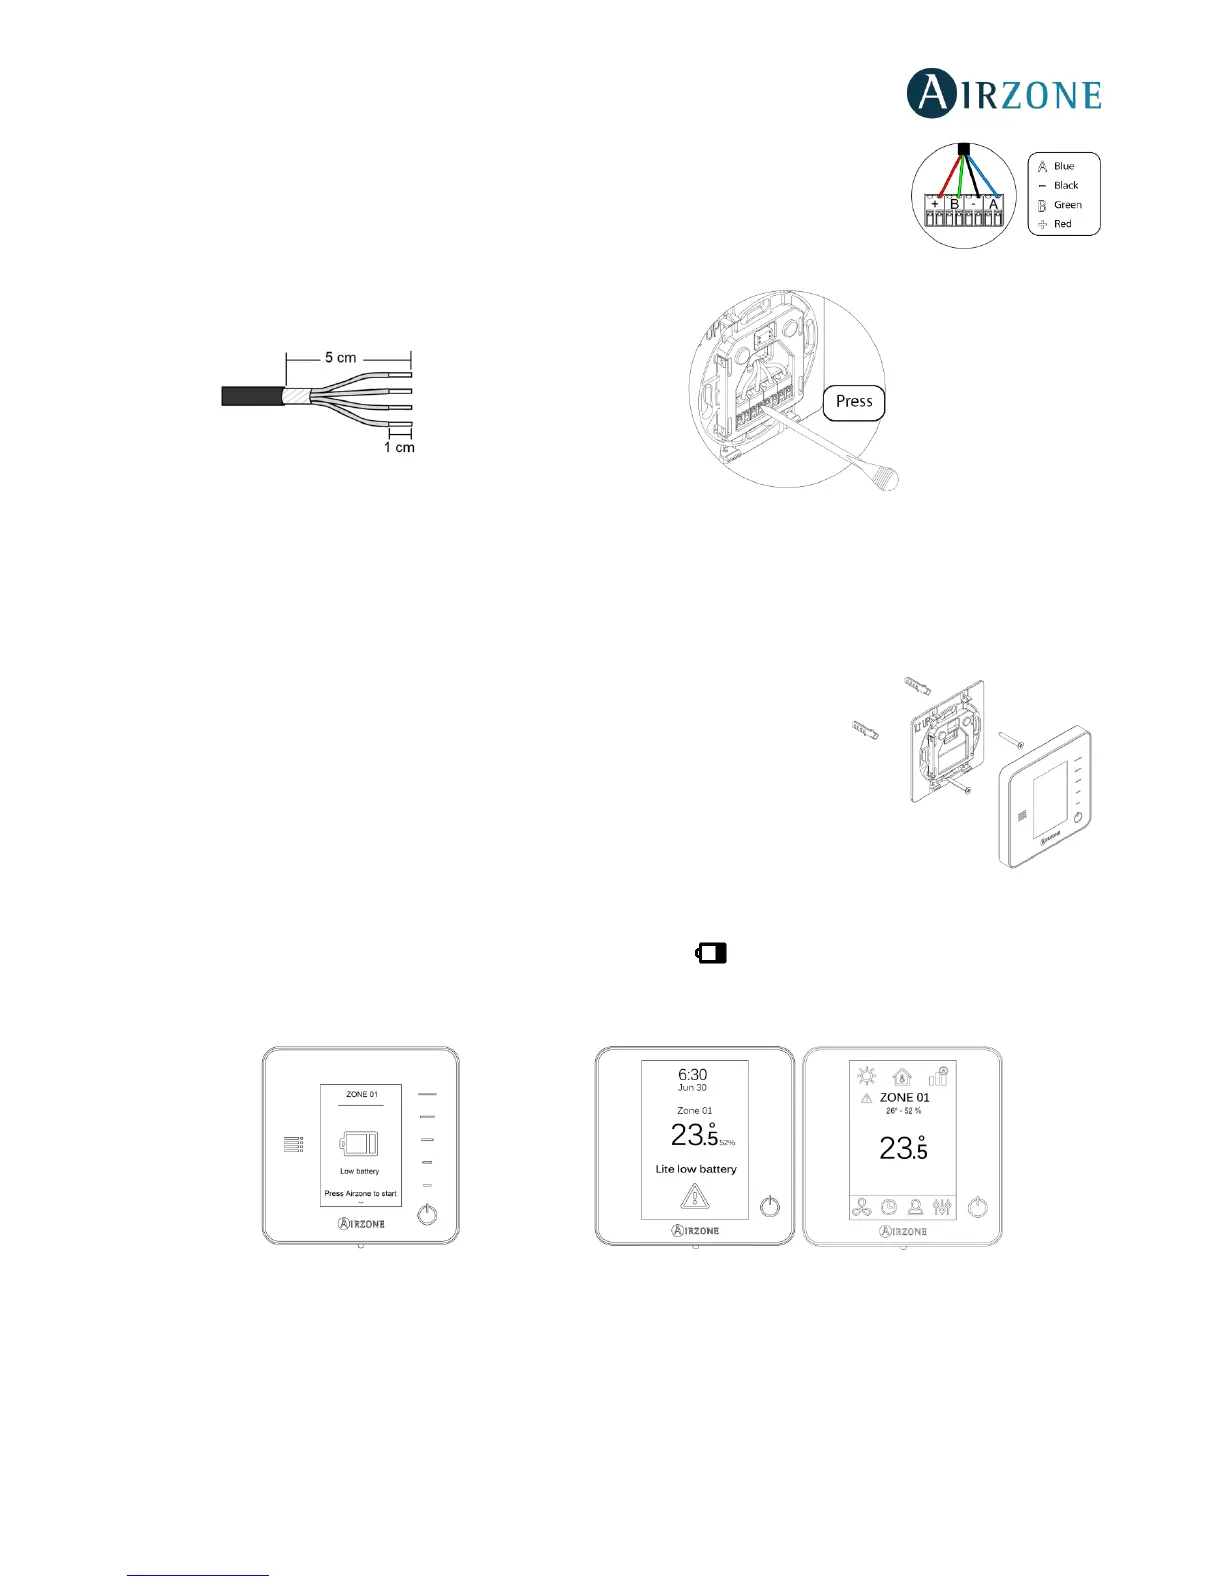
Airzone thermostats are connected to the zone module to be controlled. Attach the wires with the
terminal screws following the color code (Fig. 31).
Important: Use the provided tool to press in the locking tabs (Fig. 32).
WIRELESS THERMOSTATS (AZVAFTHINKR / AZVAFLITER)
Assembly
Wireless thermostats are mounted on the wall through a support. It is recommended not to locate it more than 40 meters away
from the control board.
To fix it to the wall, follow these steps (Fig. 33):
• Separate the back part of the thermostat from the wall support and insert the
CR2450 button battery.
• Fix the back part of the thermostat to the wall.
• Place the display on the support once it is fixed.
Changing batteries
When a Think thermostat is running out of battery, it displays this icon on the screensaver (Fig. 34). In the case of the
wireless Lite thermostats, a warning message will be displayed on the Blueface. In order to know the zone of the Lite
thermostat(s) running out of battery press on the warning icon (Fig. 35).
Fig. 34 Fig. 35
To replace the battery, separate the thermostat from its support and replace the battery (CR2450) (Fig. 36).
Note: For Lite thermostats, the low battery warning will disappear after about 5 minutes from the battery replacement.
 Loading...