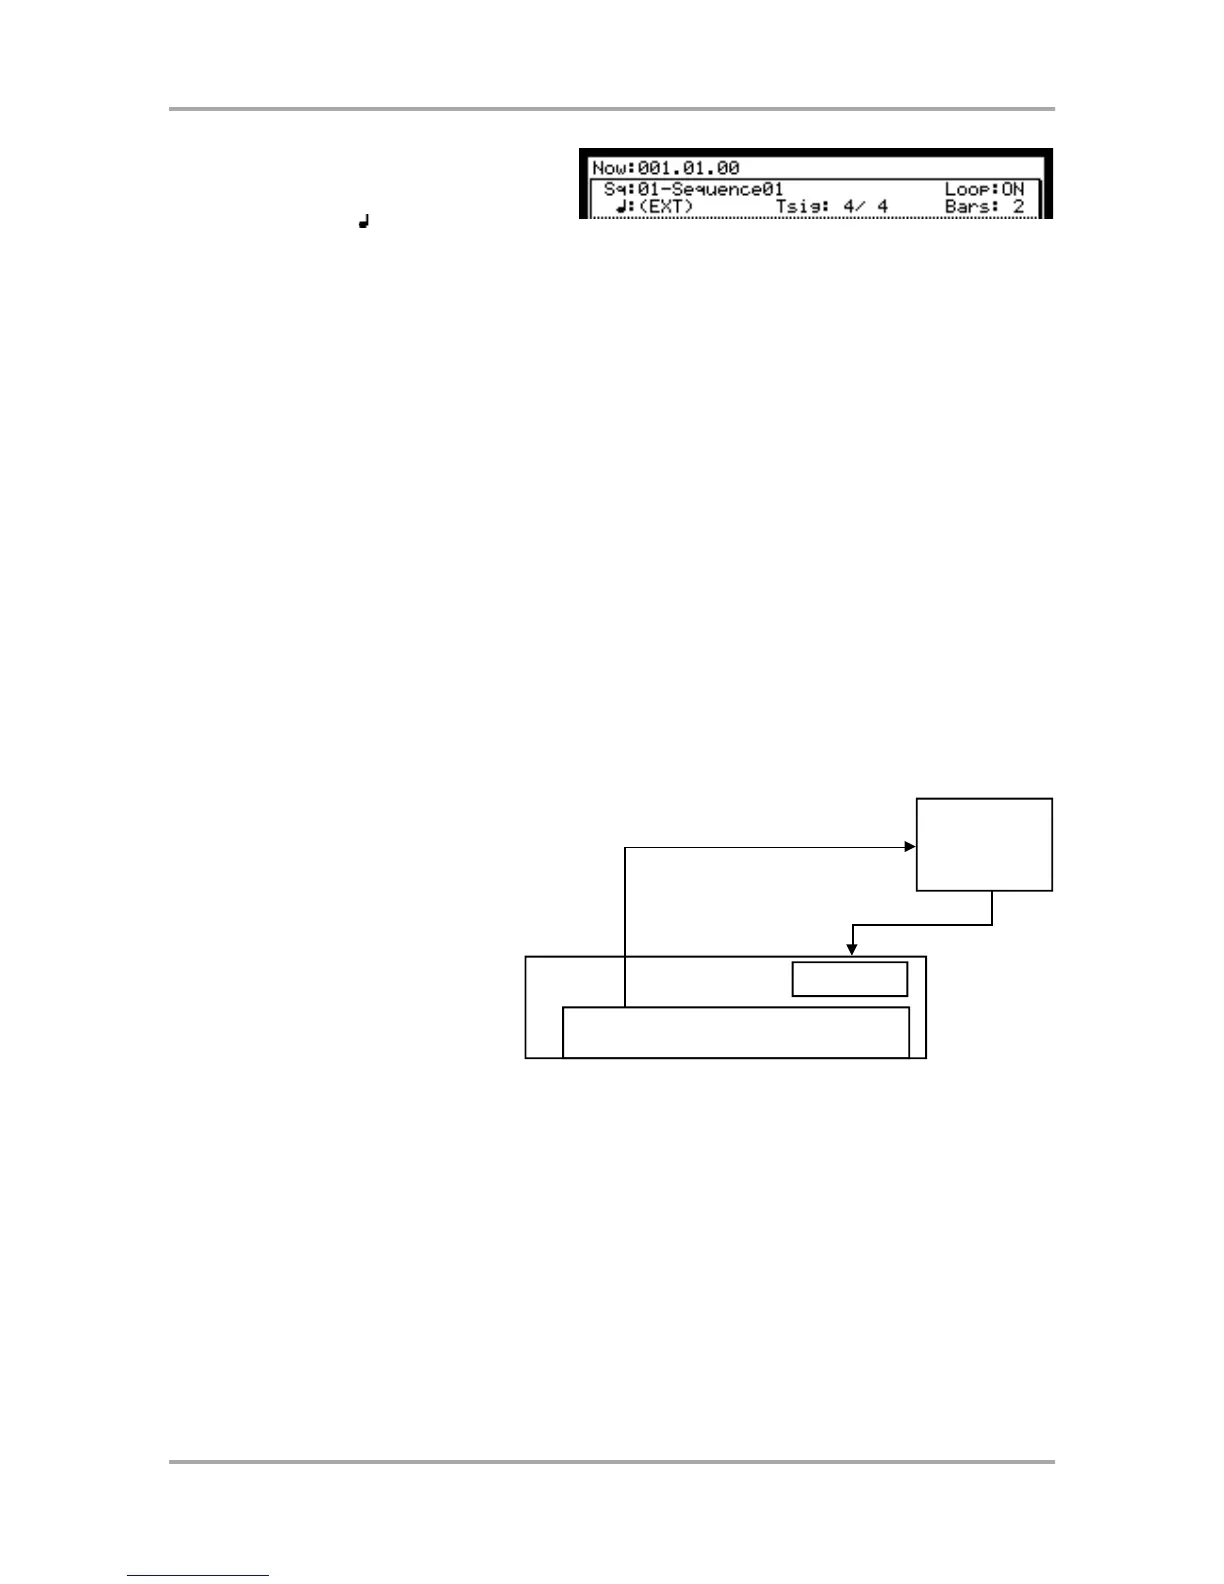
05. Press the [MAIN] key.
The main page, where you play back the
sequence, will be displayed. (EXT) will be
displayed in the (Tempo) field.
06. Set the external MIDI device to send out the MIDI clock.
Refer to the device’s operation manual.
07. Start the playback of the external MIDI sequencer.
The MPC1000 starts the playback as well.
Note: The MIDI clock signal has tempo information. The slave device will follow the master device’s tempo
regardless of its original tempo.
Note: The MIDI clock signal does not have time information. If the time settings of the master and the slave are
different, they will still play in sync but their time position display may be different.
Connecting the MPC1000 to the MIDI keyboard with the sound module
In this section, you can learn how to connect the MPC1000 to a MIDI keyboard which has an internal sound module
to use the MPC1000’s sequencer feature.
Normally, The MIDI keyboard with the sound module is set to generate the sound from the internal sound module
when you play the keyboard. However, The MPC1000 sends out any incoming MIDI signals to the MIDI keyboard at
the MIDI output. So, if you play the keyboard, the performance will be played in duplicate. To use the MPC1000 as
a sequencer, you need to change the setting on the MIDI keyboard so that the MPC1000, not the MIDI keyboard,
plays the keyboard’s internal sound module. Normally this could be done by changing the setting called “local
control”. By setting the MIDI keyboard’s local control to OFF, you can use the external keyboard and its internal
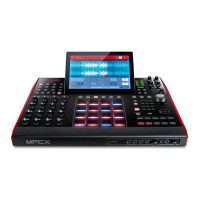
sound module separately. In this case, the MIDI signal flows as in the figure in the right.
The performance data from the MIDI
keyboard will be entered to the MPC1000.
It will not be sent to the internal sound
module.
The MIDI output of the MPC1000 will be
sent back to the MIDI keyboard, which will
plays the keyboards sound module.
For more information about the setting of
your MIDI keyboard’s local control, see
the keyboard’s operation manual.
If your MIDI keyboard does not have a local control setting, deactivate the MPC1000’s soft through function. In
this case, the MPC1000 will output only the data that is recorded on the track, not the incoming MIDI signal.
However, if you do this, you cannot use some MPC1000 features, such as note repeat.
01. Select the MIDI/SYNC mode by pressing the [MODE] key and hitting the [PAD 9]
(MIDI/SYNC).
02. Press the [F1] (MIDI) key.
The MIDI page will be displayed.
03. Select the Soft thru field and select OFF.
The soft thru field determines how to output the incoming MIDI signal.
You can select the following options:
OFF The MPC1000 will not output the incoming MIDI signal.
AS TRACK The MPC1000 refers to the MIDI channel setting of the sequence’s track. The channel
information of the incoming MIDI signal will be replaced with the MIDI channel set in the track.