Adjusting the end point
01. Select the End field and adjust the end point.
You can change the end point by turning the DATA wheel.
If you press the left/right cursor key while holding the [SHIFT] key, you can select the digit with the DATA
wheel.
You can also enter the value directly using the [NUMERIC] key and pads. When you press the [NUMERIC]
key, its LED will blink, which indicates you can enter numbers with pads.
02. Hit the pad to check the end point.
When you hit the pad, the MPC1000 plays the sample. The playback method varies depending on the pad.
If you hit the [PAD 14] (PLAY TO), the MPC1000 will play the sample until the end point.
If you hit the [PAD 15] (PLAY FROM), the MPC1000 will play the sample from the end point.
If you hit the [PAD 16] (PLAY ALL), the MPC1000 will play the whole sample regardless of the start/end point
settings.
If you hit any pad from the [PAD 1] to [PAD 12], the MPC1000 will play from the start point to the end point.
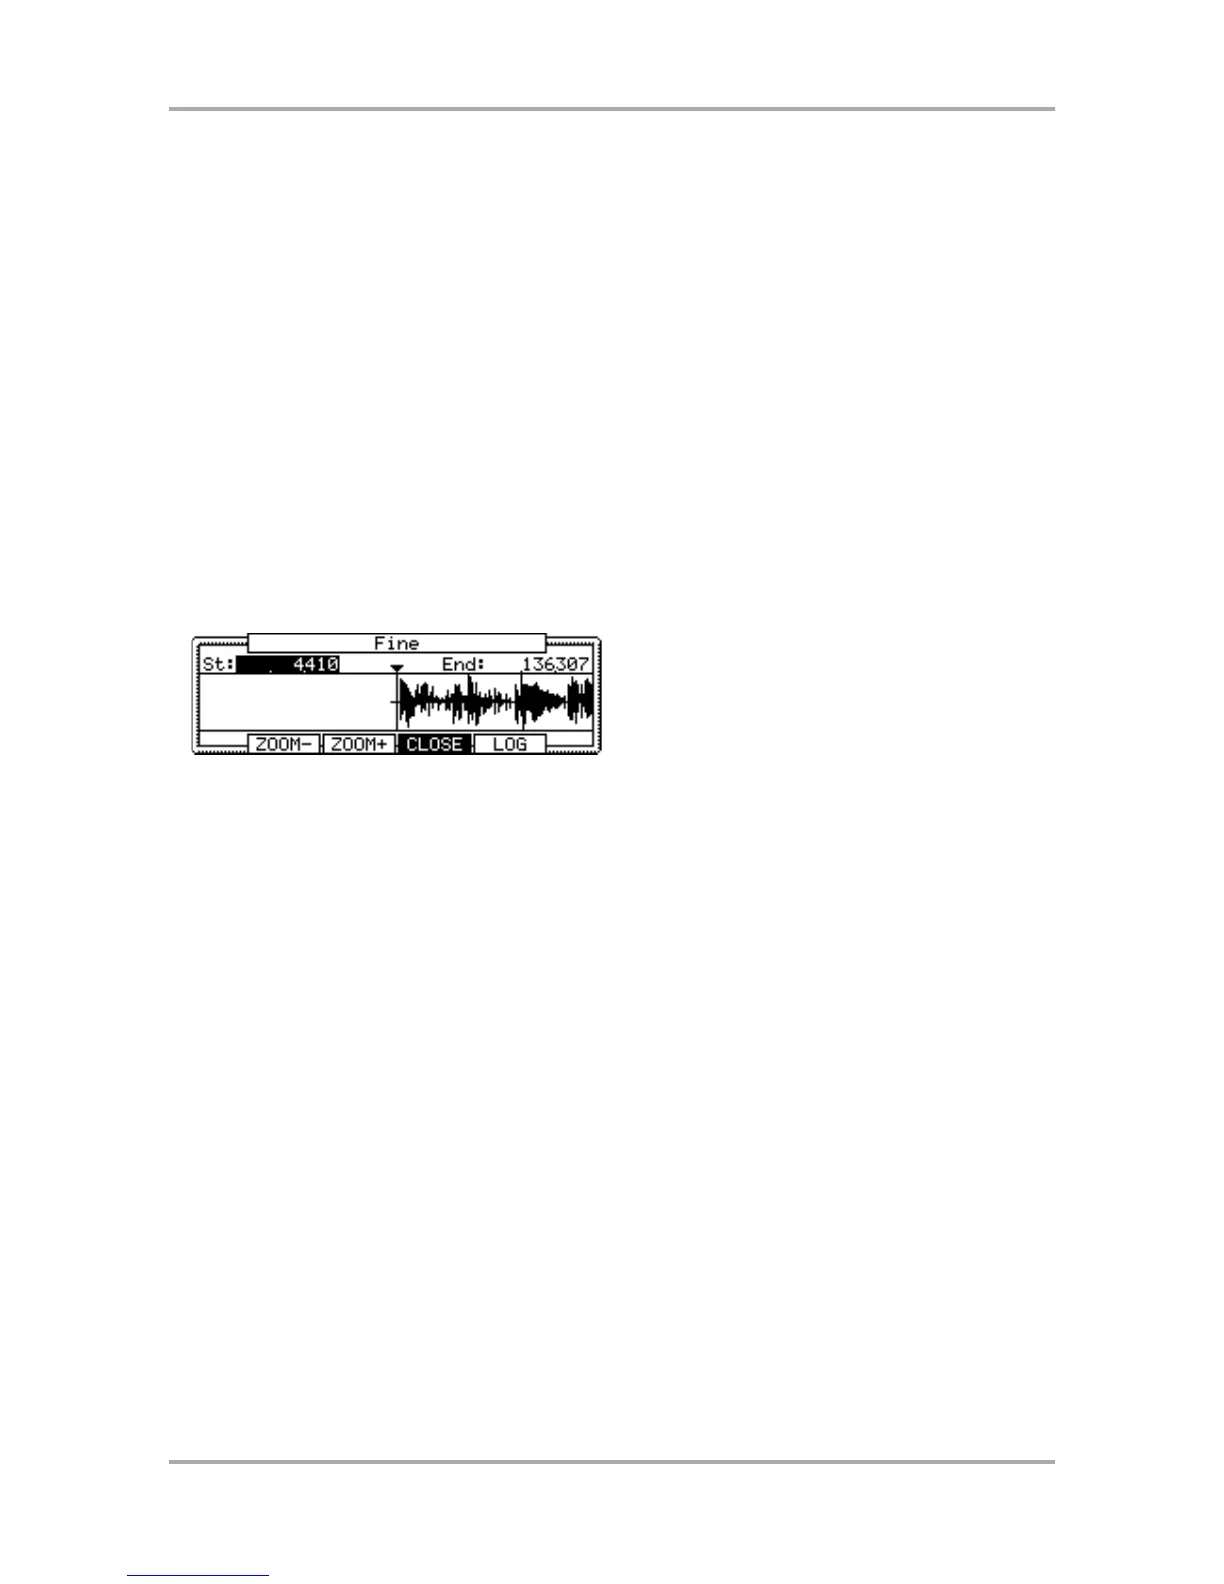
Zooming in/out of the waveform
With the Fine window, you can zoom in to a part of the waveform and edit the part in details. Press the [WINDOW]
key in the TRIM page, when the cursor is either in the St (Start) or End field, and the Fine window will be displayed.
In the Fine windows, the waveform display varies depending on the location of the cursor. When you select the
St (Start) field with the cursor, it displays the start point in the center of the window. When you select the end
field, it displays the end point in the center.
If you press the [F2] (ZOOM-) key the waveform will be zoomed out, if you press the [F3] (ZOOM+) key, it will be
zoomed in.
LINEAR and LOGARITHMIC displays
The vertical axis indicates the sample’s level. Normally, the waveform display is set to LINEAR, which displays
the sample level as it is. However, some parts (fade out part etc…) may not be displayed in the waveform if the
level is too low. In this case, you can switch to the LOG (logarithmic) display by pressing the [F5] (LOG) key and
you can see the parts whose level is low. When you switch to the LOG mode, the display in the [F5] key will
change to LINEAR. To switch back to the LINEAR mode, press the [F5] key again.
Deleting an unnecessary part from a sample (DISCARD)
The MPC1000 plays back only the part of the sample from the start point to the end point. The parts outside
these points are not used for the playback. With the Discard function, you can delete these unnecessary parts
and save the memory space.
01. Adjust the start/end points.
Set the points so that the MPC1000 plays back only the necessary part.
02. Press the [F6] (EDIT) key.
The Sample Edit window will be displayed.
03. In the Edit field, select DISCARD.
04. Press the [F5] (DO IT) key.
The data outside the start/end points will be deleted. The deleted data will be returned to the available
memory.