Chapter 11 : Editing a sample
In this section, you will learn about the TRIM mode, where you can set the sample’s start/end points, or the loop.
Setting the start/end points for the sample
The start/end points sets the part of the sample data, which will actually be played back. The recorded sample may
have an unnecessary part at the beginning, which may make it more difficult to place the sound in the correct spot
timing when hitting the pad. You can fix this problem by adjusting the start point. You can also adjust both the start
and end points to play only a part of the phrase. If the sample has empty parts at the end, which consumes
unnecessary memory, you can delete the empty parts by adjusting the end point and using the edit feature.
Start/end points are displayed in sample points. The sample point is the minimum unit used for sample editing. The
MPC1000 has the 44100 sample points per second.
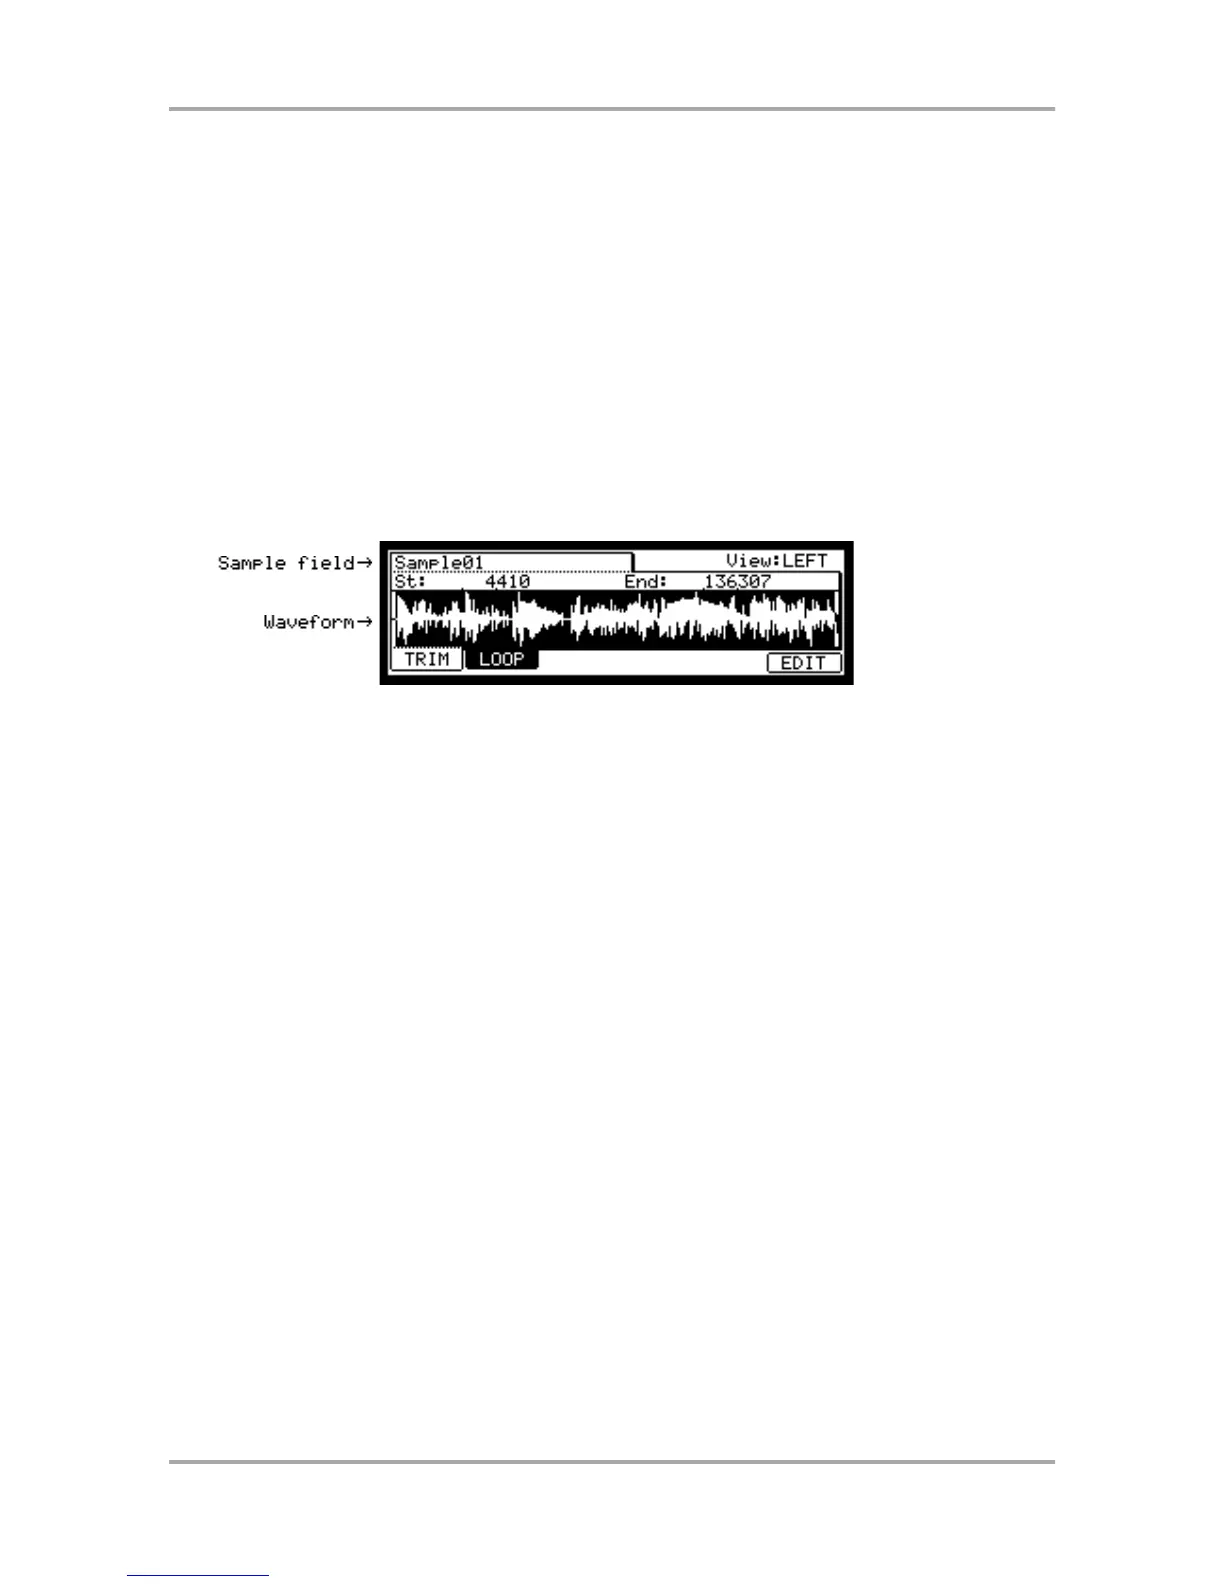
About the waveform display
The TRIM page displays the waveform of the sample selected in the Sample field.
It displays the waveform of the whole sample, with the parts set by start/end points highlighted. If you select a
stereo sample, you can select the channel (LEFT/RIGHT) to display in the View field.
Adjusting the start point
01. Press the [MODE] key and then the [PAD 6] (TRIM).
When you press the [MODE] key, its LED will blink. Press the [PAD 6] while the [MODE] key’s LED is blinking
to display the TRIM page.
02. Select the Sample field and select a sample you wish to edit.
The Sample field is located in the upper left corner of the screen, which displays the sample name. It displays
the waveform of the selected sample.
03. Select the St (start) field and adjust the start point.
You can change the start point by turning the DATA wheel.
If you press the left/right cursor key while holding the [SHIFT] key, you can select the digit with the DATA
wheel.
You can also enter the value directly using the [NUMERIC] key and pads. When you press the [NUMERIC]
key, its LED will blink, which indicates you can enter numbers with pads.
04. Hit the pad to check the start point.
When you hit the pad, the MPC1000 plays the sample. The playback method varies depending on the pad.
If you hit the [PAD 14] (PLAY TO), the MPC1000 will play the sample before the start point.
If you hit the [PAD 15] (PLAY FROM), the MPC1000 will play the sample from the start point.
If you hit the [PAD 16] (PLAY ALL), the MPC1000 will play the whole sample regardless of the start/end point
settings.
If you hit any pad from the [PAD 1] to [PAD 12], the MPC1000 will play from the start point to the end point.