34 Rockwell Automation Publication 2711P-UM006E-EN-P - January 2017
Chapter 2 Install Terminal
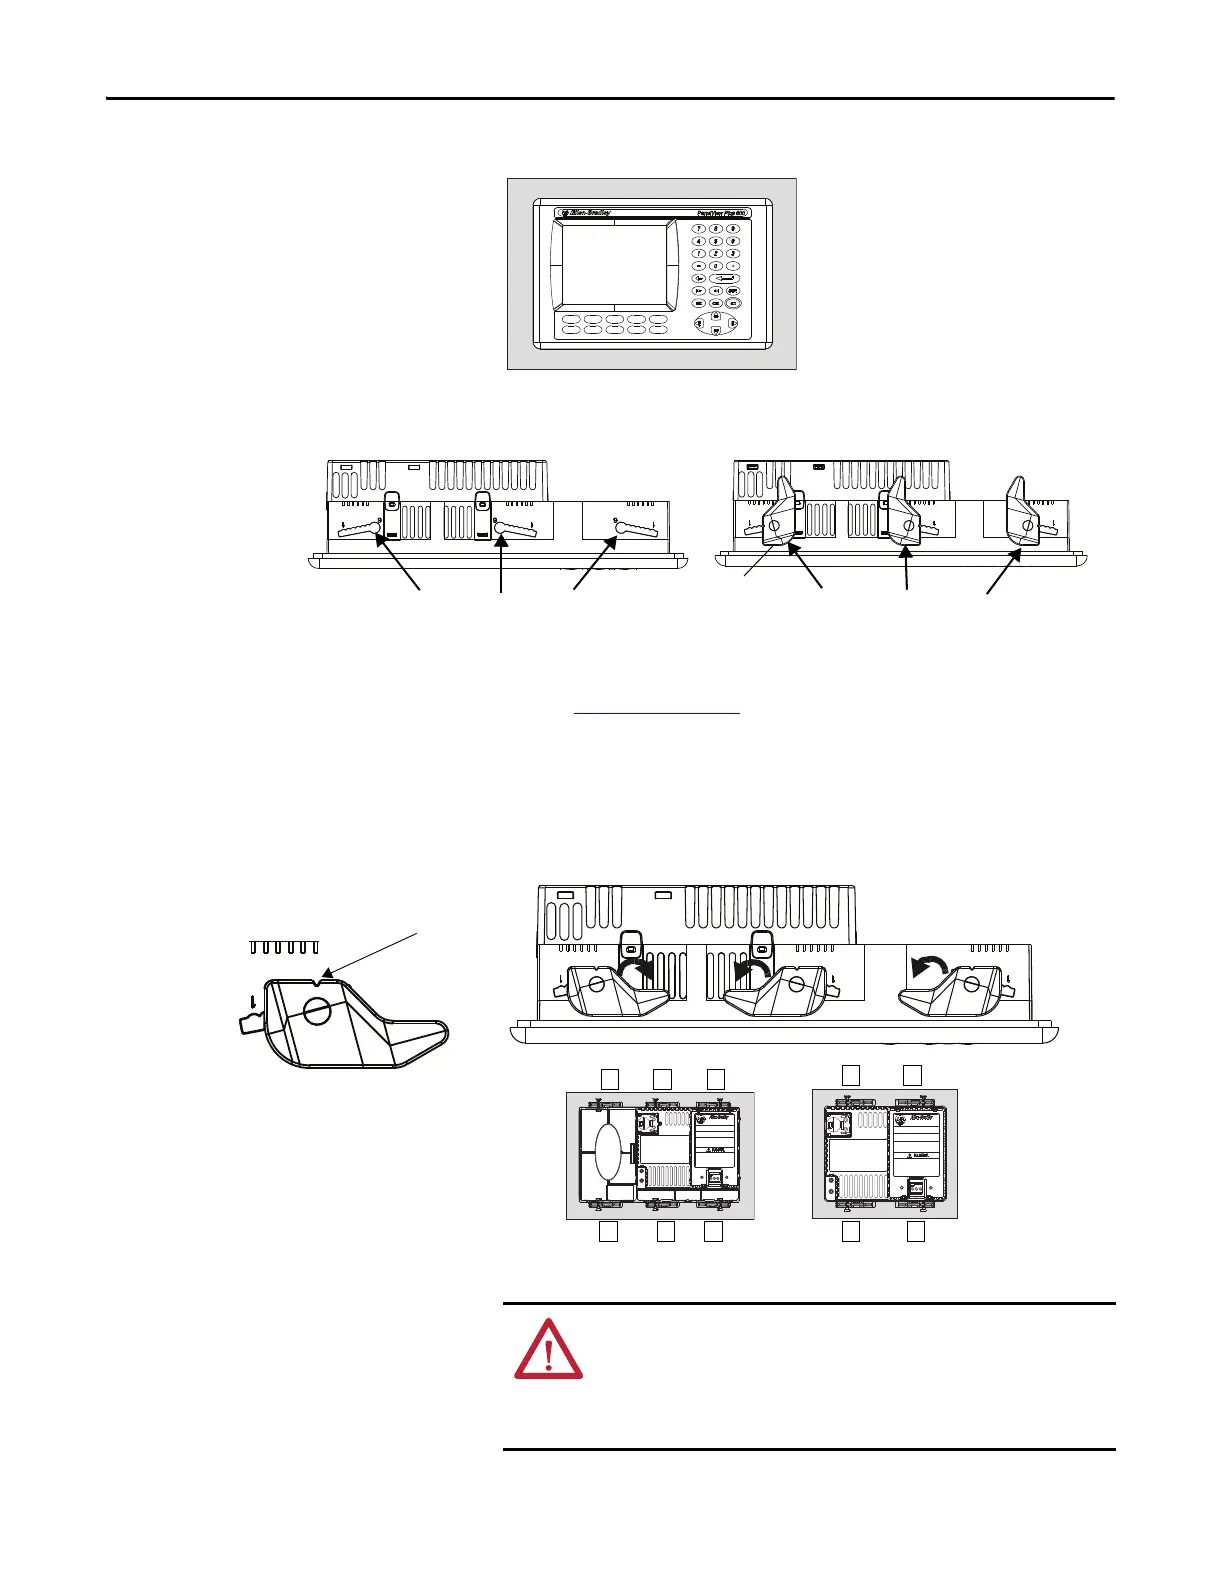
3. Place the terminal in the panel cutout.
4. Insert all mounting levers into the mounting slots on the terminal.
Slide each lever until the flat side of the lever touches the panel surface.
5. When all levers are in place, slide each lever an additional notch or two
until you hear a click.
Refer to Table 35 on page 33
as a guide to determine the locking positions
for your panel thickness.
6. Rotate each lever in direction indicated until it is in the final position.
Follow the appropriate locking sequence for the optimal terminal fit.
7. Inspect all levers to verify they are in the correct and same locked position.
Flat Side of Lever
Mounting Slots
Mounting Levers
Levers rotate in same direction on top and bottom of terminal.
FAULT
COMM
FAULT
DEFAULT
RESET
FAULT
COMM
DEFAULT
RESET
FAULT
Notch
Rotate lever until notch in lever aligns with
proper alignment mark on terminal.
Alignment Marks
6
1
1
3
4
2
1
35
4
62
ATTENTION: All levers must be locked to provide an adequate gasket
seal between the terminal and the panel. Rockwell Automation
assumes no responsibility for water or chemical damage to the terminal
or other equipment within the enclosure because of improper
installation.
 Loading...