Setup and connection
5.3 Installing the motor
Only necessary if the pump unit is assembled on site.
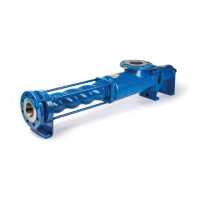
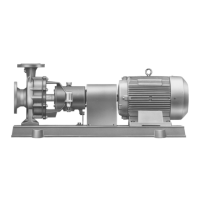
5.3.1 Clo se-coupled pump with stub shaft
NOTE
Material d amage caused b y knocks and bumps!
Do not knock or hit any components of the pump.
1. Remove the transport seal for pumps with a m echanical
seal.
2. Clean stub sh aft and motor s h aft.
3. Push the clamping set onto the stub shaft.
4. Insert the motor shaft into the stub shaft and align both shaft
ends so that the y are flush w ith one another.
5. Align the clamping set c orrectly.
6. Tighten screws crosswise. Observe the indicated torque
information on the clamping set.
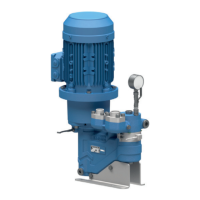
5.3.2 Pump with coupling
NOTE
Material d amage caused b y knocks and bumps!
Keep the coup ling halves properly aligned when slipping
them on.
Do not knock or hit any components of the pump.
1. Lift the motor to the prepared position on the base plate.
2. Smear a very thin coat of molybdenum disu lfide (e.g.
Molykote) on the shaft ends of the pump and motor.
3. Insert shaft keys.
4. Without a mounting rig: remove the rubber buffers and heat
thecouplinghalvesuptoapproximately100°C.
5. Slide o n the pump-side an d motor-side c oupling halves
until the shaft ends are flush with the coupling hub. When
doing this, ensure the prescribed spacing between the two
halves of the coupling is maintained (→ assembly instruc-
tions for the coupling).
6. Tighten the grub screws on both coupling halves.
7. Use suitable metal shims at the motor to align the end of
the motor shaft to the end of the pump shaft.
8. Screw in the motor bolts, but do not tighten them yet
(→ 5.8 Aligning the motor, Page 21).
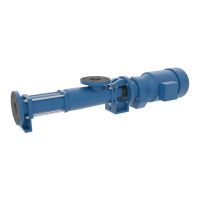
5.3.3 Pump with belt drive
Depending on the version, belt guard or parts thereof
are already attached to the pump unit when the motor is
installed.
Tension rails or pivoting motor ba s e recommended.
NOTE
Damage to the V-belt and the pulleys due to improper
installation!
Install the pulleys on the shafts with the entire hub width
and aligned with each other.
Do not attach and tension the V-bel t with a sharp-edged
tool.
For multi-groove V-belts, check for uniform length of all
V-belts.
NOTE
Bearing damage due to high V-belt tension!
Adjust the V-belt tension according to the intended param-
eters (→ setup drawing).
1. Lift the m otor to th e prepared installation site and align it
correctly w ith the pump.
2. Adjust shaft clearance (→ setup drawing).
3. Screw in the motor bolts, but do not tighten them yet.
4. If necessary, install belt guard or parts of it.
5. Push the pulleys onto the shaft ends and align the m with
each other.
6. Fasten the pulleys (→ manufacturer’s specifications).
7. Put on V-belt.
8. Set correct V-belt tension (→ setup drawing).
9. Install the be lt guard.
5.4 Planning the pipes
5.4.1 Specifying supports and flange connections
NOTE
Material damage due to excess
iveforcesandtorques
exerted by the piping on the
pump!
Do not exceed the permissible l imits
1. Calculate the pipe forces, taking every possible operatin g
condition into account:
–Cold/warm
– Empty/full
– Depressurized/pressurized
– Positional changes of the fl anges
2. Ensure the pipe suppo rts have per
manent low-friction
properties and do not seize up du
etocorrosion.
260371 – 176-982/0 BA-2020.05 en-US AE 17