Fitting instruction
16
Amaco BAG0028.0 04.06
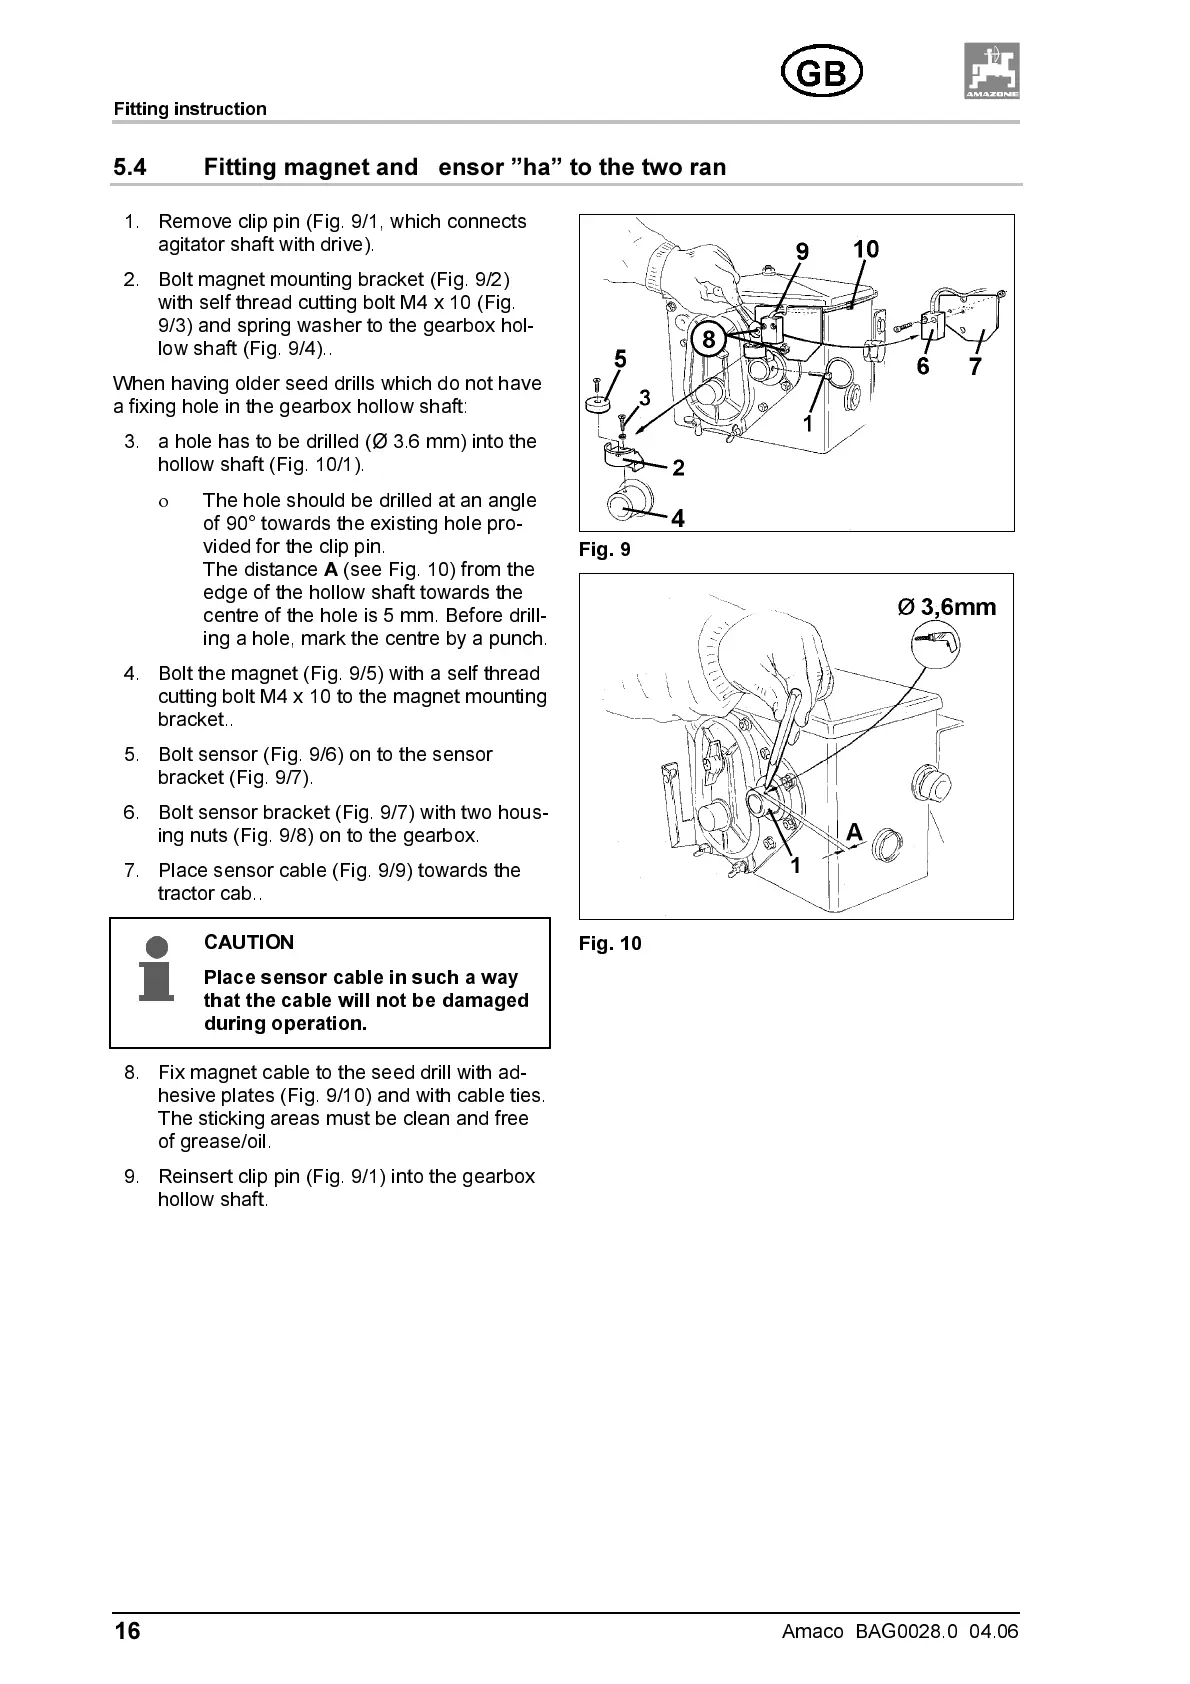
5.4 Fitting magnet and sensor ”ha” to the two range gearbox
1. Remove clip pin (Fig. 9/1, which connects
agitator shaft with drive).
2. Bolt magnet mounting bracket (Fig. 9/2)
with self thread cutting bolt M4 x 10 (Fig.
9/3) and spring washer to the gearbox hol-
low shaft (Fig. 9/4)..
When having older seed drills which do not have
a fixing hole in the gearbox hollow shaft:
3. a hole has to be drilled (Ø 3.6 mm) into the
hollow shaft (Fig. 10/1).
ο
The hole should be drilled at an angle
of 90° towards the existing hole pro-
vided for the clip pin.
The distance
A
(see Fig. 10) from the
edge of the hollow shaft towards the
centre of the hole is 5 mm. Before drill-
ing a hole, mark the centre by a punch.
4. Bolt the magnet (Fig. 9/5) with a self thread
cutting bolt M4 x 10 to the magnet mounting
bracket..
5. Bolt sensor (Fig. 9/6) on to the sensor
bracket (Fig. 9/7).
6. Bolt sensor bracket (Fig. 9/7) with two hous-
ing nuts (Fig. 9/8) on to the gearbox.
7. Place sensor cable (Fig. 9/9) towards the
tractor cab..
CAUTION
Place sensor cable in such a way
that the cable will not be damaged
during operation.
Fig. 9
Fig. 10
8. Fix magnet cable to the seed drill with ad-
hesive plates (Fig. 9/10) and with cable ties.
The sticking areas must be clean and free
of grease/oil.
9. Reinsert clip pin (Fig. 9/1) into the gearbox
hollow shaft.