Fitting instruction
Amaco BAG0028.0 04.06
17
5.5 Fitting and magnet and sensor ”ha” for precision airseeder/planter ED
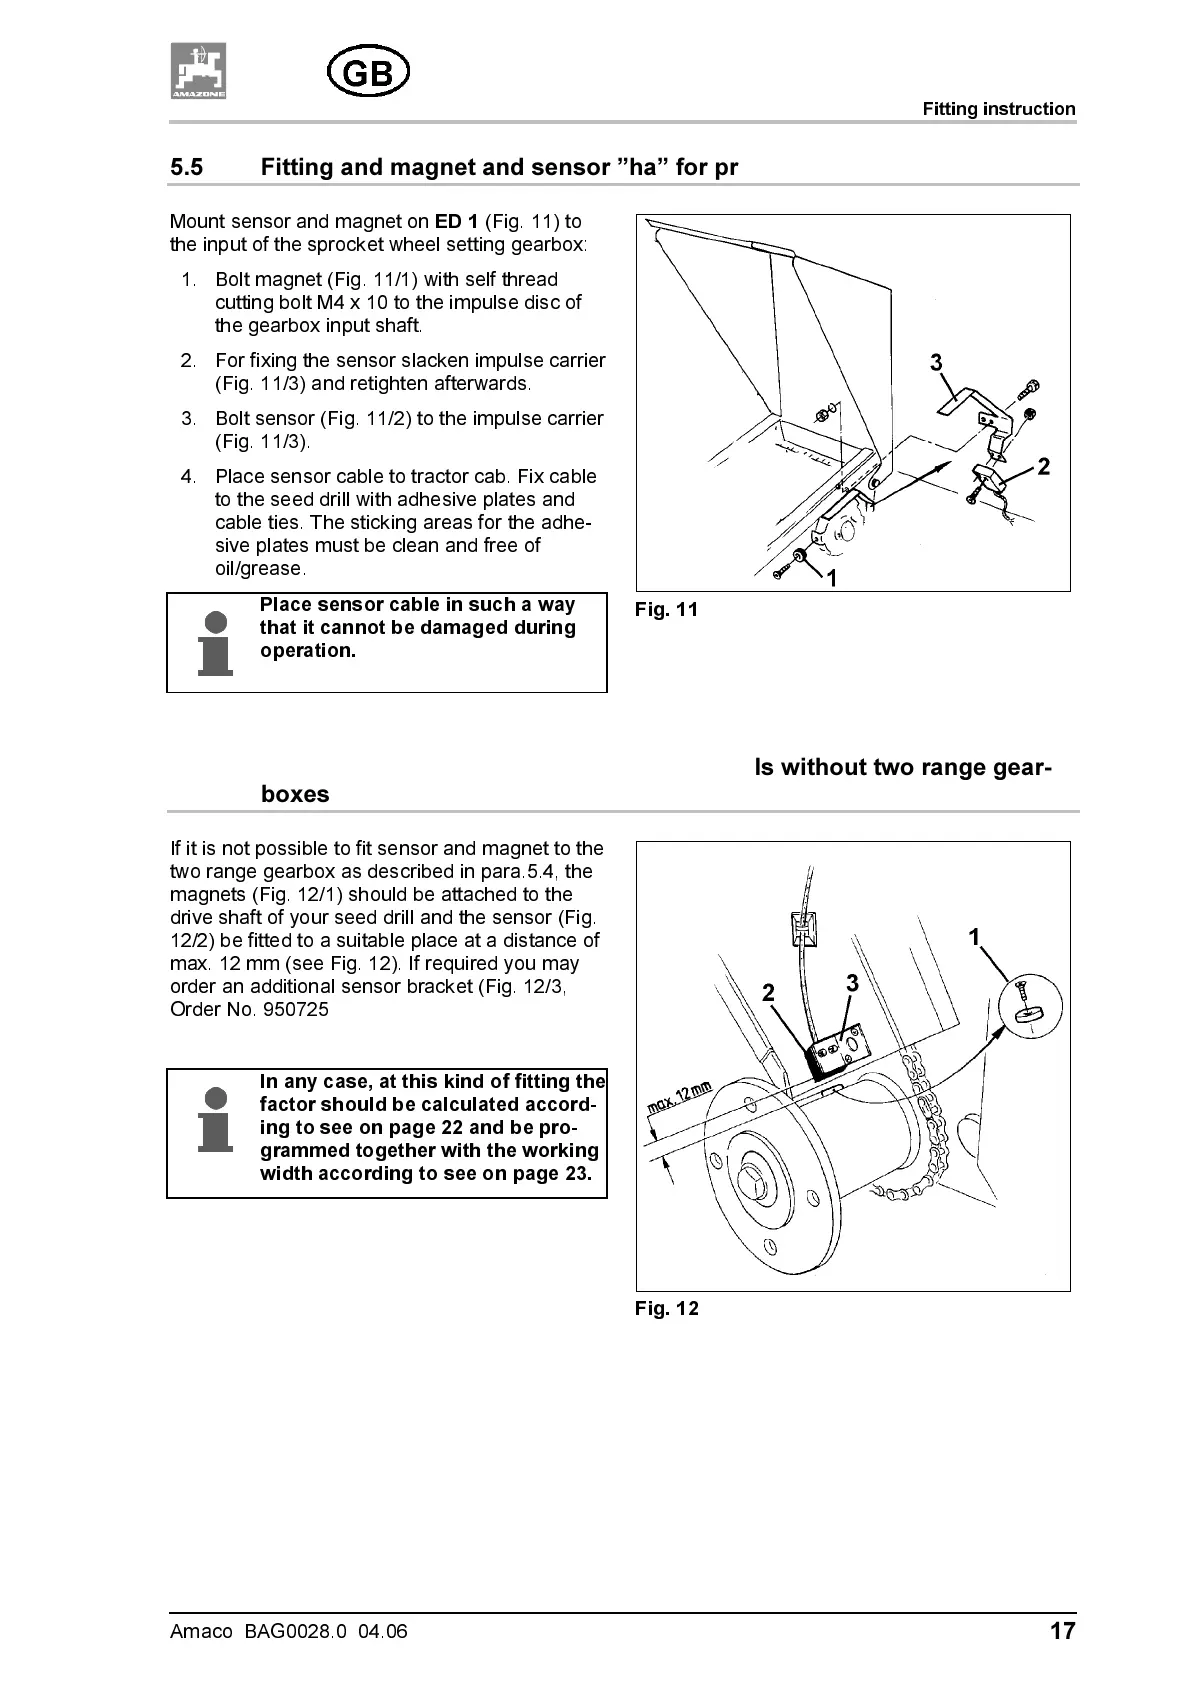
Mount sensor and magnet on
ED 1
(Fig. 11 ) to
the input of the sprocket wheel se tting gearb ox:
1. Bolt magnet (Fig. 11/1) with self thread
cutting bolt M4 x 10 to the impulse disc of
the gearbox input shaft.
2. For fixing the sensor slacken impulse carrie
(Fig. 11/3) an d retighten afterwards.
3. Bolt sensor (Fig. 11
2) to the impulse carrier
(Fig. 11/3).
4. Place sensor cable to tractor cab. Fix cable
to the seed drill with adhesive plates and
cable ties. The sticking areas for the adhe-
sive plates must be clean and free of
oil/grease.
Place sensor cable in such a way
that it cannot be damaged during
operation.
Fig. 11
5.6 Fitting magnet and sensor ”ha” to seed drills without two range gear-
boxes
If it is not possible to fit sensor and magnet to the
two range gearbox as desc ribed in para.5.4, the
magnets (Fig. 12/1) should be attached to the
drive shaft of your seed drill and the sensor (Fig.
12/2) be fitted to a suitable place at a distance of
max. 12 mm (see Fig. 12). If required you may
order an additional sensor bracket (Fig. 12/3,
Order No. 950725
In any case, at this kind o f fitting the
factor should be calculated accord-
ing to see on page 22 and be pro-
grammed together with the working
width according to see on page 23.
Fig. 12