6-9 LCD Assembly Replacement Assembly Replacement
6-10 PN: 10580-00253 Rev. J S3xxE MM
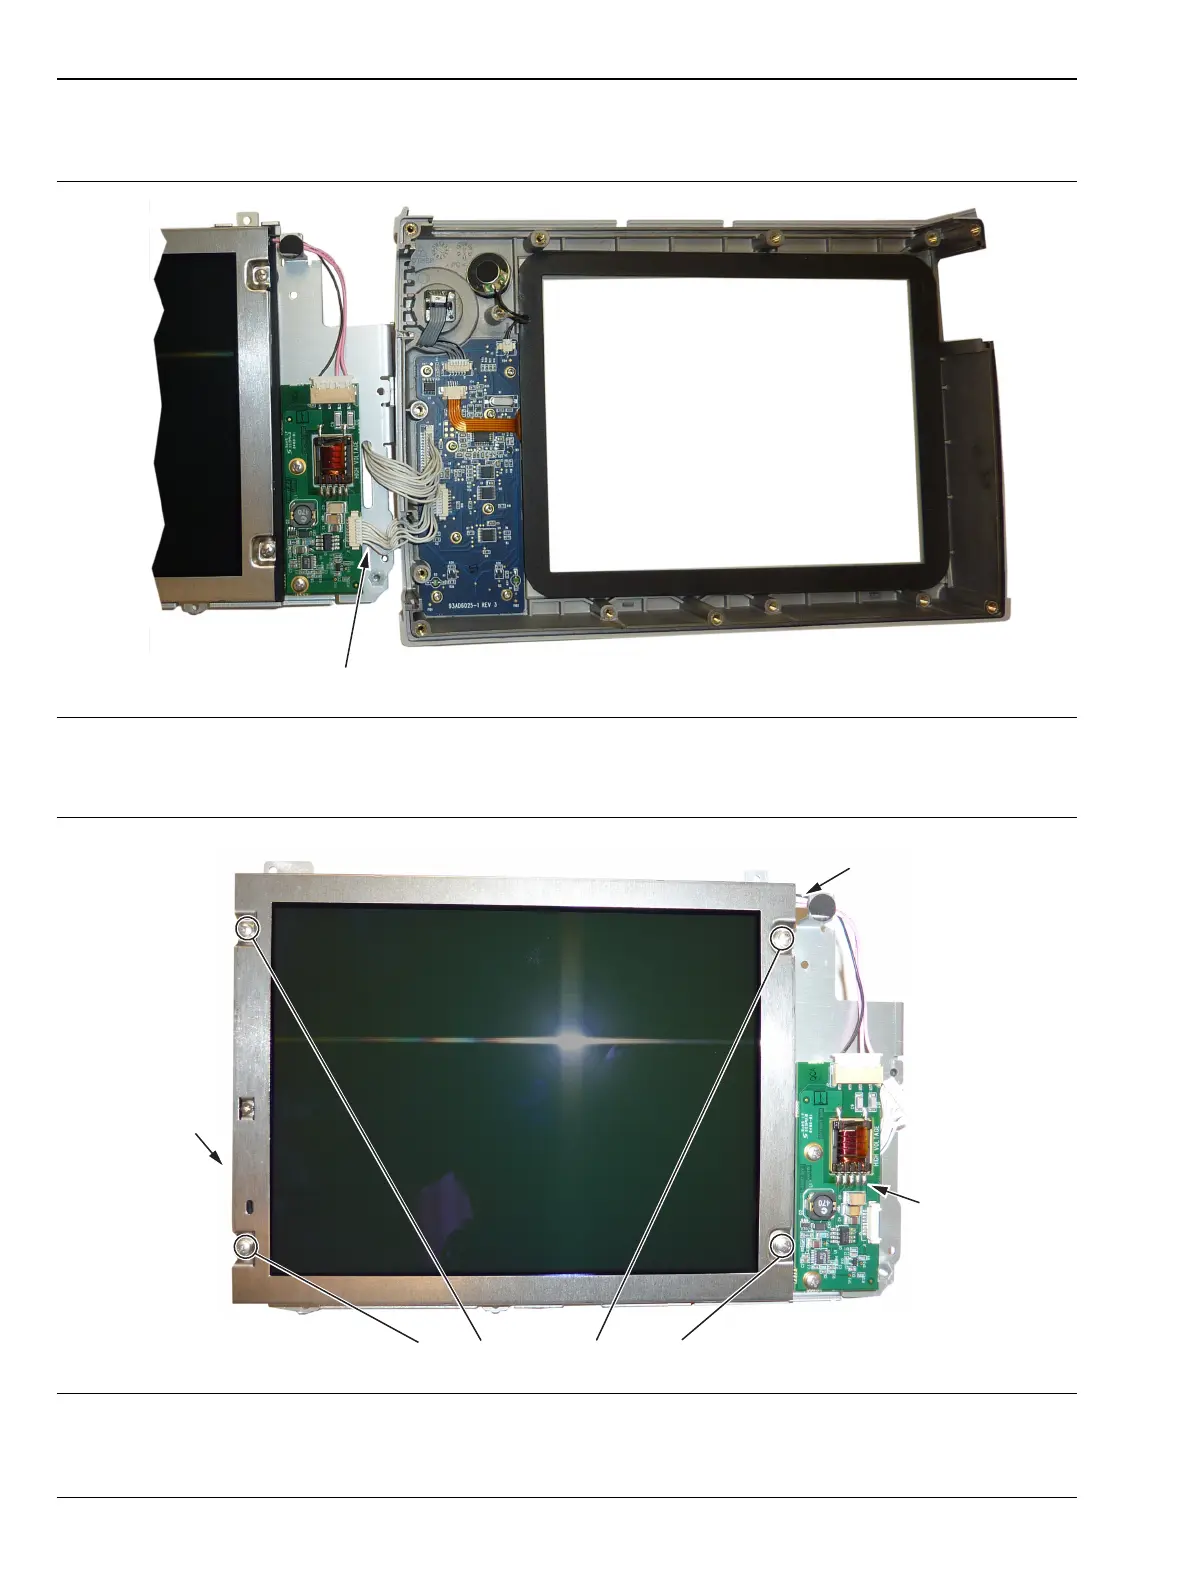
4. Turn the LCD assembly over and disconnect the front half of the case from the LCD assembly
(Figure 6-12).
5. Use a Phillips screwdriver to remove the four screws securing the LCD to the housing, see Figure 6-13.
Figure 6-12. Replacing the LCD Assembly
Figure 6-13. Replacing the LCD
LCD Cable to
Motherboard
Remove 4 screws to replace LCD
LCD Backlight
Cable
LCD Backlight
PCB
 Loading...