43
Pic4.2
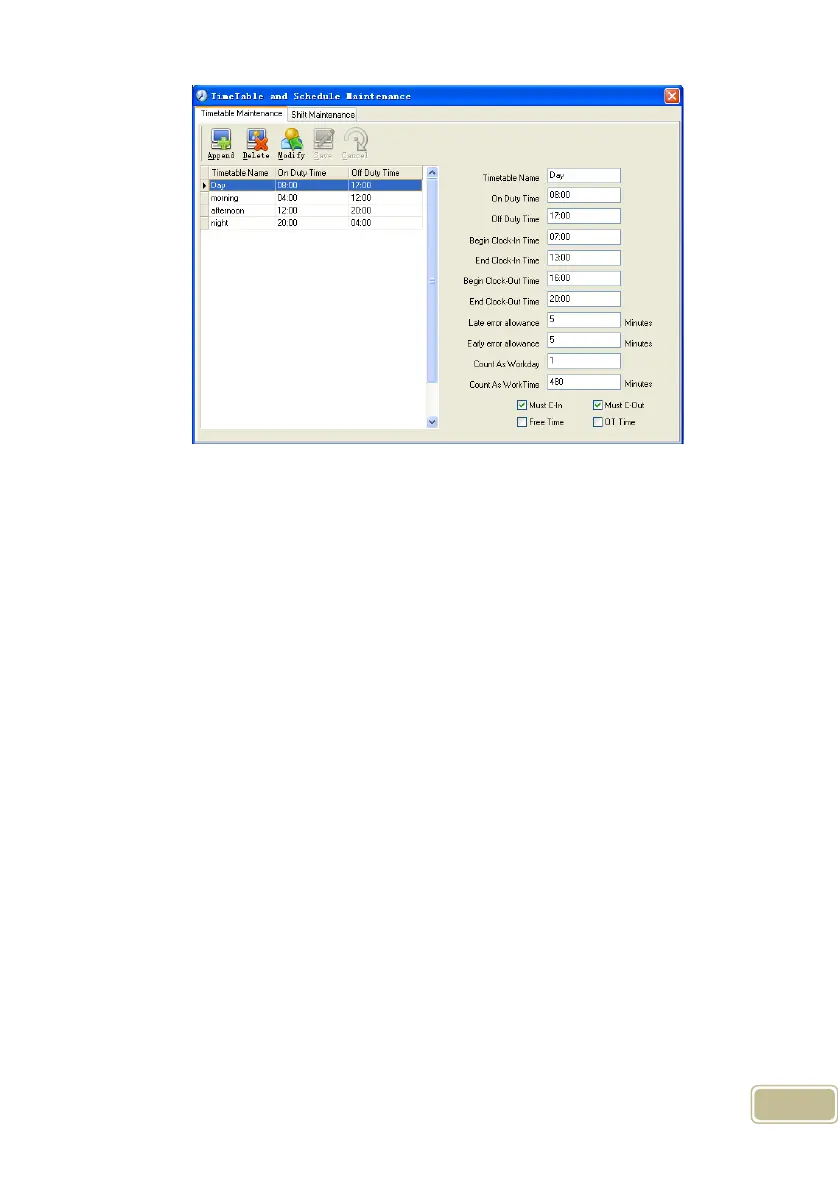
Add a new timetable:
Click [Append] and enter the corresponding information:
[Timetable Name] For instance: Day Shift
[On duty Time] (08:00) [Off duty Time] (17:00)
[Begin Clock-in Time] (07:00) [End Clock-in Time] (13:00)
[Begin Clock-out Time] (16:00) [End Clock-out Time] (20:00),
[Late error allowance] (5) [Early error allowance] (5)
[Count as work day] (1)
[Count as work time XXX minutes] (480).
Tick [Must C-In] and [Must C-out],
Finally click [Save] to confirm.
(Please note: Every item should be setup in timetables with no blank left.[Begin
Clock-in Time]and[End Clock-in Time]setup the valid time period for clock-in.
Records out of this time range will be treated as invalid ones. For instance [Begin
Clock-in Time] is 07:00 and [End Clock-in Time] is 13:00. If clock-in record is 07:01
or 12:59, they are valid records but if clock-in record is 06:59, it is invalid. Besides,
[Begin Clock-in Time] and [End Clock-in Time] can be more than one day (meaning
[End Clock-in Time] can be before [Begin Clock-in Time]) but it can’t be longer than
24 hours.