14
ONE by APOGEE – User’s Guide
Apogee Maestro
Apogee Maestro software provides the most complete control
of ONE, including control of all parameters, store/recall of
congurations and low-latency mixing. To open Maestro, choose
Applications > Apogee Maestro.
Maestro consists of two windows, Maestro Control and Maestro
Mixer, described below.
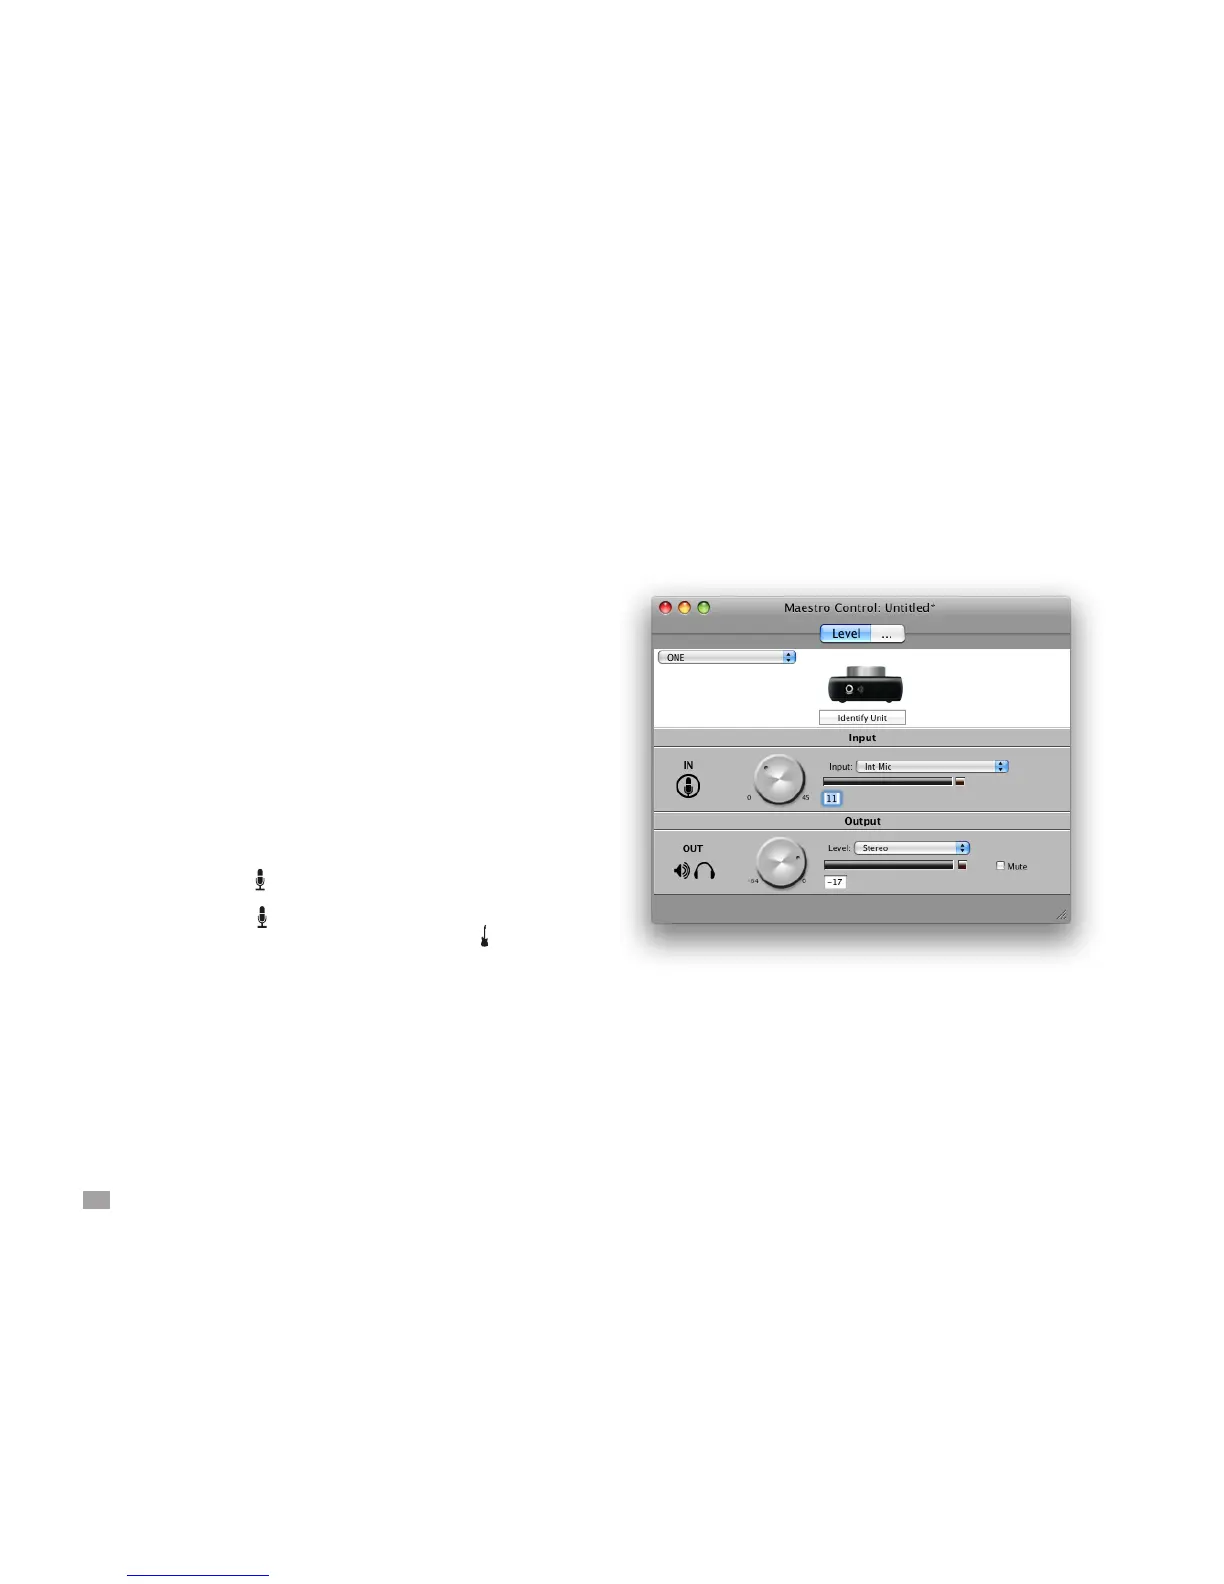
Maestro Control
Interface Menu - When multiple Apogee interfaces are connected to
the Mac, this menu is used to select the interface whose settings are
displayed in Maestro.
Identify Unit - Clicking on this button veries that communication
is established between Maestro software and ONE hardware by
lighting the four input/output icons. Click the button again to return
ONE's LEDs to their normal function.
Input - Selects ONE's active input in this menu:
Select Int Mic to use the internal electret
microphone mounted on ONE's top panel, just below the
encoder knob.
Select Ext Mic to use a mic connected to the
breakout cable’s (XLR) connector.
Select Ext 48V Mic to use a phantom-powered mic
connected to the input;
Select Inst to use an instrument connected to the input.
Input Level Software Encoder – The gain of the selected input is
controlled from this software encoder. The gain value is indicated in
the box to the right of the encoder.
Input Meter - this meter displays input level and digital overs after
conversion from analog to digital.