BIOS CONFIGURATION
36
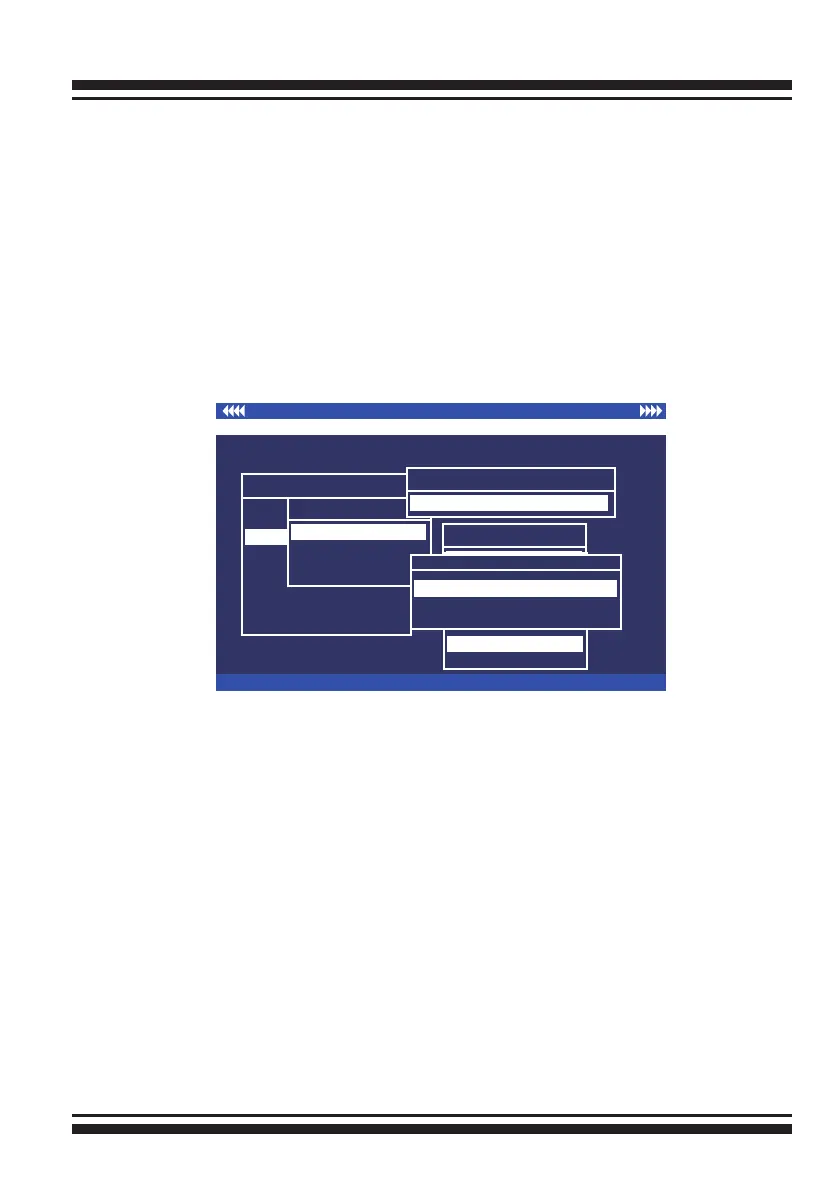
2. Choose the “Create Volume Set” from “Volume Set Functions”
dialog box screen.
3. The “Create Volume From RAID Set” dialog box will be ap-
peared. This screen displays the existing arranged RAID sets.
Select the RAID set number and press the Enter key. The “Vol-
ume Creation” dialogue is displayed in the screen.
4. A window with a summary of the current volume set’s set-
tings. The “Volume Creation” option allows user to select the
volume name, RAID level, capacity, strip size, SCSI channel/
SCSI ID/SCSI LUN, cache mode and tag queuing. The user can
modify the default values in this screen; the modication proce-
dures are in section 3.7.3.3.
I/O Port Addr:FD700000h, F2 (Tab): Select Controller, F10: Reset System
ArrowKey Or AZ:Move Cursor, Enter: Select, ESC: Escape, L:Line Draw, X: Redraw
Areca Technology Corporation RAID Controller
Create Vol/Raid Set
No
Yes
Main Menu
Quick Volume/Raid Setup
Raid Set Function
Volume Set Function
Physical Drives
Raid System Function
View System Events
Clear Event Buffer
Hardware Monitor
System information
Volume Set Function
Volume Set Function
Delete Volume Set
Modify Volume Set
Display Volume Info.
Create Volume Set
Available Capacity : 70.0GB
Selected Capacity : 70.0GB
Select Strip Size
4K
8K
16K
32K
128K
64K
Initialization Mode
No Initialization
No Init (To Rescue Volume)
Foreground Initialization
5. After completing the modication of the volume set, press
the Esc key to conrm it. An “Initialization Mode” screen is
presented.
• Select "Foreground Initialization" for faster initialization of
the selected volume set. When "Foreground Initialization", the
initialization proceeds must be completed before the volume
set ready for system accesses.
• Select "No Initialization", there is no initialization happened,
the volume set is fully accessible for system reads and writes.
The operating system can instantly access to the newly created
arrays without requiring a reboot.
• Select "No Init" (To Rescue Volume) for customer to rescue
volume without losing data in the disk.
6. Repeat steps 3 to 5 to create additional volume sets.