SECTION 1
GETTING ACQUAINTED
2
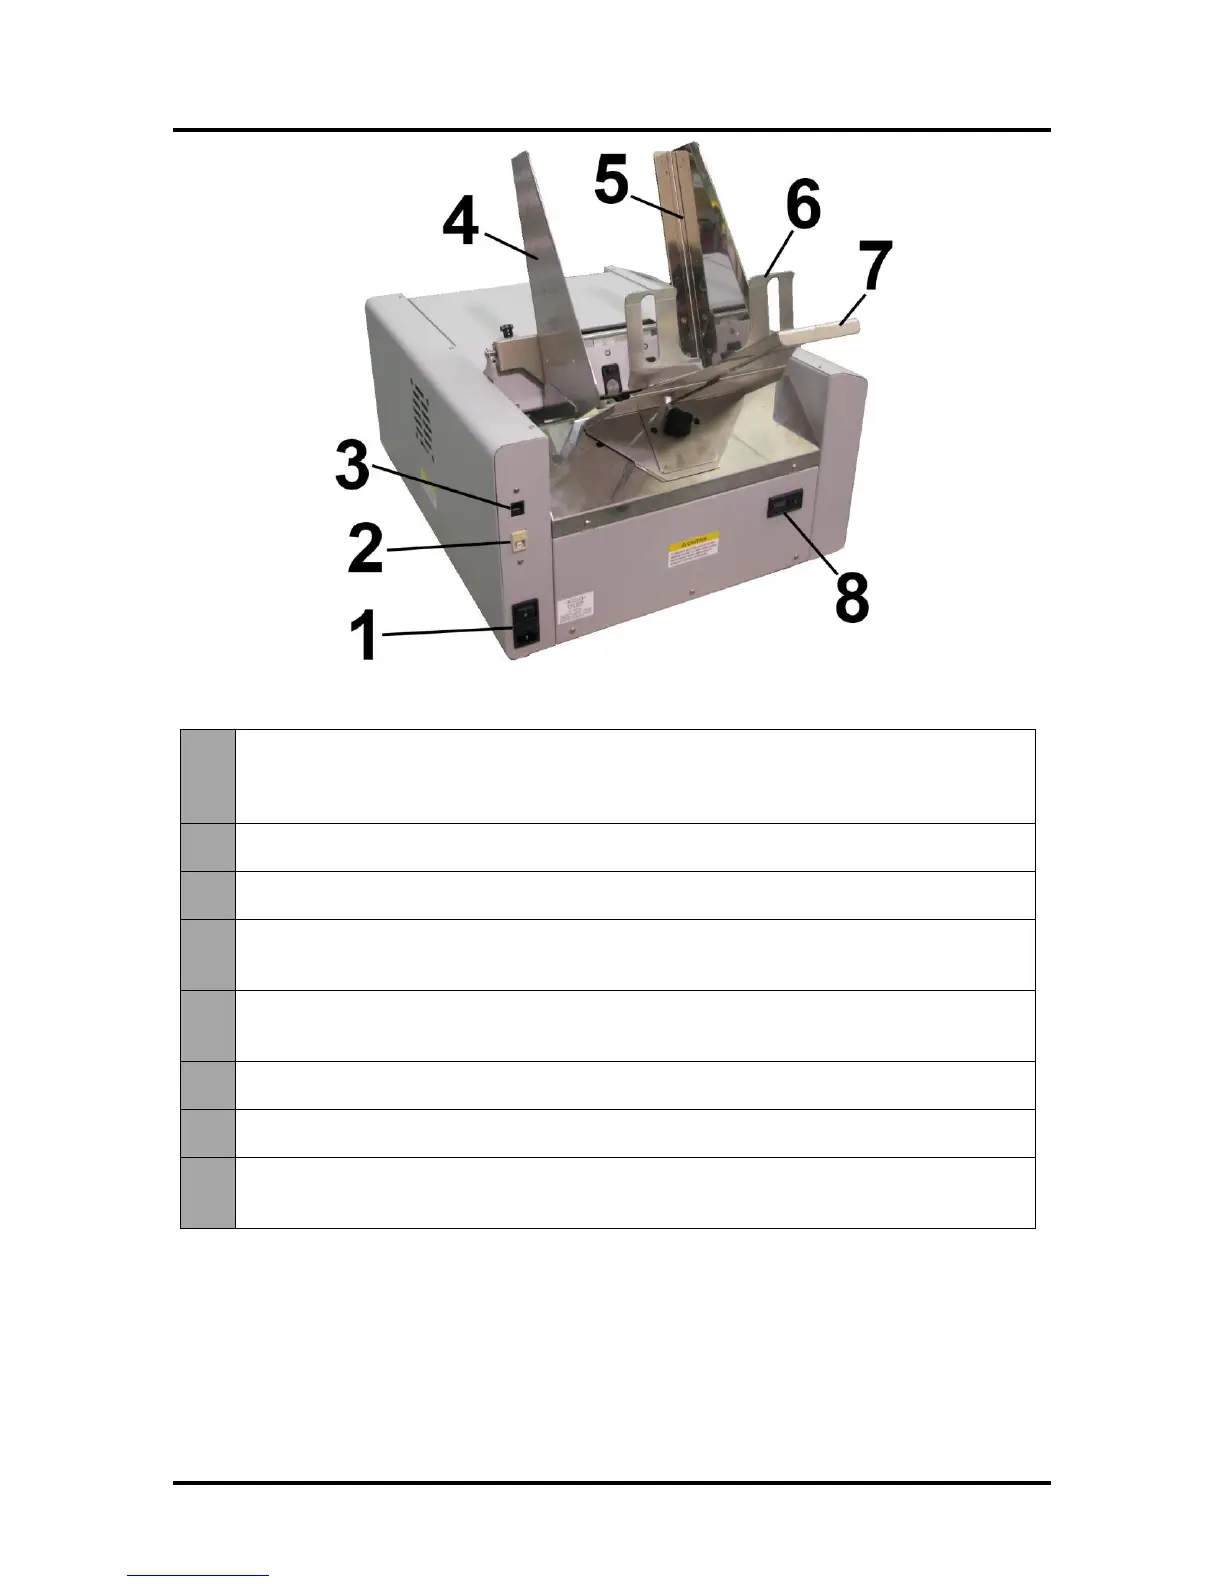
Rear View
Main Power Switch, Receptacle and Fuse – Plug in power cord here. Switch turns
main power ON/OFF. (Use the Control Panel LED Power switch to turn off machine for
cleaning and maintenance). Fuse protects the Printer’s electronic circuits.
USB Port Connection – The USB cable attaches to the Printer here.
Network Connection – The network cable plugs in here.
Envelope/Paper Media Guide – All printing is registered against this Guide. It has
adjustable positions for envelopes and paper.
Adjustable Media Guide – Adjusts to hold the paper/media against the
Envelope/Paper Media Guide.
Rear Guide – Holds the paper/media against the Front Plate.
Rear Guide Support – Supports the paper/media.
Counter – LCD displays number of pieces run for a given job. The Reset button zeros
the Counter.