SECTION 2
INSTALLING THE PRINTER
12
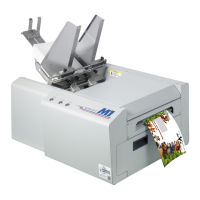
8. Finished software installation. Do not check the
Print Test Page as the Printer is not set up yet.
You can check the “Set this printer as the default
printer” at this time. Click “Next>”.
9. Install Printer Software. Click “Exit” to close
the CD.
10. Restart the computer to complete the installation.
Install the Ink Tanks
The Printer uses one Printhead Cartridge and five Ink Tanks (two
Black, one Cyan, one Magenta, and one Yellow). Install the Ink Tanks
as follows:
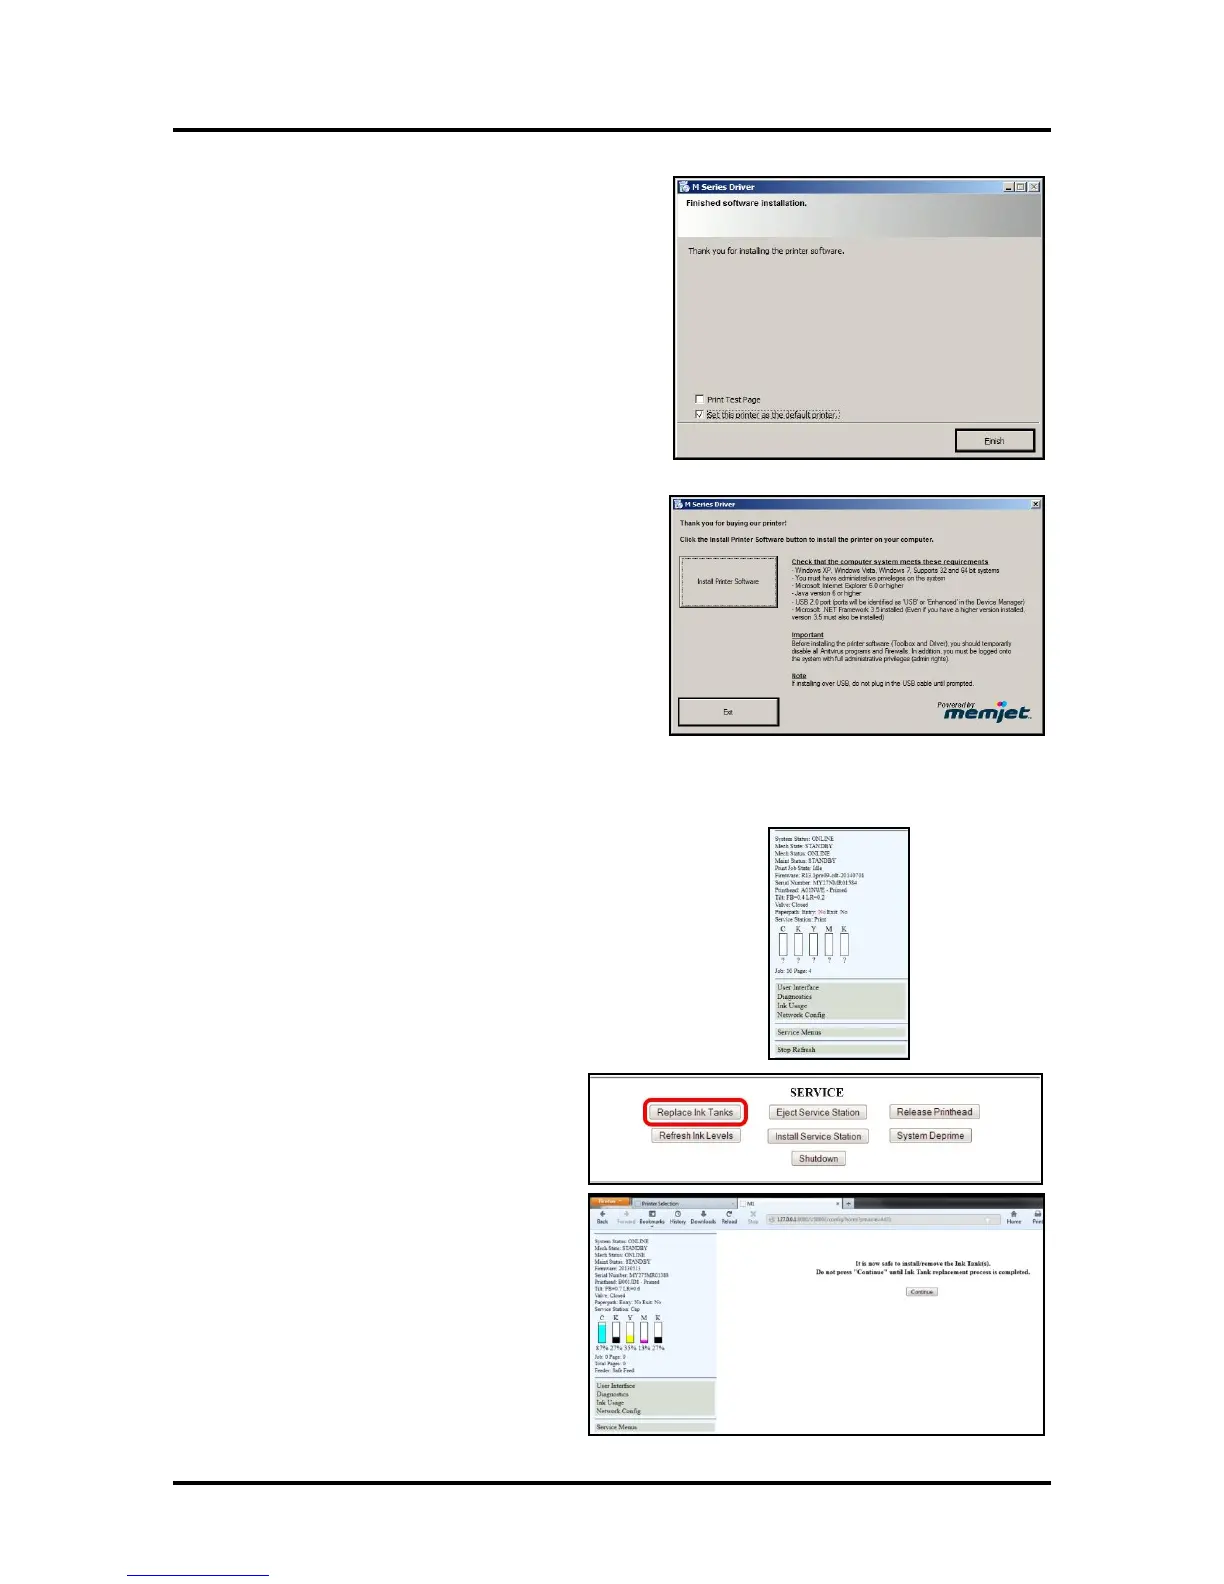
1. Open the Printer Toolbox. Go to the Start Menu and open
the “Toolbox”. You will see System Status information in the
upper left corner of the User Interface window. Note that the
“CKMYK” boxes are empty.
2. Click “Replace Ink Tanks”. This
disconnects Printer communication
with the Ink Tanks and allows safe
installation and replacement. Once the
“Confirm” screen displays, it is safe to
install the Ink Tanks.
IMPORTANT: DO NOT press
“Continue” until after you have
installed the Ink Tank(s) and closed
the Ink Tank Latches.