14
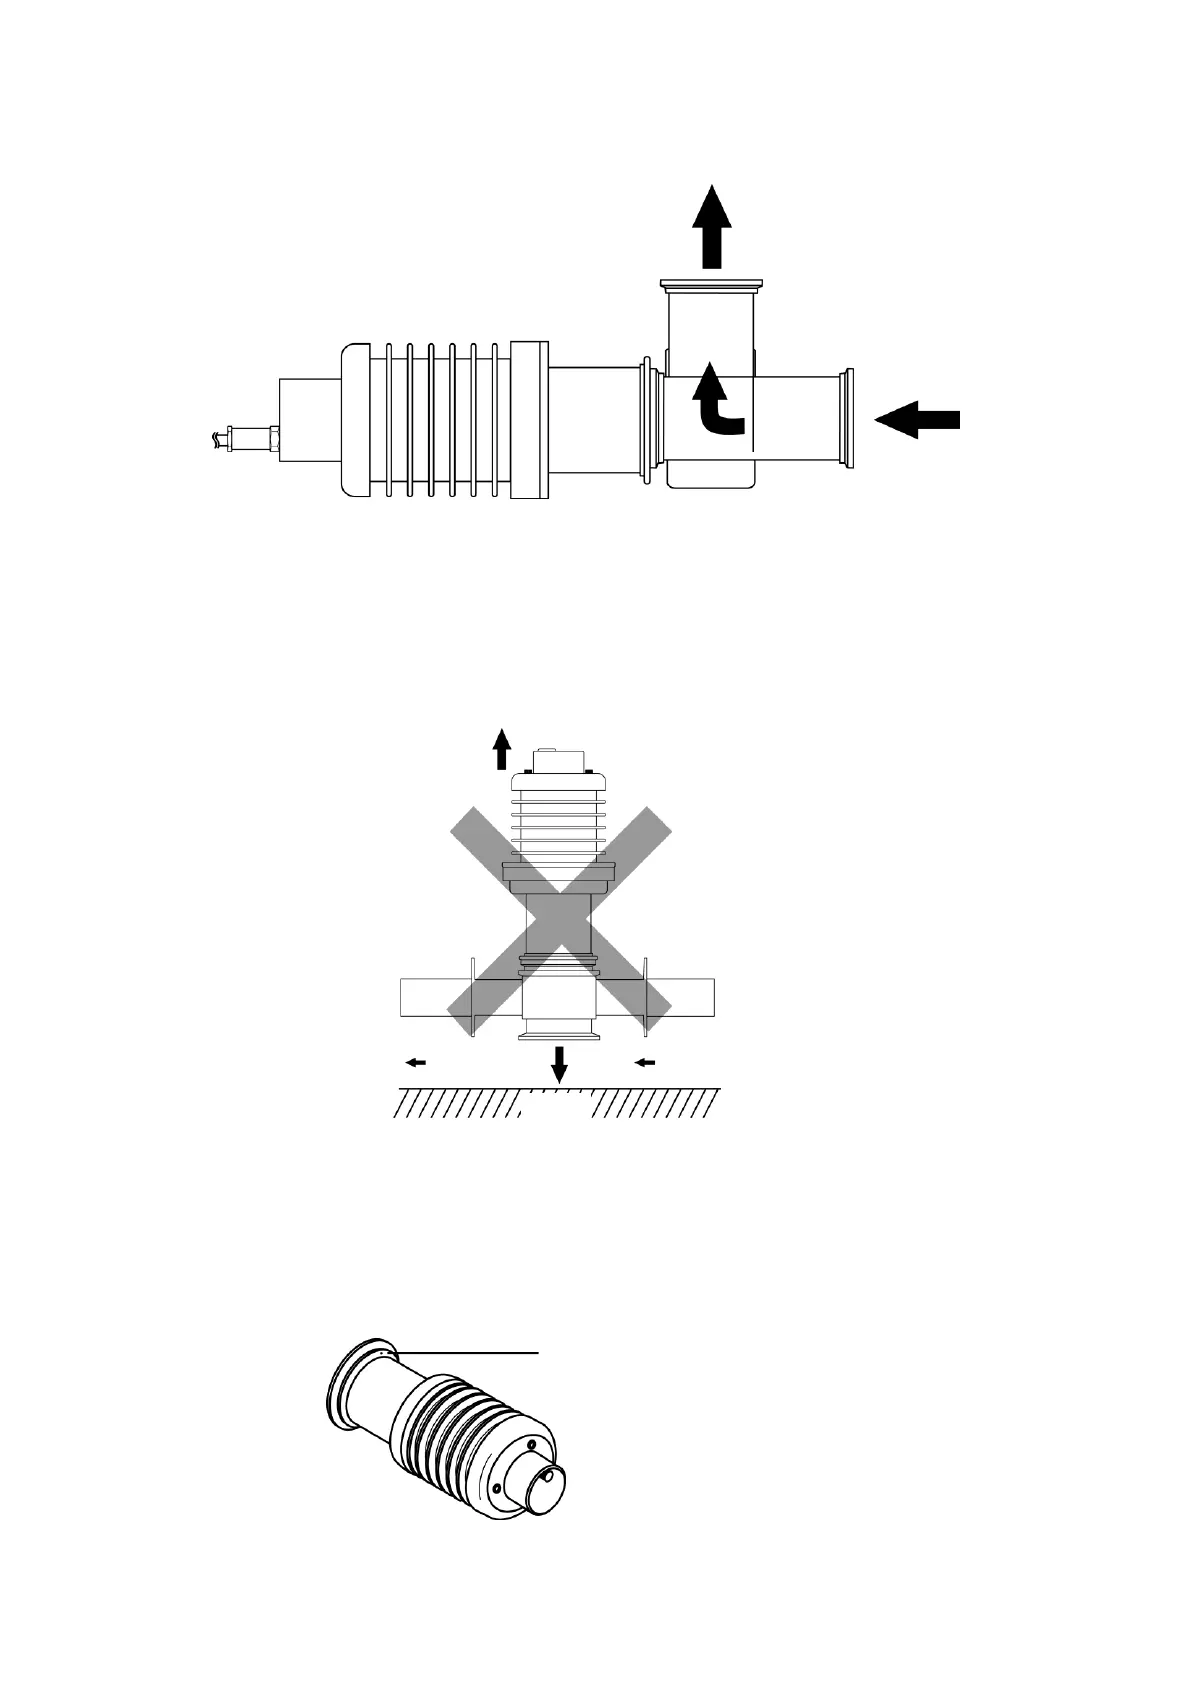
(3) Mounting on the Piping (main) (in the case of L type)
Mount the detection section on the piping, observing the flow direction of the fluid to ensure it will hit the
prism surface of the detection section (Fig. 5-4).
Fig. 5-4
(4) Mounting on the Piping (main) (in the case of straight type)
When mounting the detection section to the piping, keep it positioned parallel to or below the piping to
ensure the flow of sample passes over the prism.
Mounting the detection section as shown in Fig. 5-5 is not advised, as low pressure or flow rate may
prevent the sample from contacting the prism sufficiently, interfering with measurement.
Fig. 5-5
(5) Position of the thermo sensor
There is a built-in thermo sensor near the prism.
As the position of the thermo sensor is marked (Fig. 5-6), mount the detection section to keep the mark
upstream in case the sample temperature widely varies.
Fig. 5-6
Mark to show the position
of the thermo sensor.