① Press the START/STOP key to pause the
measurement.
②Press the SCALE key three times.
The SET UP light will then blink, and "SEt" will be
displayed on the measurement value display.
③Press the ENTER key and the SET UP light comes
on.
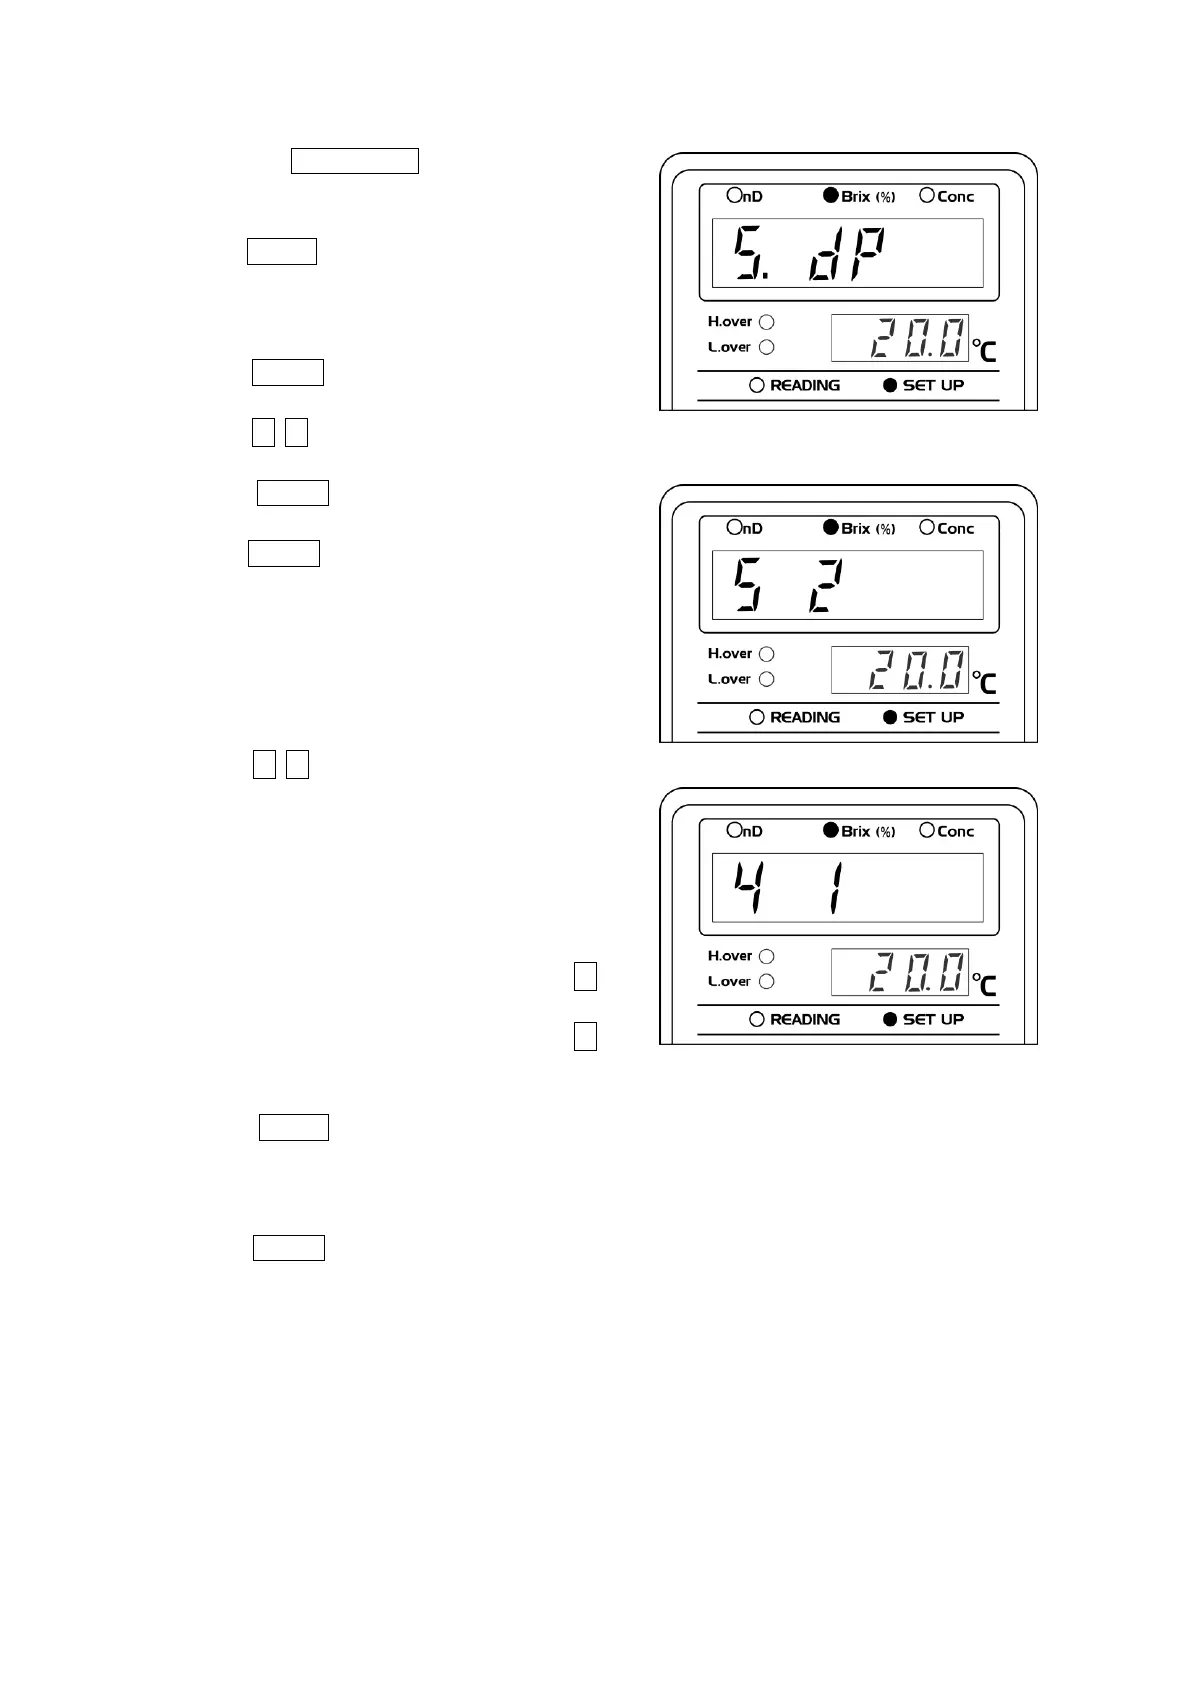
Using the ↑ ↓ keys, select "5. dp" (Fig. 11-27).
④Press the ENTER key to enter the Decimal Place
setting screen.
Press the ENTER key to confirm the selection.
"5" will appear under the LED light for nD and "2"
under the LED light for Brix (Fig. 11-28).
This means that the nD is displayed to the fifth
decimal place, and the Brix is to the second decimal
place.
⑤Press the ↑ ↓ keys, and "4" will appear under the
LED light for nD and "1" under the LED light for Brix
(Fig. 11-29).
This means that the nD is displayed to the fourth
decimal place, and the Brix is to the first decimal
place.
⑥"5" for nD and "2" for Brix are displayed when ↑ key
is pressed.
"4" for nD and "1" for Brix are displayed when ↓ key
is pressed.
※Press the SCALE key to abort the operation and
return to "5. dP."
⑦Select either of the decimal place combinations and
press the ENTER key to confirm the selection and
return to the "5. dP" screen.
※Set the number of digits in Conc mode at the time of
Conc data entry.