CS1732B / CS1734B User Manual
32
(Continued from previous page.)
(Continues on next page.)
Setting Function
BUTTON
SETTINGS
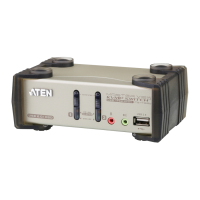
Sets the Front Panel Pushbutton Switching Operation Setting:
MODE 1 (Default Setting):
1. Press a pushbutton once to bring only the KVM focus to the computer
attached to its corresponding port (in 2 secs).
2. Press a pushbutton twice to bring the audio focus to the computer attached to
its corresponding port (in 2 secs).
3. Press a pushbutton for longer than 2 seconds to bring the KVM, Audio and
USB focus simultaneously to the computer attached to its corresponding port.
4. Press pushbuttons 1 and 2 simultaneously for 2 seconds to start Auto Scan
Mode.
5. Press pushbuttons 3 and 4 simultaneously for 2 seconds to perform a
keyboard and mouse reset. (CS1734
B only)
MODE 2 (Alternative Setting)
1. Press a pushbutton once to bring the KVM, Audio and USB focus
simultaneously to the computer attached to its corresponding port (in 2 secs).
2. Press a pushbutton twice to bring the Audio focus to the computer attached
to its corresponding port (in 2 secs).
3. Press a pushbutton for longer than 2 seconds to bring only the KVM focus to
the computer attached to its corresponding port.
4. Press pushbuttons 1 and 2 simultaneously for 2 seconds to start Auto Scan
Mode.
5. Press pushbuttons 3 and 4 simultaneously for 2 seconds to perform a
keyboard and mouse reset. (CS1734B only)
PORT
DISPLAY
DURATION
Determines how long a Port displays on the monitor after a port
change. The choices are User Defined (from 0–255 secs), the default
is 3 seconds. If you specify 5 and press [Enter] and then return to the
previous page, the Port Display Duration will be saved as 5 SEC.
Note: A value of 0 (zero) will disable the Port Display Duration
function.
SCAN
DURATION
Determines how long the focus dwells on each port as it cycles through
the selected ports in Auto Scan Mode. Key in a value from 1–255
seconds (the default is 5 secs) and press [Enter] to save the setting.
SCREEN
BLANKER
SET TIMEOUT: OFF and SCREEN LOCK: OFF is the default setting.
Settings steps:
1. SET TIMEOUT to ON. Key in a value from 1–30 minutes. If SET TIMEOUT is
set to OFF, you will not be able to set the SCREEN BLANKER.
2. Set the SCREEN BLANKER password. Key in a password that is 8
characters long (allowed characters are A–Z and 0–9). If you have not
changed the default password, you can press [Enter] to cancel SCREEN
LOCK.
3. Set the SCREEN LOCK to ON. Key in Y. If the SCREEN LOCK function is set
to ON, a password is needed to the leave the SCREEN BLANKER mode and
return to the OSD.

 Loading...