8
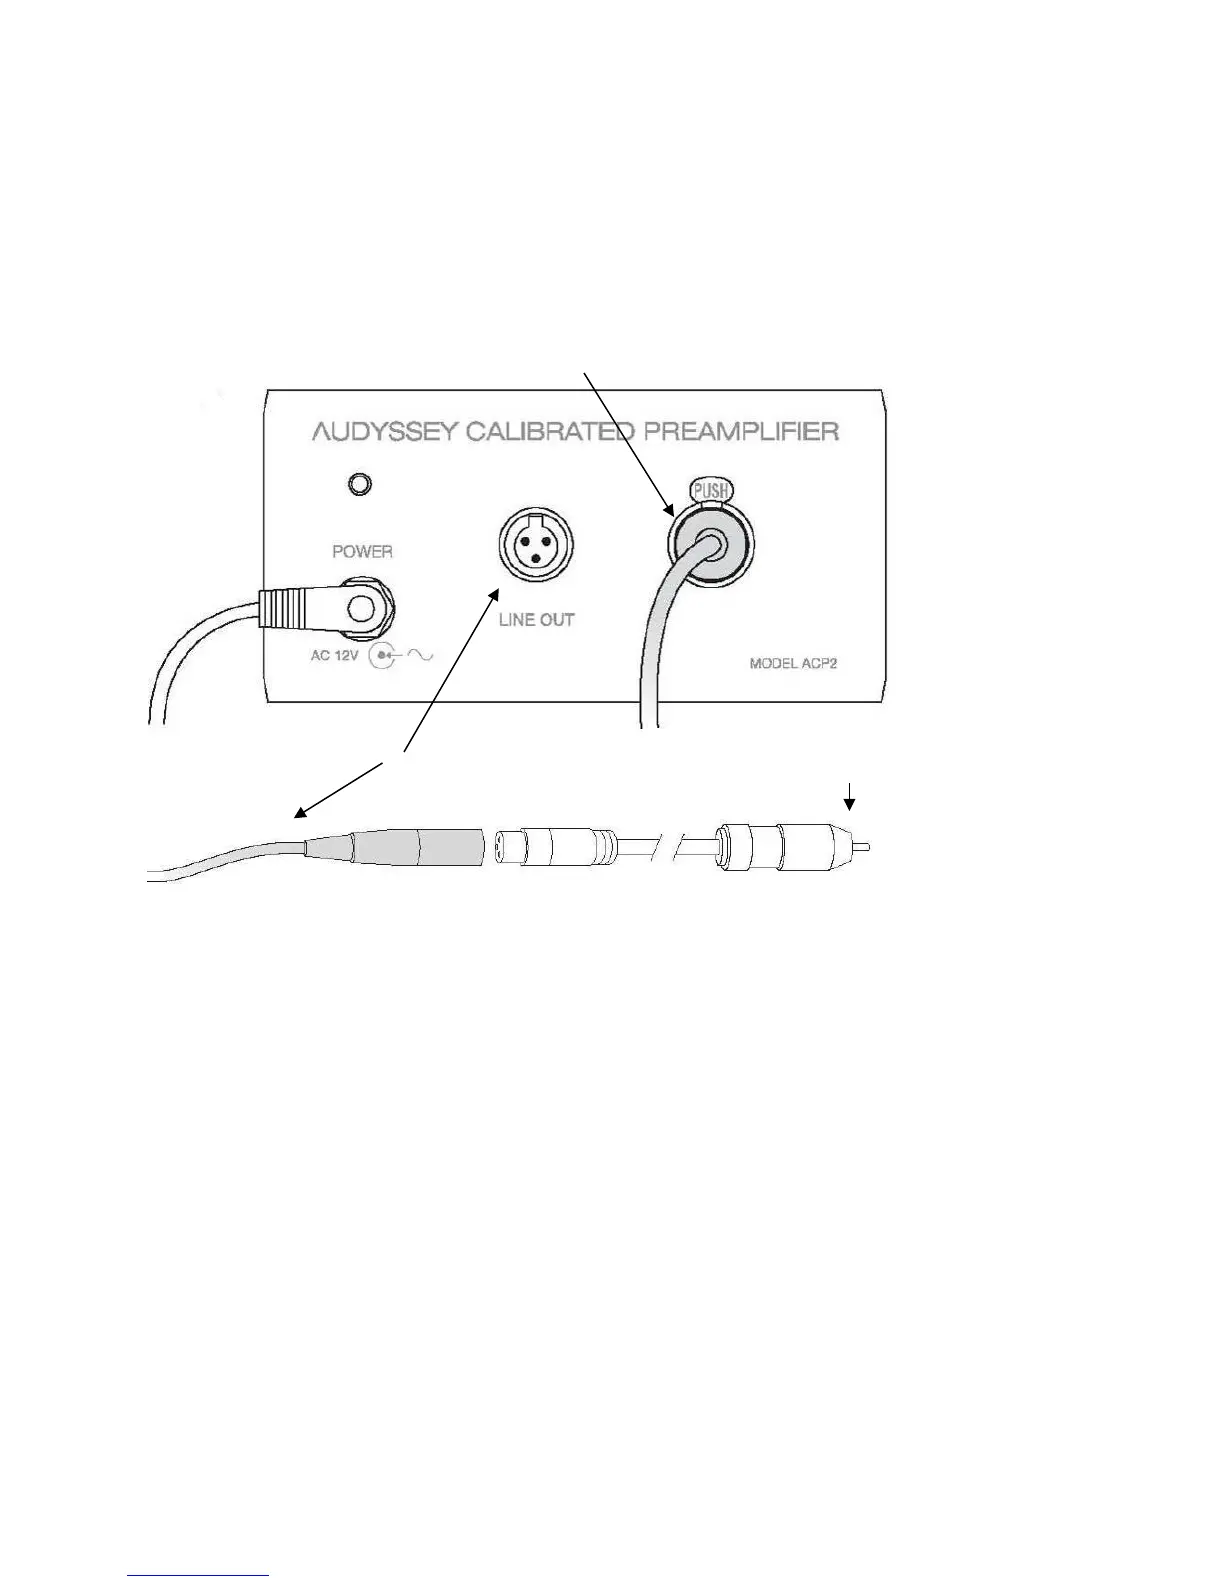
C Connect the mini-XLR cable from the microphone to the input (MIC IN) of the microphone preamp.
D Connect another mini-XLR cable to the output (LINE OUT) of the mic preamp. Connect the mini-XLR-
to-RCA adapter to this mini-XLR cable if required by the product being calibrated.
E Prepare to connect the mini-XLR-to-RCA adaptor to the audio input that will be used for microphone
signal but Do not connect it yet. Doing so before completing the Product Selection screen of the
MultEQ Pro application might cause microphone feedback at levels that could damage the speakers
(Page 12).
F Connect the laptop to the Installer-Ready Product using the USB cable, an RS232 cable or the
supplied USB to RS232 adapter.
Provide enough slack so that the cable will not be disconnected accidentally during calibration. An
accidental disconnection usually requires the user to restart the entire process.
It is not advised to substitute a different USB to RS232 cable than the one included in the Installer Kit.
However, an active extension or hub may be used to extend USB length.
G Connect the AC adapter and Power cable to the preamplifier.
Preparation of Audio Equipment
Amplifier or Preamplifier Configuration
Set the Amp Assign, Pre-out Assign, XLR Out Polarity and Subwoofer Configuration in the
receiver or preamplifier menus as necessary. This must be done before calibration start;
speakers disabled in the Amp Assign will not show in MultEQ Pro. If these settings are changed