30
Target Curve Designer and Target Curve Editor
The “Target Curve Designer” and “Target Curve Editor” windows are used to customize the
frequency response of the base target curves on a channel-by-channel basis. All target curves
on the “Target Sound Options” screen are affected by these edits.
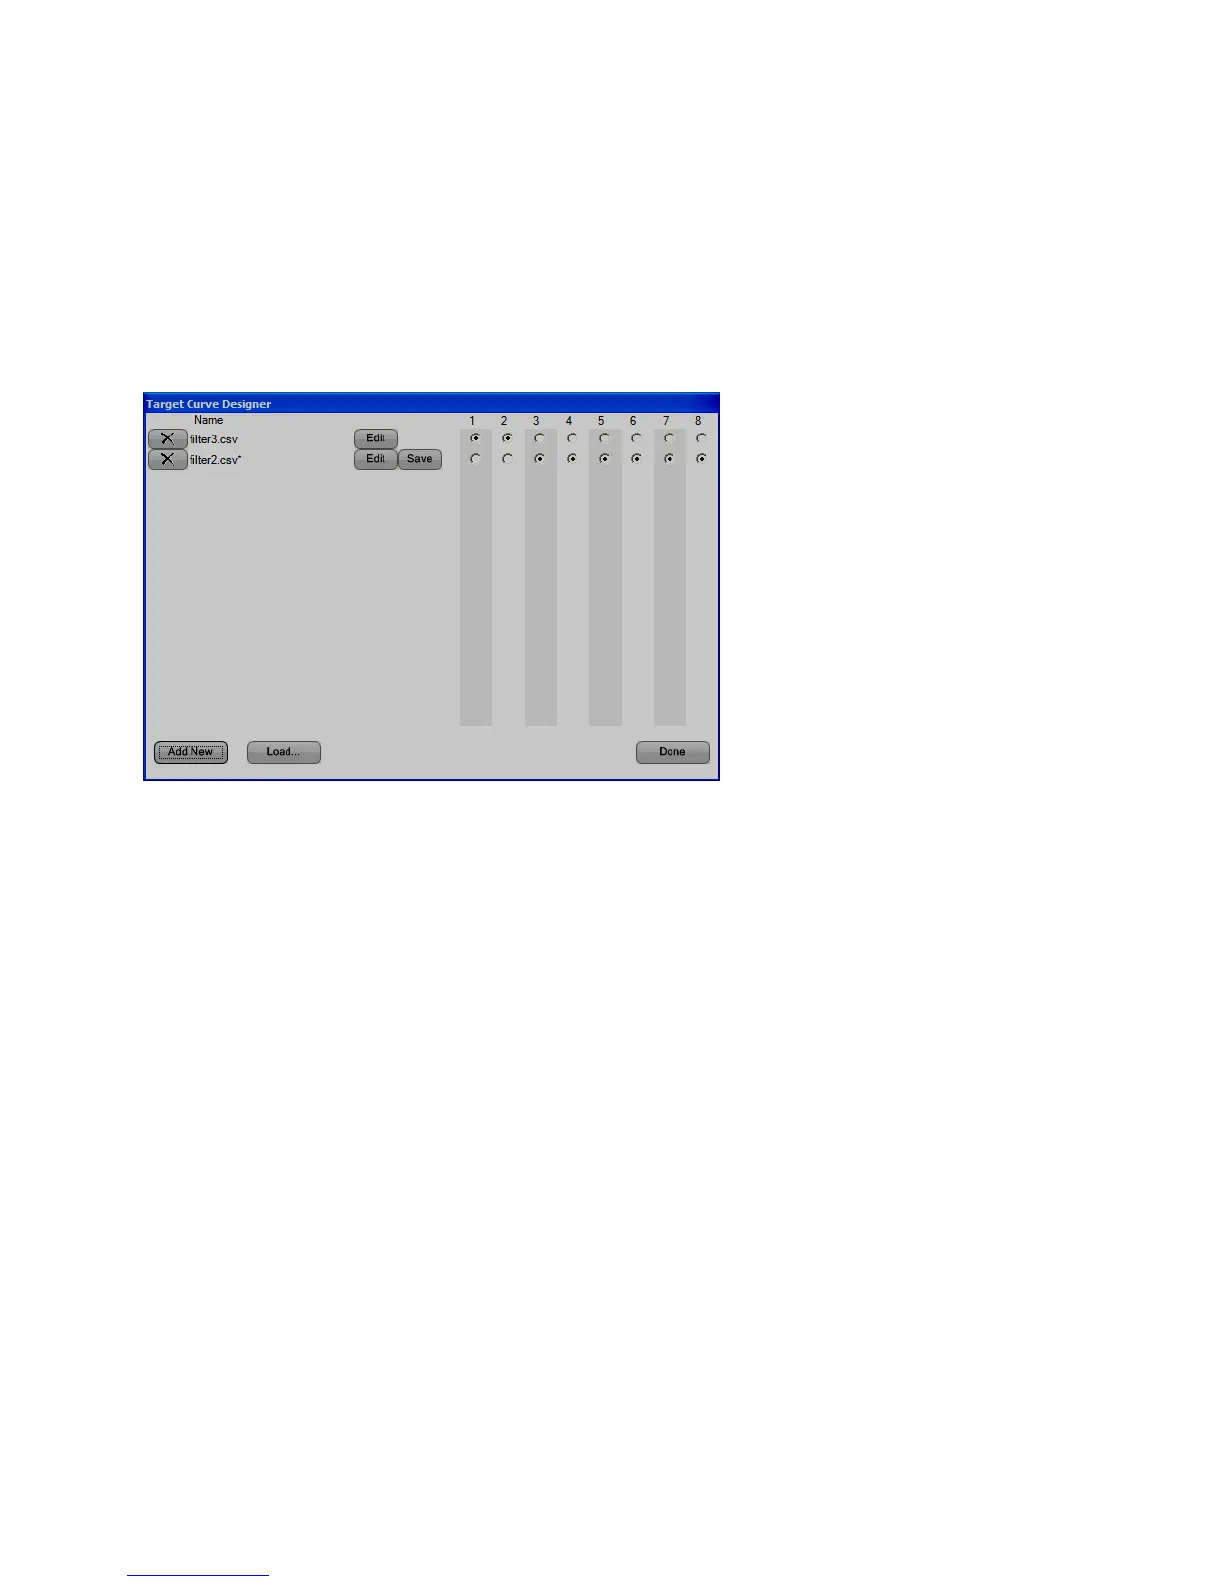
The Target Curve Designer
The “Target Curve Designer” window allows creation of target curve modifiers and the
assignment of individual modifiers to one or more channels.
• Add New – Add a new target curve modifier by clicking the “Add New” button. A file
name is generated at the bottom of the “Name” column.
• Load… – Use the “Load…” button to choose a previously saved target curve modifier
file. Only individual modifier files are saved and loaded. Channel assignments cannot be
saved.
• Save – Use the “Save” button to choose a filename and location for the target curve
modifier. The default save location is the “My Documents\Audyssey\Measurements”
folder.
• Select Channels – Use the radio buttons to the right of the file names to select the
channels to which each target curve modifier is applied. Each modifier may be applied to
as many channels as desired. Each channel may have only one modifier applied to it.
• Delete – Use the ”X“ button to remove a target curve modifier from the list. If the file has
been saved, this will not delete the file. However, changes made to the modifier since it
was created, loaded or saved will be lost.
• Done – Exit the Target Curve Designer, applying the current configuration.
• Edit – Click the “Edit” button to launch the “Target Curve Editor” window. This window is
used to edit the frequency response of the corresponding target curve modifier.