31
Using the Target Curve Editor
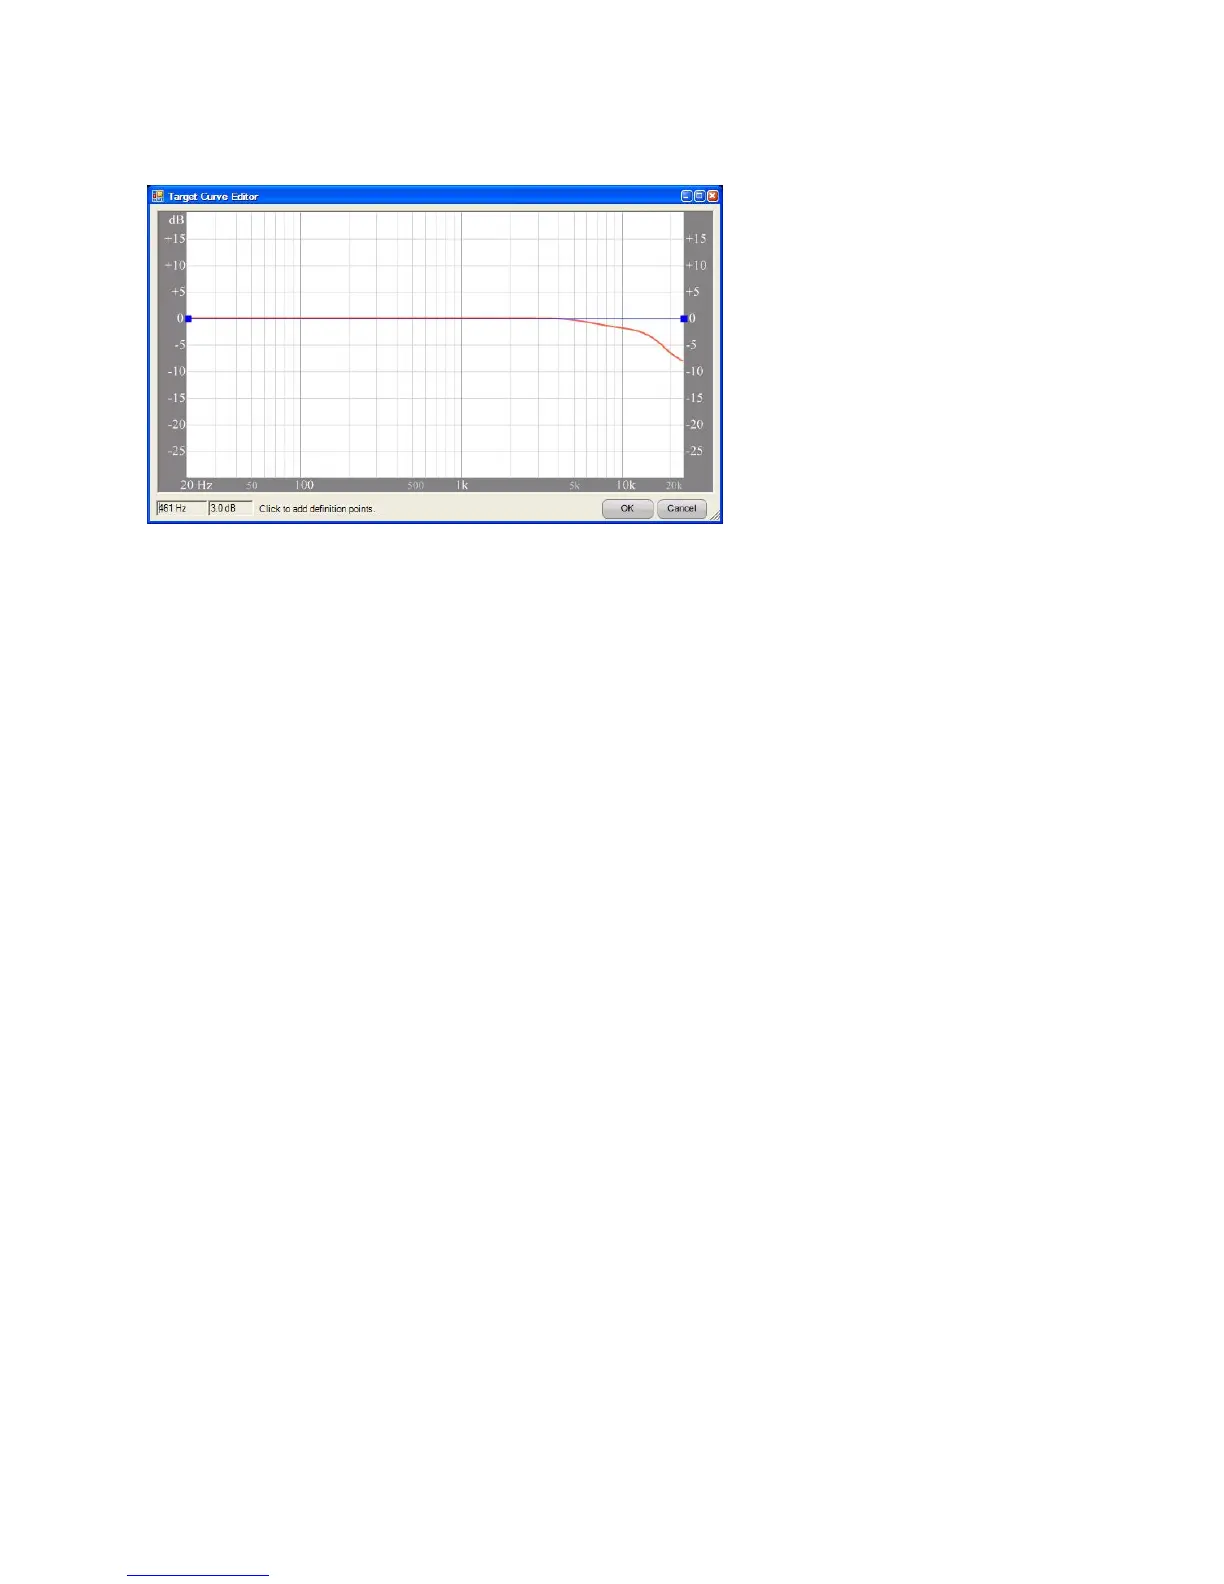
Figure 13 - Target Curve Editor - the High Frequency Roll Off 1 target curve is shown with Midrange
Compensation disabled (see Target Sound Options, page 28)
The “Target Curve Editor” is launched from the “Target Curve Designer” in order to edit a target
curve modifier. A graph of the audible frequency spectrum is displayed, with the target curve
modifier plotted in blue. The Audyssey base target curve that was selected on the Target Sound
Options screen is displayed in the background so that the customized target curve can be
viewed as the modifier is edited.
Placing and Adjusting Grips
Grips are control points that are used to edit the target curve modifier. They appear as blue
squares on the target curve modifier and turn green when selected.
A grip is placed at each end of the graph by default. These two grips can never be moved
horizontally or deleted, but they can be moved vertically.
Add new grips to the modifier by left-clicking the graph in the desired location. Grips may also
be added by typing in the desired frequency and gain. Enter this information in the text boxes in
the lower left corner of the window and press enter.
Control points must be separated by at least 1/3 octave. Clicking too close to an existing
grip will not insert a new grip.
Limits of +/-3dB are imposed on the vertical range (gain) of the target curve modifier so that
the target curve cannot consume the available headroom to the detriment of the equalization
range (Figure 14). Clicking or attempting to type in a number outside of this range will insert a
grip at the nearest allowed gain value.