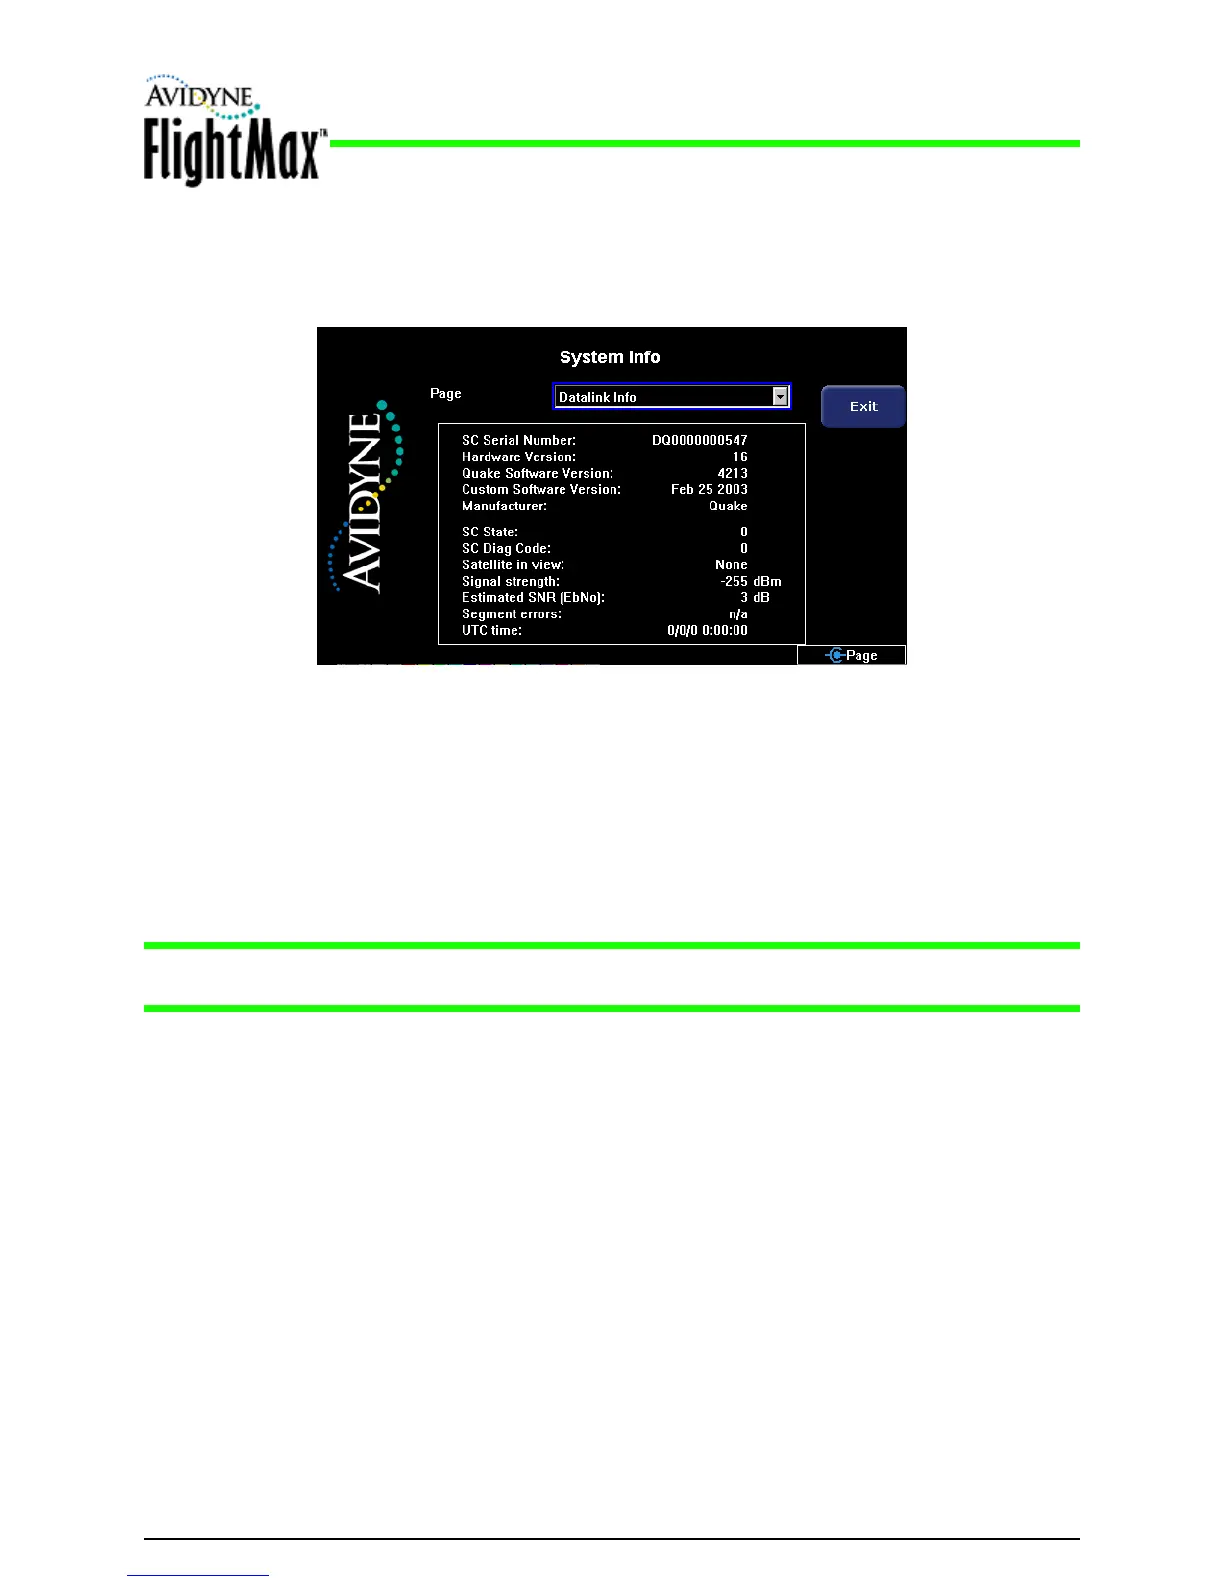
Figure 19: System Info—Datalink Info Page for ORBCOMM
5.10.2 Broadcast Datalink Setup
Broadcast Datalink Checkout
Installation Manual
P/N 600-00175-000 Rev 04 MFD Feature Setup and Checkout
- 61 -
ORBCOMM Datalink Checkout (EX500 Only)
➤ To check the ORBCOMM Datalink installation:
1. From the Maintenance Mode page, select System Info. The System Info page displays:
2. In the Page dropdown, select Datalink Info.
3. On the Datalink Info page, verify the SC Serial Number and software versions.
If ORBCOMM is enabled and the port is selected on the Aircraft Setup page, the EX500 is
configured for ORBCOMM operation.
➥ To finish the checkout process, see Section 6.6, “ORBCOMM Satellite Reception (EX500 Only)” on
page 72.
Note: ORBCOMM-network Narrowcast support is expected to cease in 2010. Contact Avidyne for
more details.
The EX500/EX600 supports the Heads Up XMD076 XM data receiver or Avidyne MLB700.
Configure Broadcast as follows:
● Broadcast—XM WX Satellite Weather, MLB 700 Sirius Radio, or None. This enables the Datalink
functionality and communication with the satellite data receiver.
● Port—Select the RS-232 port wired to the Broadcast Datalink receiver.
➤ To check the Broadcast Datalink Installation:
1. Power up the MFD and Broadcast Datalink Receiver and select the Trip Page.
2. From the Trip Page, press Display to view Broadcast Status (down pointing arrow). If the MFD
reports a Receiver ID or Serial Number, the receiver is communicating with the MFD and the RS-
232 wiring is correct.
3. Position the aircraft in an area open to the sky.
 Loading...