R5900049 /13 ClickShare CSE-80086
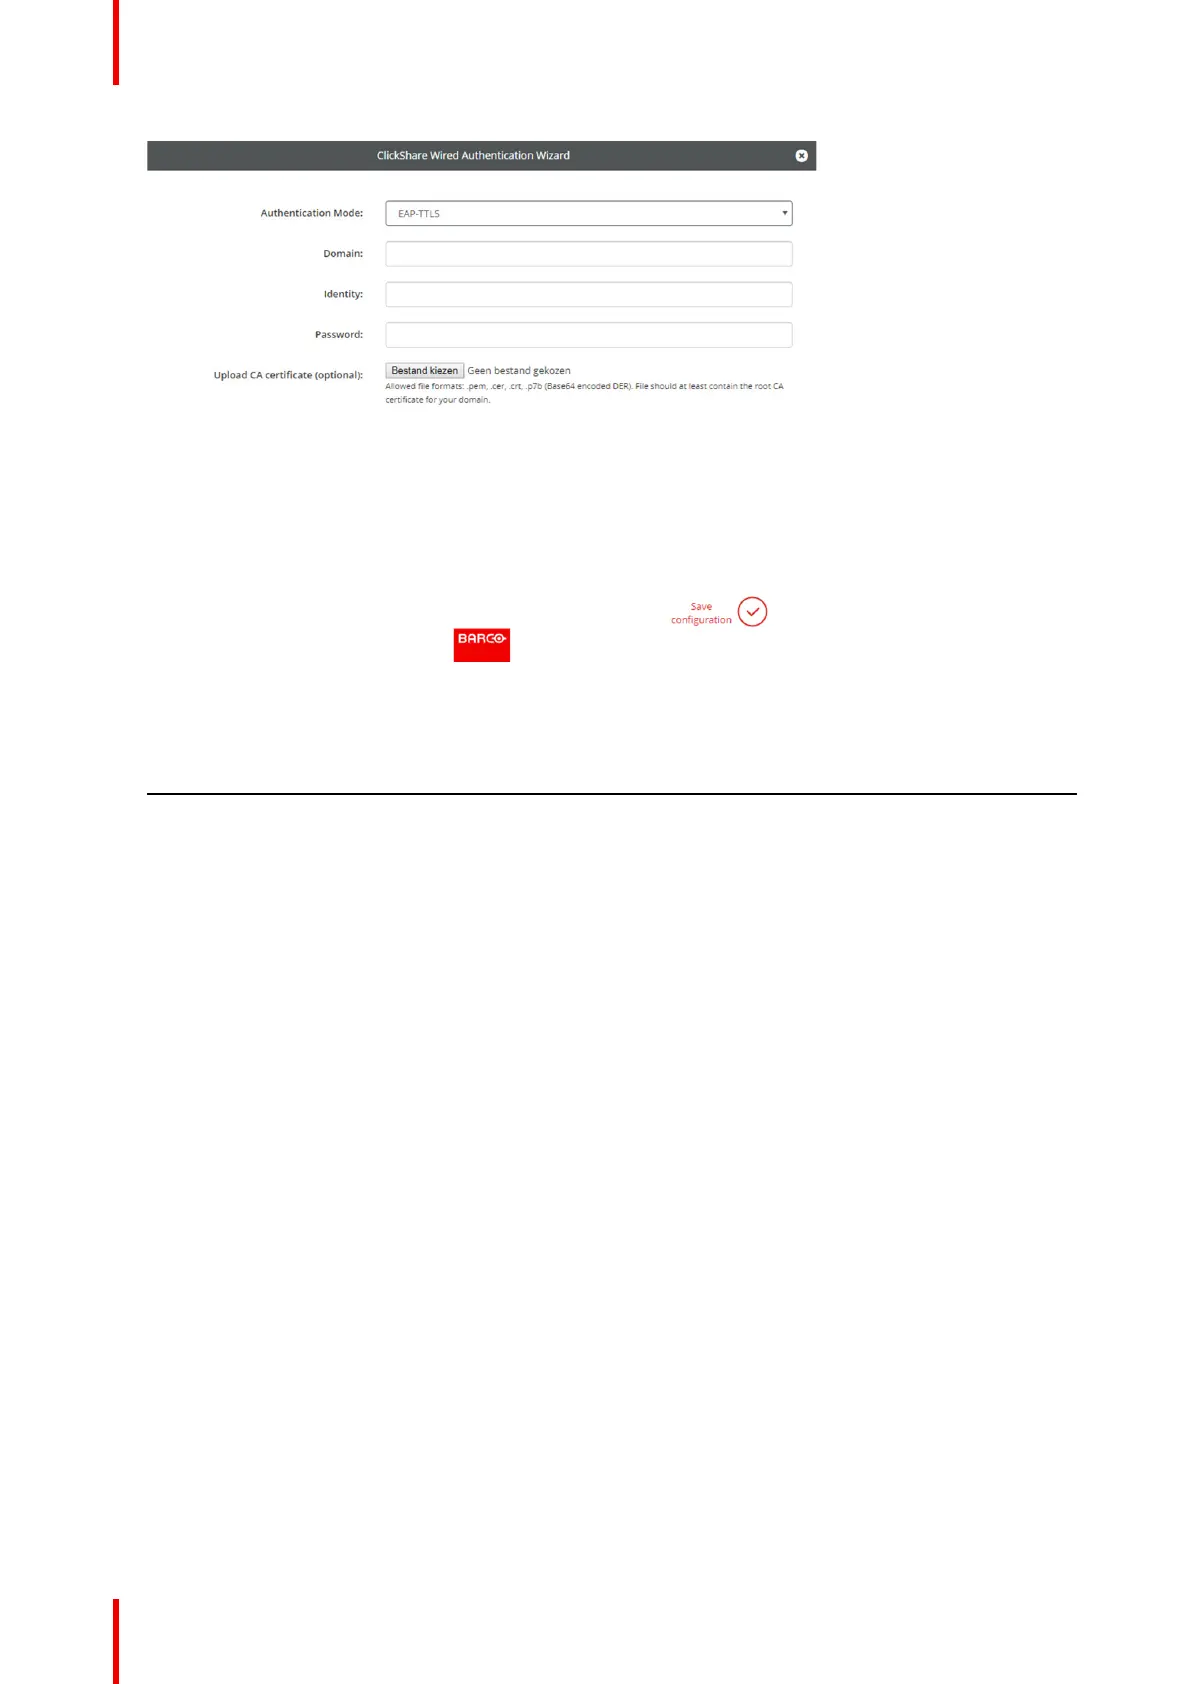
Image 6–31 EAP-TTLS
2. Fill out the Domain and Identity.
Domain The company domain for which you are enrolling, should match with the one
defined in your Active Directory.
Identity Identity of the user account in the Active Directory which will be used by the
ClickShare Buttons to connect to the corporate network.
3. Enter the Password.
The corresponding password for the identity that you are using to authenticate on the LAN network. Per
Base Unit each Button will use the same identity and password to connect to the corporate network.
4. Optionally, upload the CA certificate.
The following formats are allowed:
• .pem
• .cer
• .crt
• .pb7 (Base64 encoded DER)
File should at least contain the root CA certificate for your domain.
5. Click Save configuration.
6.16 Services, mobile devices
ClickShare app
This function enables the possibility to connect with a mobile device using the ClickShare app to connect to
the Base Unit.
It is enabled by default. When the Base Unit is integrated in the corporate network, it may be required to
disable content sharing from the ClickShar app.
CSE-800 Configurator

 Loading...