38
1. Creating a map
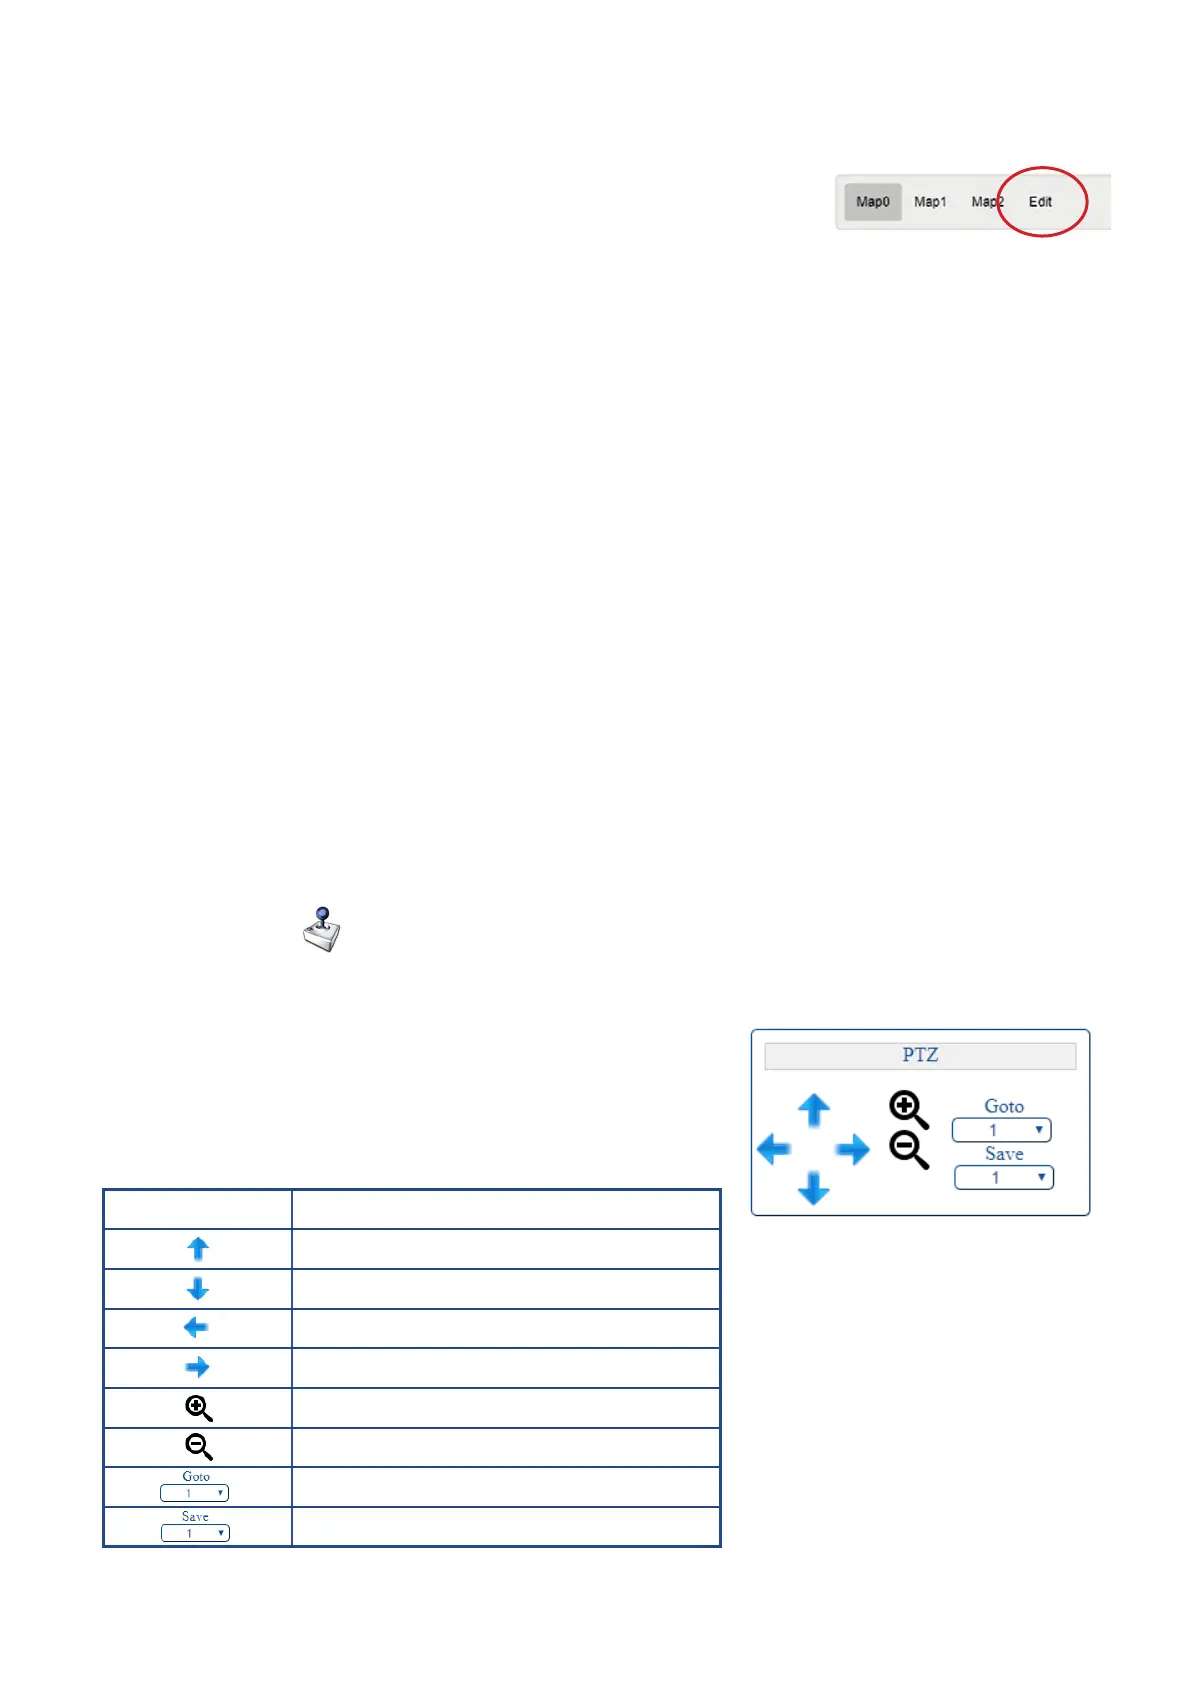
• Click the Edit button to go into Map Edit Mode (as shown in the screenshot to the right).
• To create a new map, click on the + button, enter a map name, followed by OK.
• Select the relevant image file from your computer when prompted.
2. Add camera icons
• Click on ‘add camera icon’.
• Enter camera name, then click OK.
• Click OK for large icons, or Cancel for small icons. The icon will then appear in the top-left corner of the page.
- Click on the icon to select it and move it around (the camera icon turns orange when selected).
- The R key rotates the icon.
- Place the camera where required on the map.
3. Add monitor icon
• Click on ‘add monitor icon’.
• Enter camera name, then click OK.
• Click OK for large icons, or Cancel for small icons. The icon will then appear in the top-left corner of the page.
- Click on the icon to select it and move it around. Place it on the right-hand-side (the monitor icon turns purple when selected).
4. Save Map
• Once complete, click ‘Save Map’. Unsaved changes will be lost when leaving the page.
5. ‘Back to view’
• ‘Back to view’ takes you to map control/view page.
6. Select the required video
• Select the required video by clicking on monitor, then camera (e.g. Monitor 1, Camera 1).
7. Click on the icon to control the tilt/pan, zoom and focus of your
chosen camera
8. Saving a Preset
• Point to a desired camera position, using the PTZ arrow controls.
• Click on Save and choose a number from the dropdown.
• Go to preset: select one of your saved presets from the
‘Goto’ dropdown.
PTZ Function Description
Tilt Up
Tilt Down
Pan Left
Pan Right
Zoom In
Zoom Out
Goto Preset
Save Preset