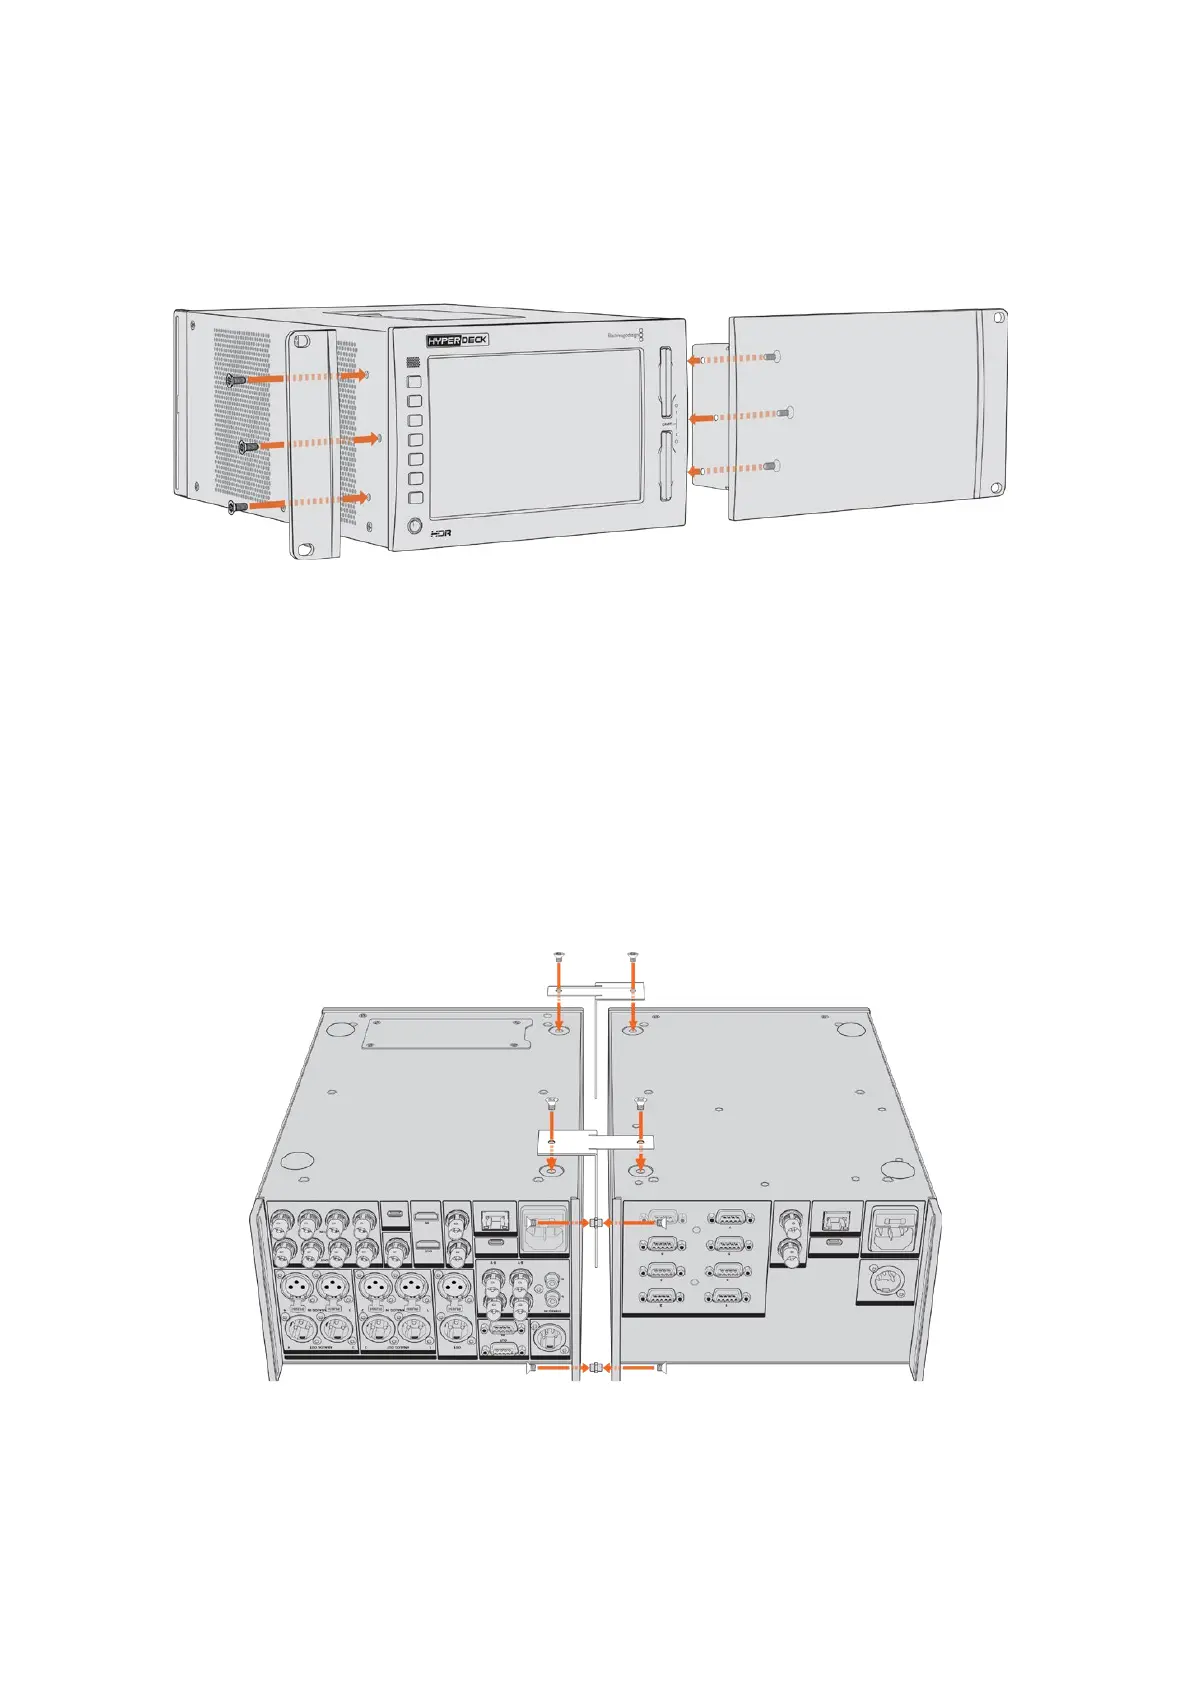
2 Attach the blanking panel to the side of your HyperDeck unit using three of the supplied
blanking panel screws.
3 Use three of the rack ear screws to attach a rack ear to the other side of the
HyperDeck unit.
With the rack ear and blanking panel now attached, you can install the HyperDeck unit into a
rack. Use the mounting holes on both sides and standard rack screws.
Preparing to rack mount a HyperDeck Extreme
with a HyperDeck Extreme Control.
When rack mounting HyperDeck Extreme and HyperDeck Extreme Control side by side, it’s
best to have the controller on the right. This way your headphone port will be on the far left and
your search dial on the far right, making it a seamless transition from traditional broadcast deck
to your HyperDeck Extreme.
1 The two units will be joined on one side using support brackets, so the first step is to
remove the two rubber feet from the joining side of each unit.
2 The units will be secured via the cable brackets on the rear along with t shaped support
brackets installed on the base.
On the rear cable brackets, insert a cable tab insert into the top and bottom holes on one
unit, securing each in place using the supplied support bracket screws. Attach the two
t-shaped supports between the two units at the front and rear and screw in place using
support brackets screws.
92Accessories