OM0001_L2_R_WM_USAv2.1 13
Step 1 (continued)
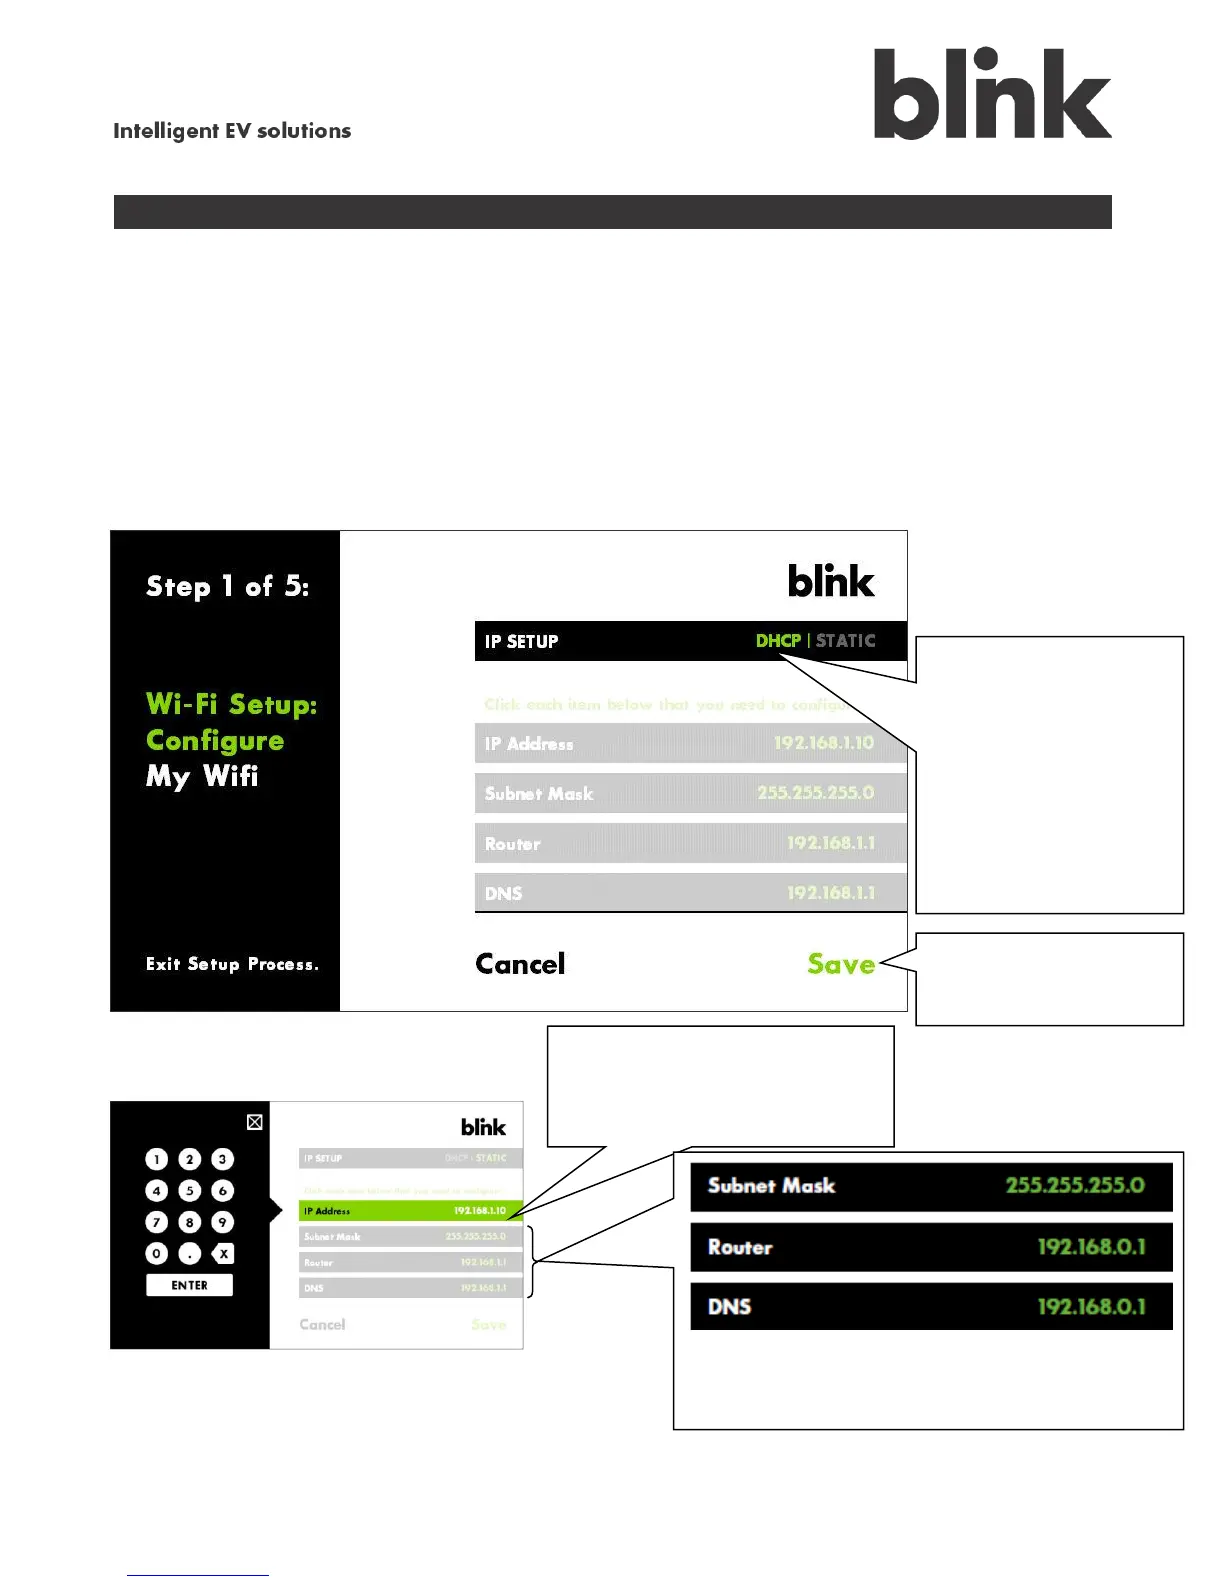
C. Set up the IP
Most users do not need to change the settings shown on the IP Setup screen. The typical installation
simply allows DHCP to assign the IP address and associated settings; in this case, all you need to do
for this screen is touch Save.
If you are an advanced user familiar with network setup, you may choose to specify a static IP address
and associated settings. In this case, follow the steps shown below.
Do you have a
standard setup? If so,
just touch Save.
or
Touch Static to specify
an IP address for your
home network. Go to
below.
Touch IP Address then
use the numeric keypad on the
left to enter the address.
Touch and enter the address for the Subnet
Mask, Router, and DNS for your network.
Touch Save to
finish IP setup. Go to D.