ACM200 USER MANUAL
29contact support@blustream.co.uk / support@blustream.com.au
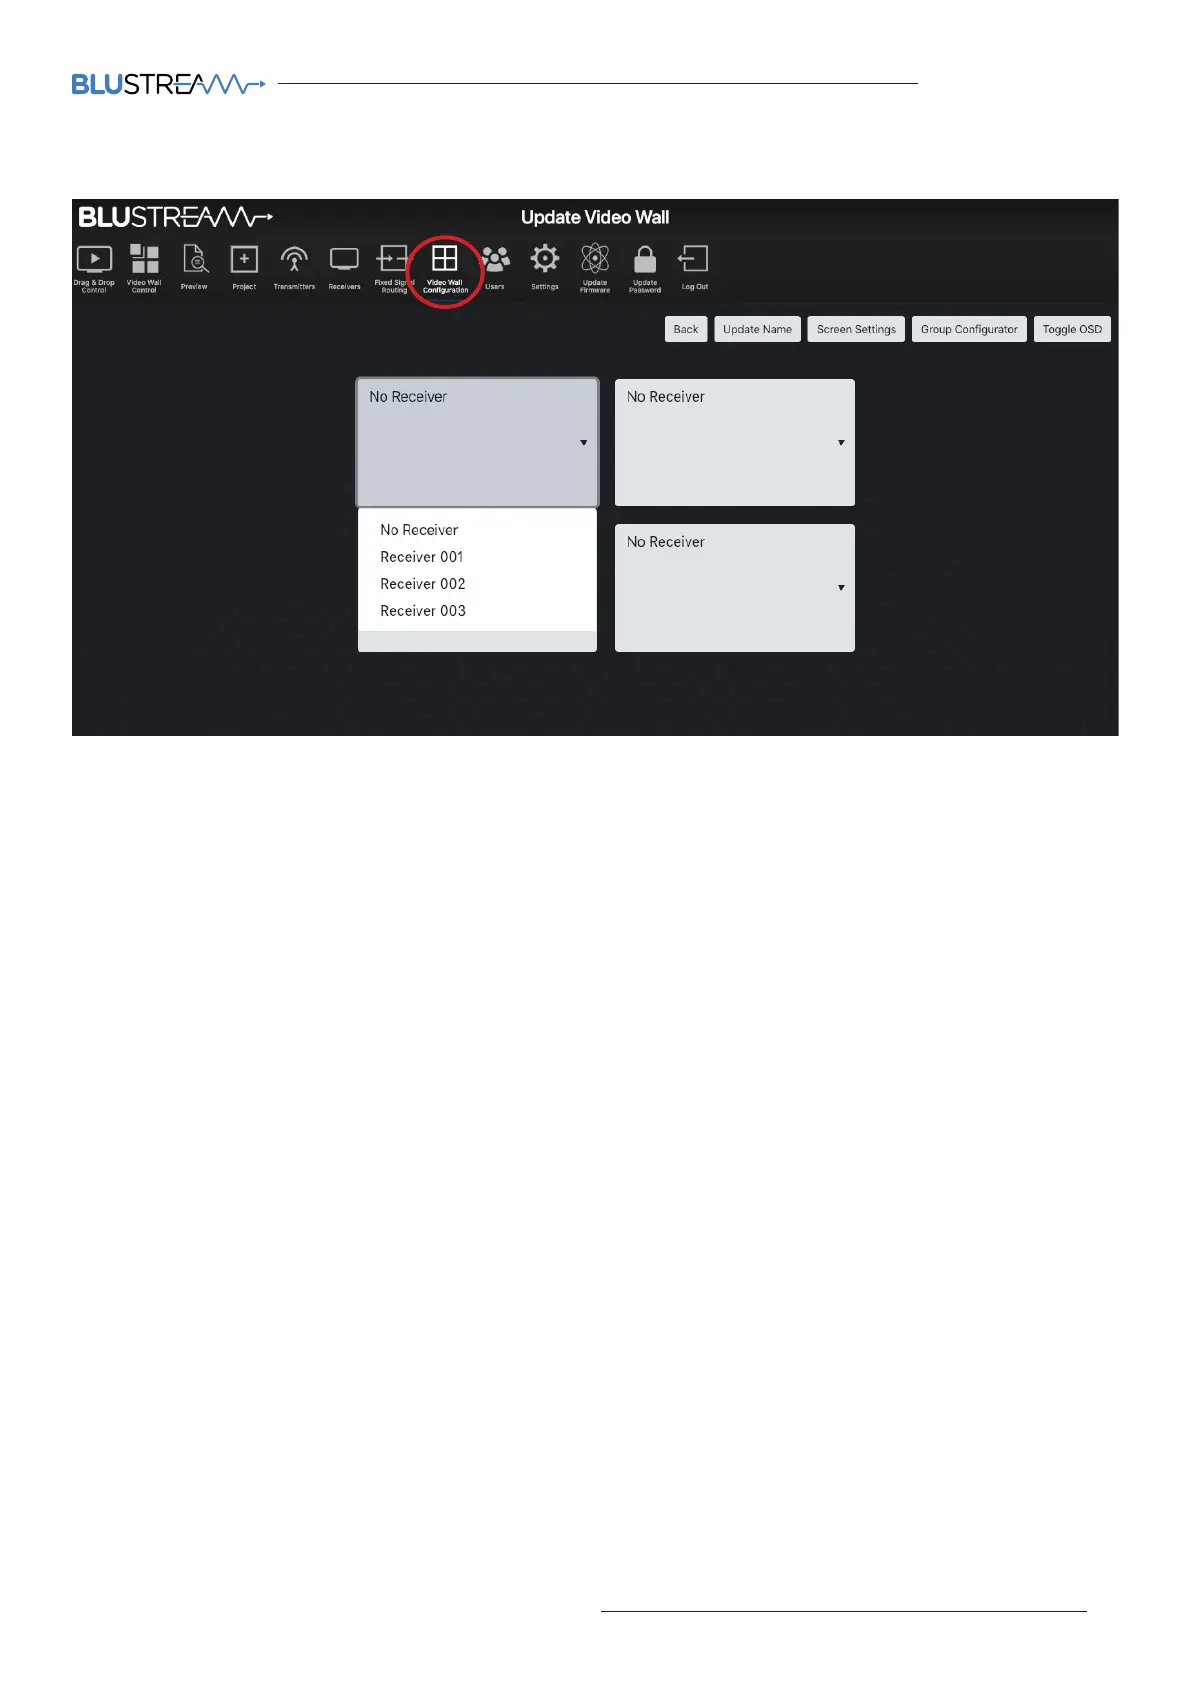
Web-GUI - New Video Wall Configuration - continued...
The menu page for the new Video Wall array has the following options:
1. Back - returns to the previous page for creating a new Video Wall.
2. Update Name - amend the name given to the Video Wall array.
3. Screen Settings - adjustment of bezel / gap compensation of the screens being used. See next page for more
details on Bezel settings.
4. Group Configurator - there are options to be able to create multiple configurations (or 'presets') for each
Video Wall array. The grouping / preset allows for the Video Wall to be deployed in multiple ways i.e. grouping
dierent numbers of screens together to create dierent sized walls within a single array. See page 31 for more
information.
5. Toggle OSD - turn On / O the OSD (On Screen Display). Toggling the OSD On will show the ID number (i.e. ID
001) of the Multicast Receiver on each display as an overlay to the media being distributed. Toggling OSD O
removes the OSD. This allows easier identification of displays within a Video Wall during configuration and set-
up.
Display / Receiver Assign (drop down boxes):
The ACM200 will create a visual representation of the Video Wall on the page. Use the drop down arrows for each
screen to select the relevant Multicast Receiver on the Video Wall array.