25
0° Bevel Stop – Adjustment
Procedure
To avoid possible injury,
disconnect plug from
p
ower source before performing any
assembly, adjustments or repairs.
CHECKING 0° BEVEL STOP SETTING
1. Hold the saw head assembly down and push
in the head assembly lock pin (item 43 –
page 12) to keep the saw in the DOWN
position.
2. Slide the head assembly completely to the
back and engage the lock lever (item 27 –
page 12) by lifting up the finger tab.
3. Rotate the table to the 0° miter position.
4. Pull up the bevel lock lever to loosen.
5. Check the position of the bevel range
selector knob; it should be at the “0-45°
Left” position.
6. Tilt the saw assembly to the left
(counterclockwise), then rotate to the right
(clockwise) until it hits the stop in the
vertical position – this is where the saw is
currently set to make a 0° cut.
7. Push down the bevel lock lever to lock the
angle position.
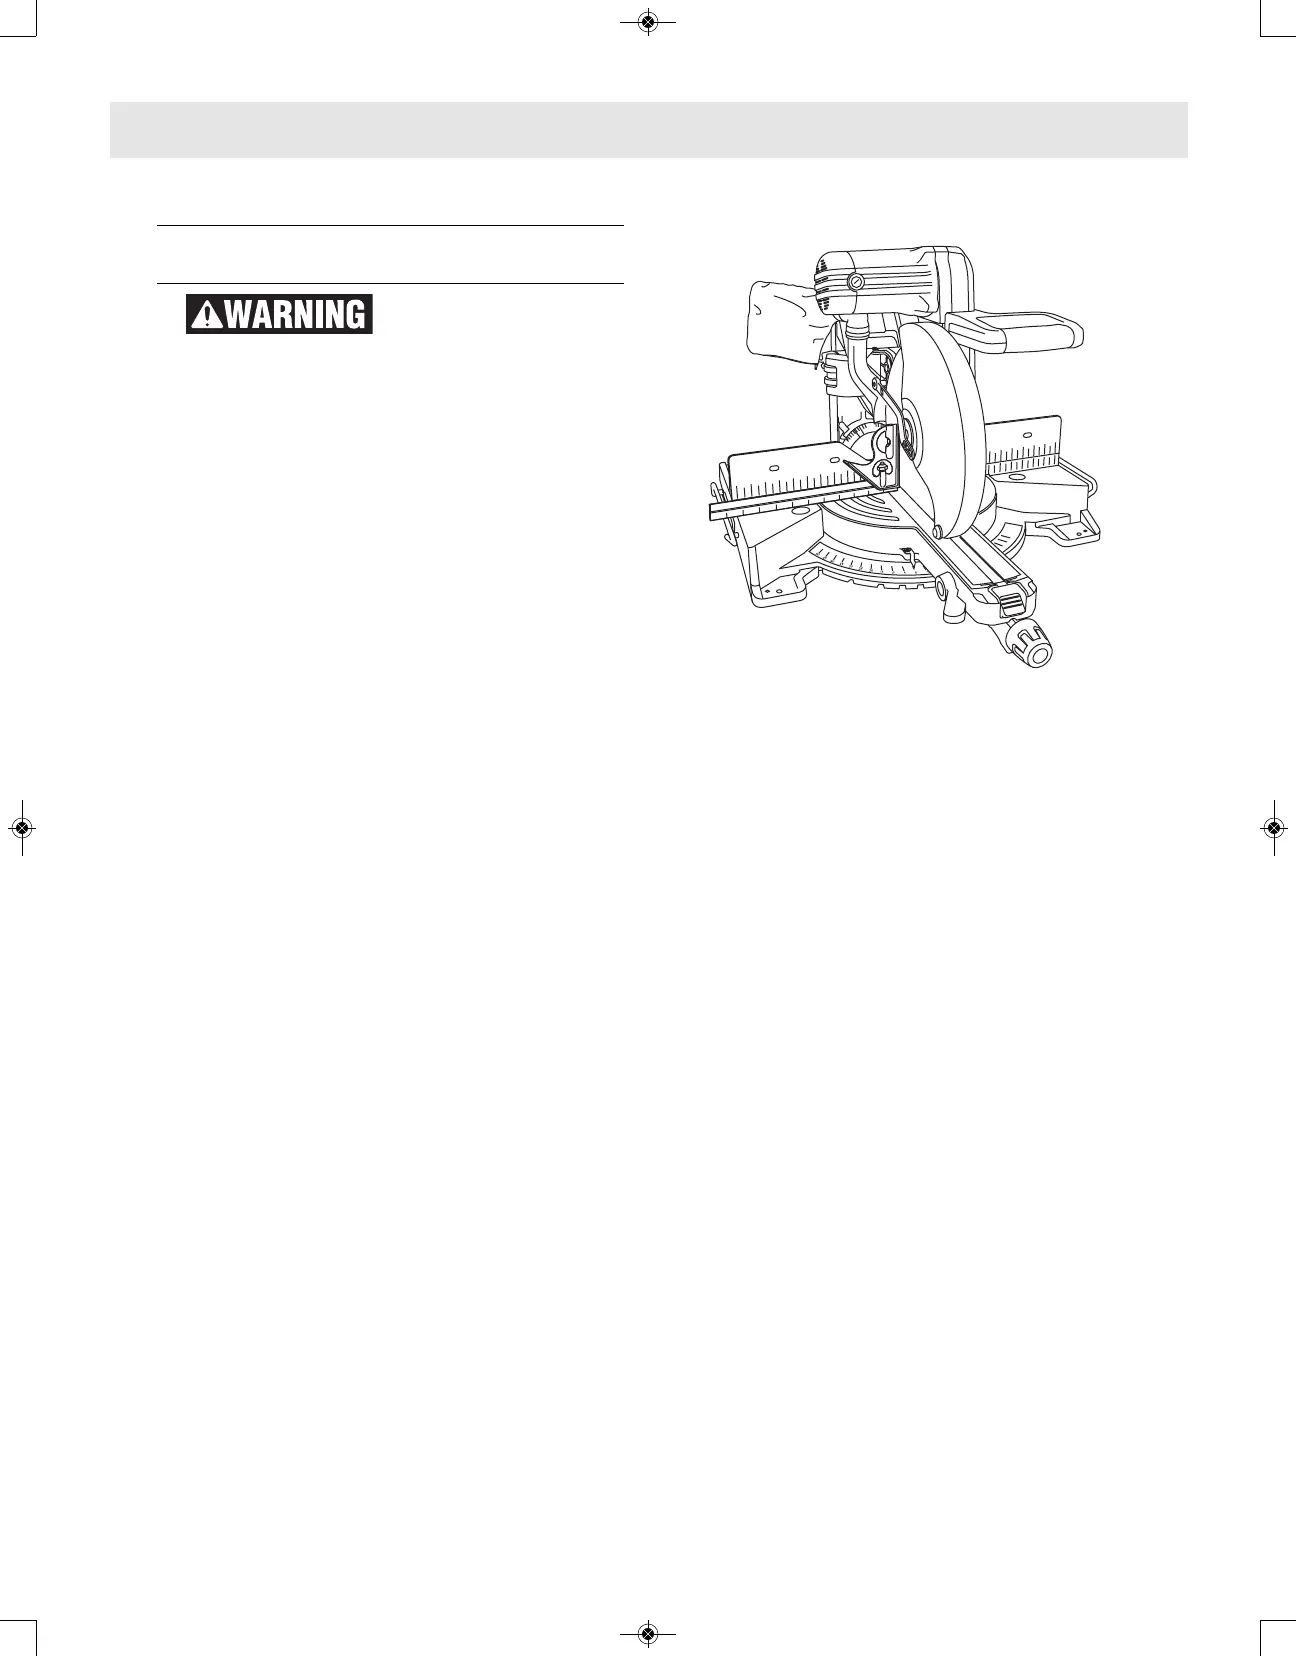
8. Use a combination square to check that the
blade is 90° (square) to the table. Place the
square’s ruler edge against the table and
slide it to contact the blade with the vertical
side of the square’s head (see Figure 22).
Figure 22
9. Check that the saw blade’s plate (not teeth)
is touching the square’s 90° side. If the saw
blade’s plate is not in full contact with the
square’s body 90° side, follow the
“Adjusting 0° Bevel Stop” procedures.
Adjustments