Service Manual 04/2010 Rev.B
60
Fig.82
Take the new motor.
Install the pulley by using rubber hammer and
fit its screw by using green loctite.
NOTE: The mounting of the new pulley must be
done very carefully in order to avoid motor
bearings damaging.
Install the motor on its support without lock
the bolts #C (Fig.80).
Lock the motor support only with 8mm #A
(Fig.80) and the 4 12mm bolts (Fig.81).
Make pulleys alignment by moving the motor
only and using a straight bar as shown in the
picture: there must be 1,5 mm between bar
and plastic pulley (Fig.83).
Fig.83
Lock all 4 10mm motor bolts #C (Fig.80).
Lose the 8mm bolt #A (Fig.80) and the 4
12mm bolts (Fig.81).
Mount the belts
Make the belts tension by turning the 12mm
nuts (Fig.81).
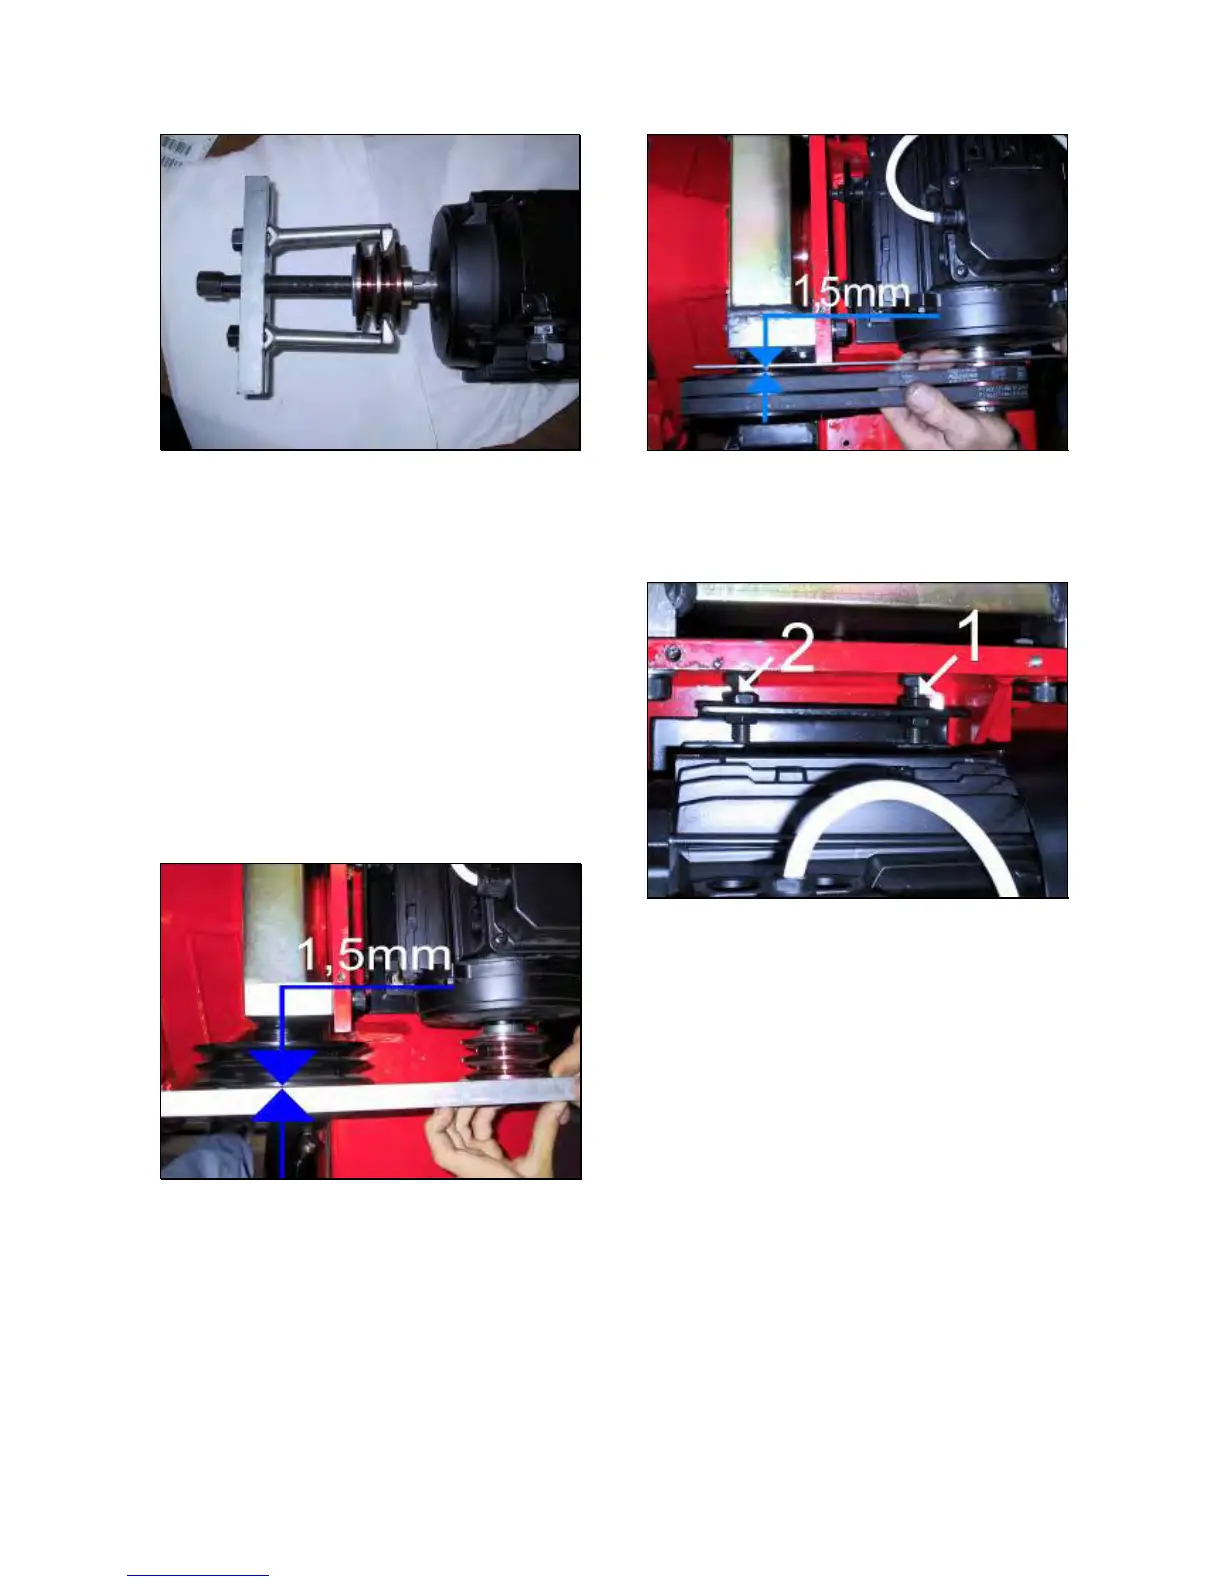
When the belt tension is done, make sure
that there are still 1,5mm between bar and
plastic pulley (Fig.84).
Fig.84
If the clearance is not correct, increase it by
turning the nut #1 or decrease it by turning the
nut #2 (Fig.85).
Fig.85
Lock the 8mm and 12mm bolts (Fig.80 and
81) FIRMLY.
Connect the wires FIRMLY to motor terminals
following the proper electric diagram.
NOTE: Before connecting the wires ends, tighten
all terminals nuts.
Check if the chuck motor rotation way is
correct and if it is the same in both speeds: if
the motor change direction changing the
speed, take the electric diagram and reverse
two wires of the wrong speed cable on the
motor only. If the chuck motor turns in wrong
direction in both speed, reverse the wires 8
and 9 of the remote control cable on the wire
terminal into the electric box (5.0).
Mount the motor terminals cover.
IMPORTANT: WHEN REMOUNTING THE
MOTOR TERMINALS COVER BE CAREFUL
NOT TO CRUSH WIRES.
Mount the belts protections.
 Loading...