Unit Elements
4
Perfusor® compact, 2.1 gb 4- 9
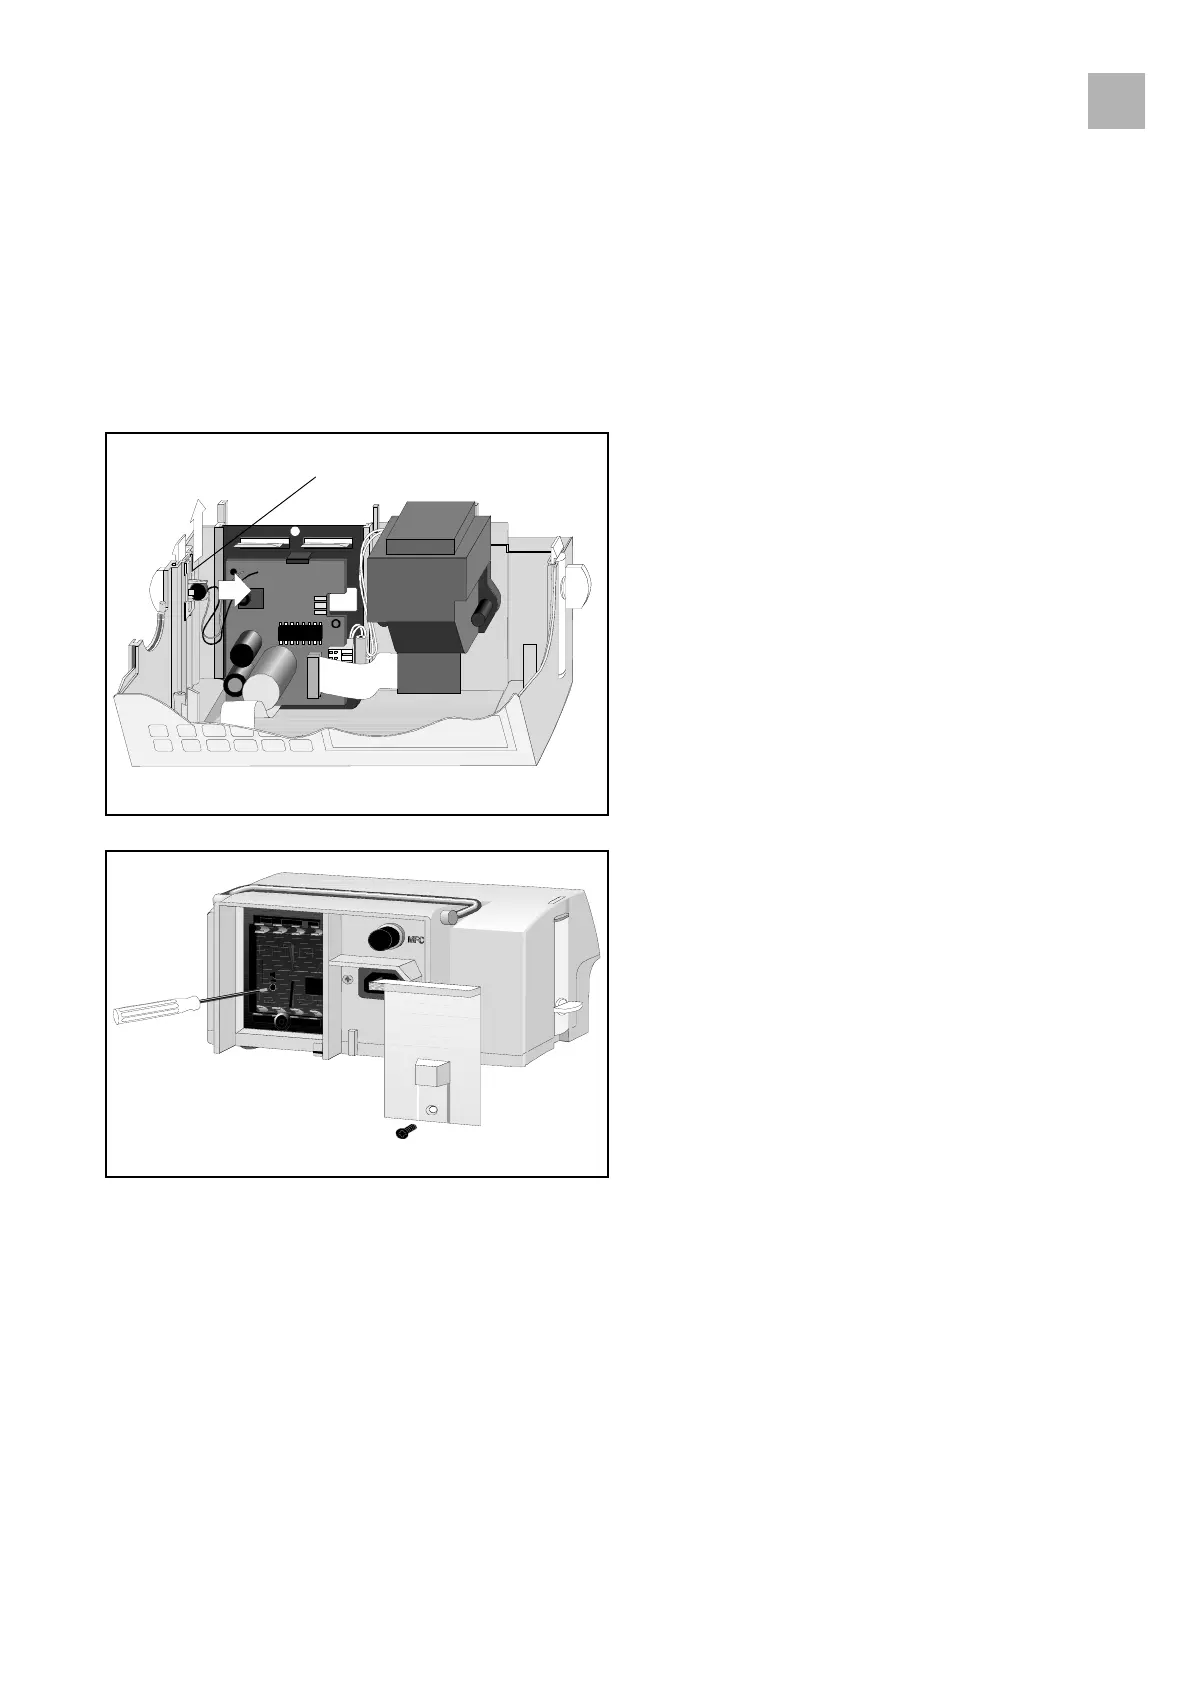
4.8 LS-Clip
Designation Ord. No.
LS-clip . . . . . . . . . . . . . . . . . . . . . . . . . . . . . . . . . . . . . . 3450 7710
Exchange
1. Open unit (see "Open unit" ➨ p. 4 - 3).
2. Press buzzer out of the holder.
3. Pull LS-clip out of the guide and exchange.
4. Assembly is performed in reverse order.
Setting the Loudness of the Alarm Tone (from serial number
38100 on)
1. Open battery compartment (see "Battery Compartment
Cover" ➨ p. 4 - 7).
2. Remove batteries.
3. Connect unit to mains power and switch unit on.
4. Disconnect from mains power for a short moment when the
switch-on test is finished. Pull out the mains power
connector and plug in again to trigger a device alarm (code
22, continuous tone).
5. Put a small flat blade screw driver (carefully) through the
battery compartment opening and set the volume desired.
6. Switch unit off via the keyboard.
7. Insert batteries.
8. Close battery compartment.
Fig.: 4 - 9
LS-clip
Fig.: 4 - 10
2.1