Unit Elements
4
4- 10 Perfusor® compact, 3.1 gb
4.9 E-Module
Designation Ord. No.
E-Module II with DIANET
Star
. . . . . . . . . . . . . . . . . . . . . 3452 0465
(compatible with older series of units, too)
Exchange
Prior to exchange: Read and note down user-specific settings and
reset after modification (see "Display / Save the Unit Settings"
➨ p. 3 - 4).
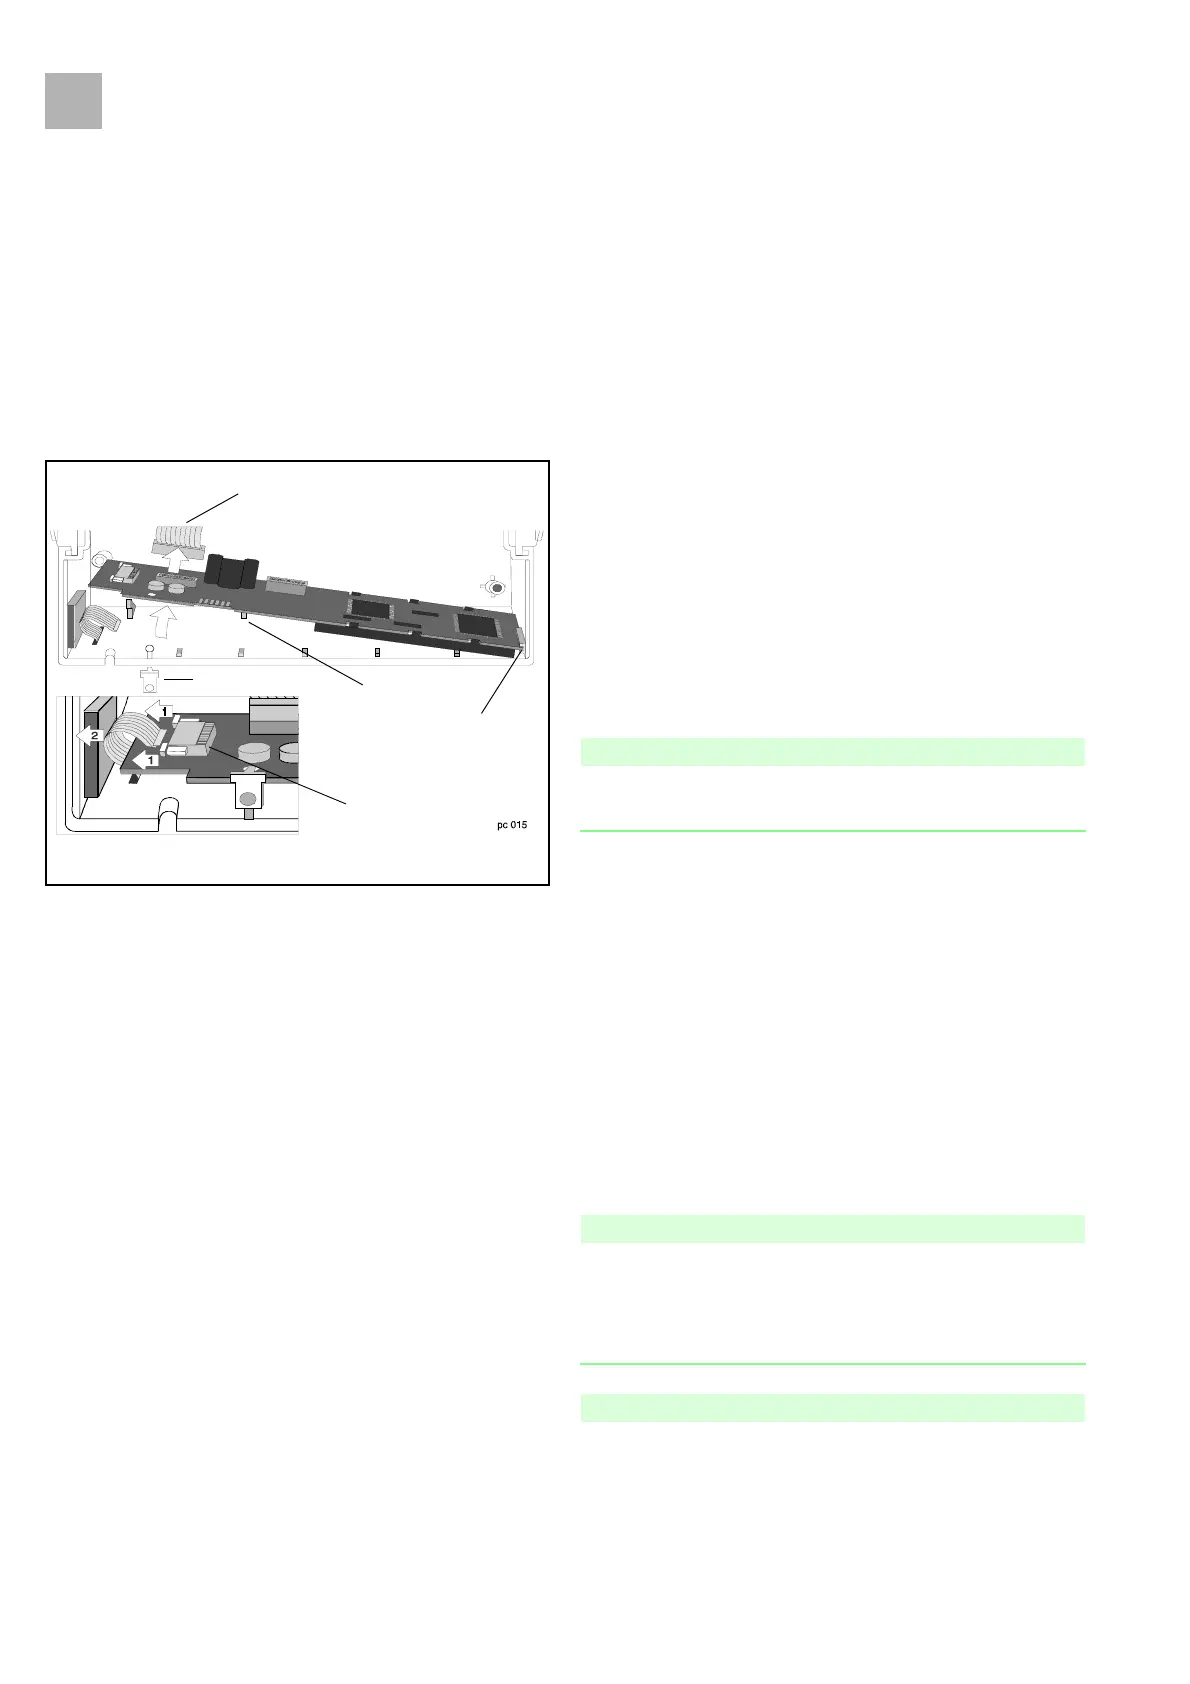
1. Open unit (see "Open unit" ➨ p. 4 - 3).
2. Unlock zero force connector on both sides and pull off ribbon
cable.
3. Remove white board holder.
4. Push E-Module to the left and swivel out.
5. Pull off connection cable.
Note
Before assembly: Remove protective foil from display, unlock zero
force connector and lay ribbon cable.
6. Connect connection cable.
7. Insert new E-Module at the side into the guide and position
behind the holder. (Caution! Do not damage the components.)
8. Push board in the guide to the right and insert a new board
holder (must engage in hole).
9. Push ribbon cable in zero force connector until stop and lock
on both sides (can get jammed, lock both sides).
10. Close the unit. Do not squeeze the cable (see "Close Unit"
➨ p. 4 - 4).
11. Calibrate in Service Program (see "Unit Calibration"
➨ p. 3 - 16).
Note
Swivel out the E-Module so that the connector can be connected
more easily.
Disconnect or connect ribbon cable only when the E-Module is
fastened.
Note
After replacement of the E-Module, compare the syringe table at
the unit with the syringe table of the new E-Module. If the syringe
Fig.: 4 - 11
Zero force connector
Board holder
Holder
Guide
Connection cable
3.1