Unit Elements
4
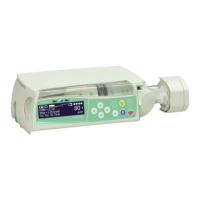
4- 12 Perfusor® compact, 3.0 gb
4.12 Carrying Handle
Designation Ord. No.
Carrying handle . . . . . . . . . . . . . . . . . . . . . . . . . . . . . . . 3450 6438
Exchange
Note
Not recommended as special tools are required.
1. Open housing (see "Open unit" ➨ p. 4 - 3).
2. Remove N-Module (see "N-Module" ➨ p. 4 - 11).
3. Pull adapter sleeve out of the joints.
4. Pull off handle and remove both joints.
5. Assembly is performed in reverse order.
Note
Press in adapter sleeves carefully and do not kink.
4.13 Drive
Designation Ord. No.
Drive, complete (with motor) . . . . . . . . . . . . . . . . . . . . 3450 6624
Straight pin lock . . . . . . . . . . . . . . . . . . . . . . . . . . . . . . 3450 9100
WARNING
!
The drive consists of safety relevant parts.
FUNCTIONAL SAFETY JEOPARDIZED IF PARTIALLY REPLACED!
- Always replace entire drive.
Exchange
1. Open unit (see "Open unit" ➨ p. 4 - 3).
2. Move drive arm to middle position and lock.
3. Loosen screw on syringe size board, spread snap-in hook and
remove board.
4. Loosen both screws on drive and remove drive.
Note
If you hear a scraping noise when the drive arm is pulled out, the
straight pin (under the spindle) may have come loose. In this case,
an additional straight pin lock (Ord. No. 3450 9100) can be
inserted in units up to serial No. 66725. From serial No. 66725 on
Fig.: 4 - 13
Carrying handle
Fig.: 4 - 14
Syringe size board
Snap-in hook
Lock washer
Do not jam
3.0